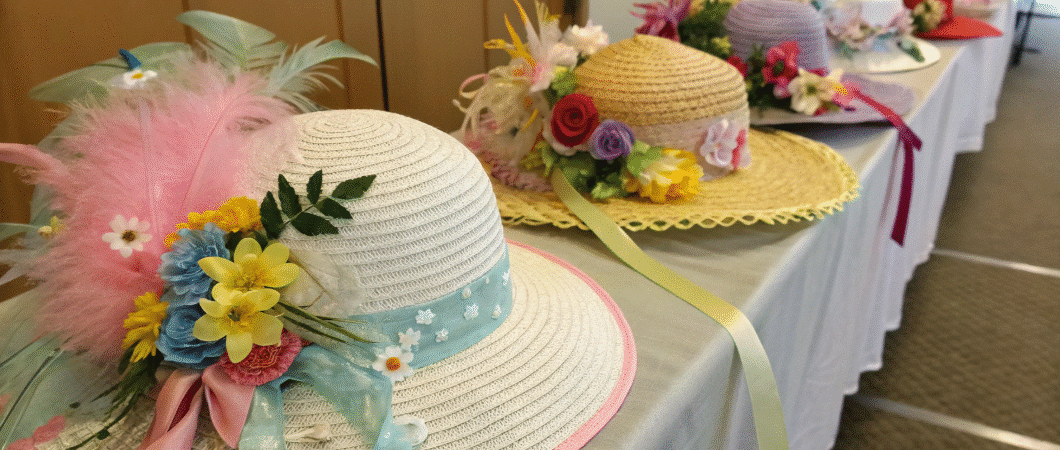
Easter Bonnets are a wonderful tradition. I remember making them as a child. It was always a highlight of the spring season. We would gather all sorts of colorful materials. The goal was to create the most amazing hat for the parade. This tradition brings so much joy and creativity to the holiday. It’s a chance for families to make something beautiful together. My guide will walk you through everything you need to know. We will cover the history, materials, and fun ideas. You will be ready to craft your own amazing hat. Let’s get started on this fun project. It’s time to bring your own festive headwear to life.
The Story Behind the Hat
Have you ever wondered where this tradition came from? The idea is tied to the end of Lent. People would wear new clothes to church on Easter Sunday. This symbolized renewal and a fresh start. A new hat was a key part of this new outfit. Over time, these hats became more decorated. They turned into a springtime celebration. The Easter parade became a place to show off these fancy hats. The tradition is especially popular in places like New York City. The famous Easter Parade and Bonnet Festival on Fifth Avenue is a huge event. People show up with the most creative headwear you can imagine.
Getting Your Supplies for Fun Easter Bonnets
First things first, you need a base for your hat. You do not need to buy anything fancy. A simple straw hat, a paper plate, or even a sturdy paper band will work perfectly. The fun part is all the decorations you add.
Here are some ideas for materials you can gather:
- Flowers: Fake flowers are a classic choice. You can find them at any craft store. Look for bright, spring colors like yellow, pink, and blue.
- Ribbons: Satin or grosgrain ribbons add a lovely touch. You can tie them in bows or weave them around the brim.
- Eggs: Small, plastic Easter eggs are perfect. You can paint them or use them as they are.
- Chicks: Fluffy yellow craft chicks are an adorable addition.
- Grass: Green Easter grass can fill in empty spaces. It gives your hat a nest-like look.
- Paper: Construction paper is great for cutting out shapes. Think flowers, bunnies, or butterflies.
You will also need a few tools to put it all together. A hot glue gun is my best friend for these projects. It secures everything quickly and strongly. Just be careful with hot glue, especially if kids are helping. Craft glue or strong double-sided tape are good alternatives. Scissors will be necessary for cutting ribbons and paper.
Simple Hat Ideas for Beginners
Starting your first project can feel like a big step. I have some easy ideas to get you going. These projects are great for kids and adults who are new to crafting.
The Classic Garden Hat
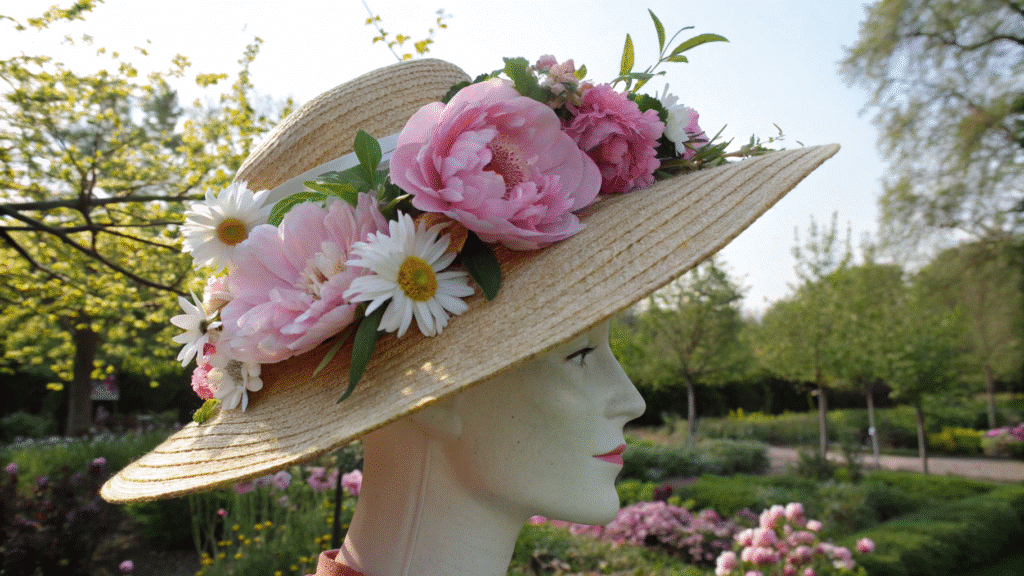
This is a timeless design. It is easy to make and always looks great.
- Start with a simple straw hat.
- Arrange some large fake flowers on the front or side. Peonies or daisies work well.
- Glue them in place with your hot glue gun.
- Wrap a wide ribbon around the base of the hat’s crown.
- Tie the ribbon into a big bow at the back.
- You can add a few smaller flowers or some green leaves around the larger ones.
The Cute Bunny Hat
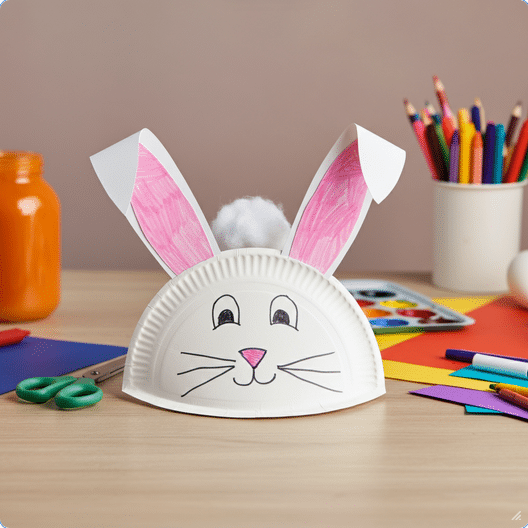
This idea is always a hit with the little ones.
- Use a sturdy paper plate as your base.
- Cut a hole in the middle big enough for a head. Or, attach a string to wear it like a hat.
- Cut two long bunny ear shapes from white or pink construction paper.
- Glue them to the top of the plate so they stand up.
- Add a cotton ball for a fluffy bunny tail on the back.
- You can draw a bunny face on the front with markers.
Advanced Ideas for Craft Experts
If you feel more confident, try one of these more detailed designs. These allow for more creativity and unique touches.
The Bird’s Nest
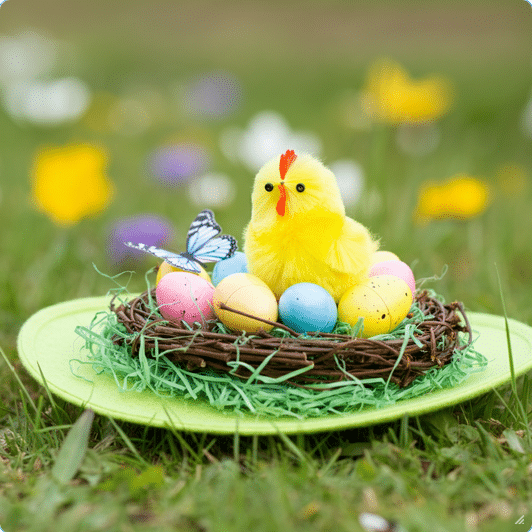
This design is a real showstopper. It looks complicated, but it’s very manageable.
- Start with a wide-brimmed straw hat.
- Cover the entire top of the hat with green Easter grass. Use plenty of glue to make sure it sticks.
- Create a small “nest” in the center using more grass or some twigs.
- Place a few small plastic eggs and a fluffy chick inside the nest.
- Add some small flowers and butterflies around the brim. This will make it look like a piece of a spring meadow.
The Candy Explosion Hat
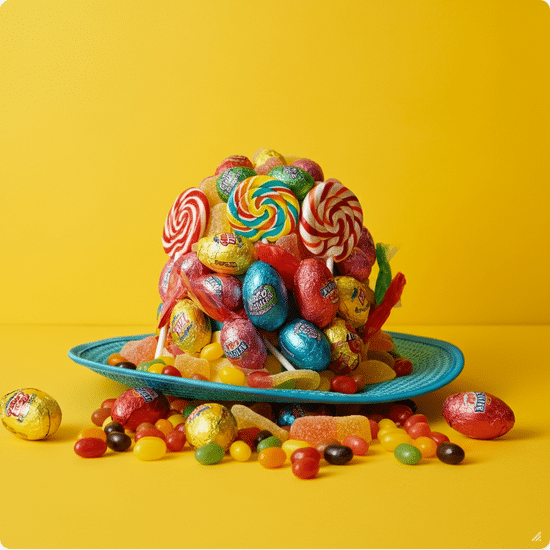
Who doesn’t love candy? This hat is sweet in every way.
- Use a sturdy hat base that can hold some weight. A plastic party hat or a firm felt hat works well.
- Glue wrapped candies all over the hat. Think about colorful jelly beans, chocolate eggs, and lollipops.
- Be strategic with your placement. Create patterns or a fun, chaotic mix of colors.
- Use a strong adhesive for this project. Hot glue is essential to keep the candies in place.
- You can add ribbons and bows to fill in any gaps.
Tips for a Successful Crafting Day
Making hats should be fun, not stressful. I have a few tips to help your crafting session go smoothly.
- Cover Your Workspace: Use newspaper or a plastic tablecloth. Glue and glitter can get messy.
- Plan Your Design: Before you start gluing, lay out your decorations on the hat. This helps you see what it will look like. You can move things around until you are happy with the arrangement.
- Work in Layers: Start with the bigger items first. Then add the smaller details. This gives your design depth.
- Let It Dry: Give your hat plenty of time to dry completely. You do not want decorations falling off during the parade.
- Have Fun: Remember, there are no rules. Let your imagination run wild. The best hats are the ones that show off your personality.
Creating your own hat is a fantastic way to get into the Easter spirit. It is a creative outlet that results in something you can proudly wear. I love seeing the unique designs people come up with each year. It is a tradition that brings color, joy, and a personal touch to the holiday celebration. I hope these ideas inspire you to make your own amazing Easter Bonnets.
