Flamingo nail art can refer to both creative designs for your fingernails and decorative wall art made with string and nails. While many think of flamingo nail art as a manicure style, this guide will show you how to create a stunning flamingo wall piece using string and nails. This guide is perfect for anyone who loves DIY crafts and wants to add a playful, tropical touch to their home decor with a handmade flamingo string art project. Whether you’re a seasoned crafter or a flamingo fan looking for a fun, colorful decor idea that’s easy to make, you’ll find everything you need right here.
Flamingo Nail Art has been on my mind, but not the kind for your fingernails. I’m talking about the string and nail kind of art. We have a serious love for flamingos in this house. Last year, I went all out with flamingo-themed crafts, and my friend even made a fantastic flamingo print bag. I’ve said the word so many times it almost sounds made up. My daughter calls them “falingos,” and I haven’t corrected her. It’s one of those little things that keeps her small, and now I’ve started saying it too. So, I decided to make her some fun wall decor. It’s just nails, string, and a piece of wood. I absolutely love how it turned out. Want to make one with me?
If you’re searching for a way to add a splash of color and creativity to your space, this project is the perfect place to start. Flamingo nail art isn’t just for your fingertips—it’s a celebration of all things pretty, playful, and unique. Whether you’re a seasoned crafter or just beginning to learn about nail art, you’ll find plenty of inspiration here. We absolutely love the charm and elegance that flamingos bring, and this project is designed to help you create your own vibrant flamingo nail masterpiece. From soft, delicate pinks to bold, tropical designs, there’s a style for everyone. By following along, you’ll ensure your finished piece stands out, and you’ll discover just how much fun it is to experiment with new ideas. So, if you’re ready to fall in love with flamingo nail art, read on and let your creativity take flight!
- Getting Your Supplies Together
- Step 1: Prepping the Board
- Step 2: Creating the Flamingo Outline with Nails
- Step 3: Filling in the Shape
- Step 4: Adding a Pop of Pink Color
- Step 5: Weaving the String
- Step 6: Completing the String Design
- Step 7: Finishing Touches
- Step 8: Hanging Your Finished Flamingo Nail Art
- Tips and Variations for a Flamingo Nail
Getting Your Supplies Together
First things first, let’s gather what you’ll need. This project doesn’t require a huge list of items, which is always a bonus.
- 30cm square of plywood
- White paint
- Hammer and some small nails
- Pink sewing thread
- Black sewing thread
- Superglue
- Tape
- Picture hanger disc
Step 1: Prepping the Board

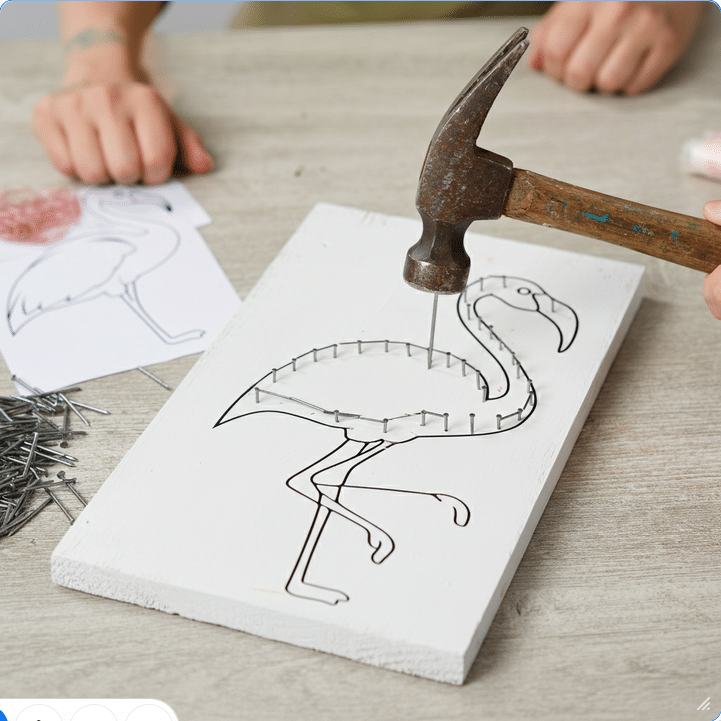
Start by painting your wooden board completely white. Give it some time to dry. While it’s drying, you can find a flamingo silhouette. I just drew a simple one myself. You could also print one from an image search online if you prefer. Your shape should be about 20cm tall. Once you have it, cut it out. Tape the paper flamingo to the center of your board.
Step 2: Creating the Flamingo Outline with Nails

This is where the hammering begins. Pick a point on your flamingo outline, like the tail, and hammer in your first nail. Make sure the nail is straight and feels sturdy in the wood. It should not go all the way through. Mine were sticking out by about 1.5cm. Continue hammering nails into each corner and along the angles of the flamingo shape. This will build the basic form of your bird.
Step 3: Filling in the Shape

After the main points are in, it’s time to fill the rest of the outline. Add more nails around the entire silhouette. Space them about 1cm apart from each other. Once all the nails are in place, you can carefully remove the paper template and the tape. You should now have a perfect flamingo shape made of nails.
Step 4: Adding a Pop of Pink Color
Now for the really fun part: adding the string. Take your pink thread, but keep it on the reel. Wind the end of the thread around one of the nails. Tie a small, secure knot to hold it in place.
Step 5: Weaving the String
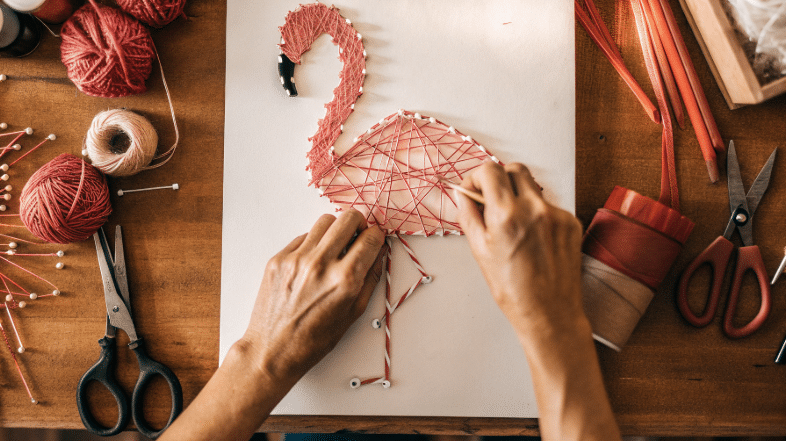
From your starting nail, pull the thread so it is taut. Wind it twice around the nail next to it. Then bring the thread back to the first one. Repeat this process with the next closest nail, always keeping the string tight. You want to go back and forth between points. This creates a web-like pattern. Continue this until you have connected all the points within easy reach of your starting area. Try not to bend the thread around sharp corners.
Step 6: Completing the String Design
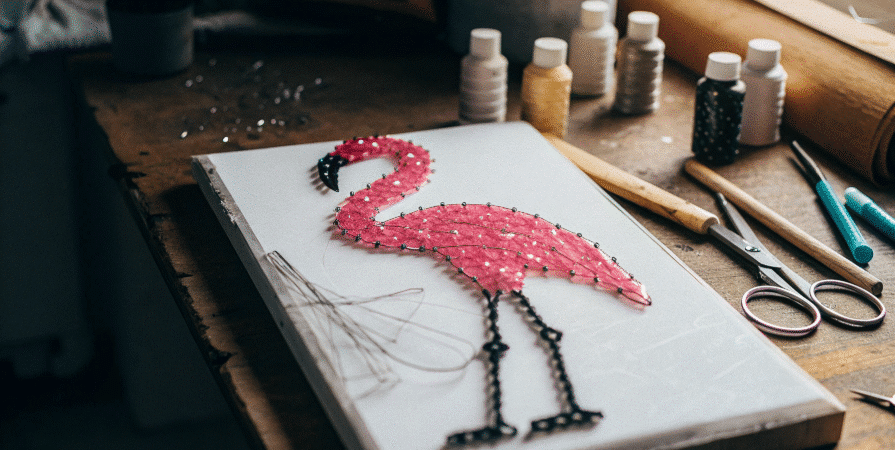
Now, pull the thread over to a new nail and start the process again. The general idea is to connect all the nails that are within reach of one another. This method will fill the body of the flamingo with color. When you get to the beak and legs, switch to the black thread. Use the same weaving technique for these smaller sections. If you need a break or a cup of tea, use a piece of tape. Temporarily tape the thread to the board to hold it. You definitely do not want your hard work to come loose.
Step 7: Finishing Touches
Once the entire shape is covered in colorful thread, you’re almost done. I find this part of the process very relaxing. You can now deal with any loose ends. Wrap the end of the thread around a nearby nail. Add a small blob of superglue to the knot to seal it. This will keep everything from unraveling.
Step 8: Hanging Your Finished Flamingo Nail Art
The final step is to make it ready for the wall. Glue a picture hanger to the back of the plywood board. Let the glue dry completely. And just like that, your piece is finished and ready to display. This project is a simple way to create some truly unique decor. Enjoy your new piece of Flamingo Nail Art!
Now that you’ve created a beautiful flamingo wall piece, you might also want to try flamingo designs on your nails. If you’re also interested in flamingo designs for your fingernails, here are some creative ideas.
Tips and Variations for a Flamingo Nail
Switching from wall decor to actual fingernail art, here are some tips for creating beautiful flamingo-themed nails.
Start with a Protective Top Coat
- Always begin with a protective coat of top coat. This simple step helps ensure your design stays fresh and pretty for longer.
Color Inspiration
- For a chic, January-inspired look, try using soft pinks and crisp whites—these colors create a romantic and elegant vibe that’s perfect for any season.
Add Sparkle and Shine
- If you love a bit of sparkle, add a touch of gold or a hint of glitter to your flamingo nail for a luxurious finish that catches the eye.
Tropical Accents
- Want to take your design even further? Incorporate tropical elements like palm leaves or tiny flowers to give your nail art a playful, vacation-ready twist.
The best part is experimenting and learning what you love most. With a little patience and practice, you’ll master the art of flamingo nail design and ensure your nails are always a conversation starter. So go ahead, let your imagination guide you to your next pretty flamingo nail creation!


