

There’s something magical about watching a preschooler’s face light up when they see a teddy bear cake made just for them. The good news? You absolutely do not need to be a professional baker to pull this off. This incredibly easy teddy bear cake uses shapes you already know – circles and domes – to build a lying-down bear that looks impressive but takes a fraction of the effort of a sculpted 3D design.
Key Takeaways
- This easy teddy bear cake is built from two round cakes and a handful of cupcakes – no special pan required – making it perfect for a child’s birthday party or baby shower.
- The recipe uses a moist chocolate cake base with chocolate frosting and simple buttercream “fur” piped with a star or grass tip, plus candy details that kids can help add.
- Standard 8-inch cake pans and a regular muffin tin are all the bakeware you need; the head, ears, paws, and snout are assembled from basic shapes.
- Cake layers can be baked and frozen up to one month ahead, then decorated on the day of the party for a stress-free dessert table centerpiece.
- At Little Button Diaries, we focus on family-friendly, budget-conscious projects, so this cake recipe favors pantry ingredients and maximum kid participation.
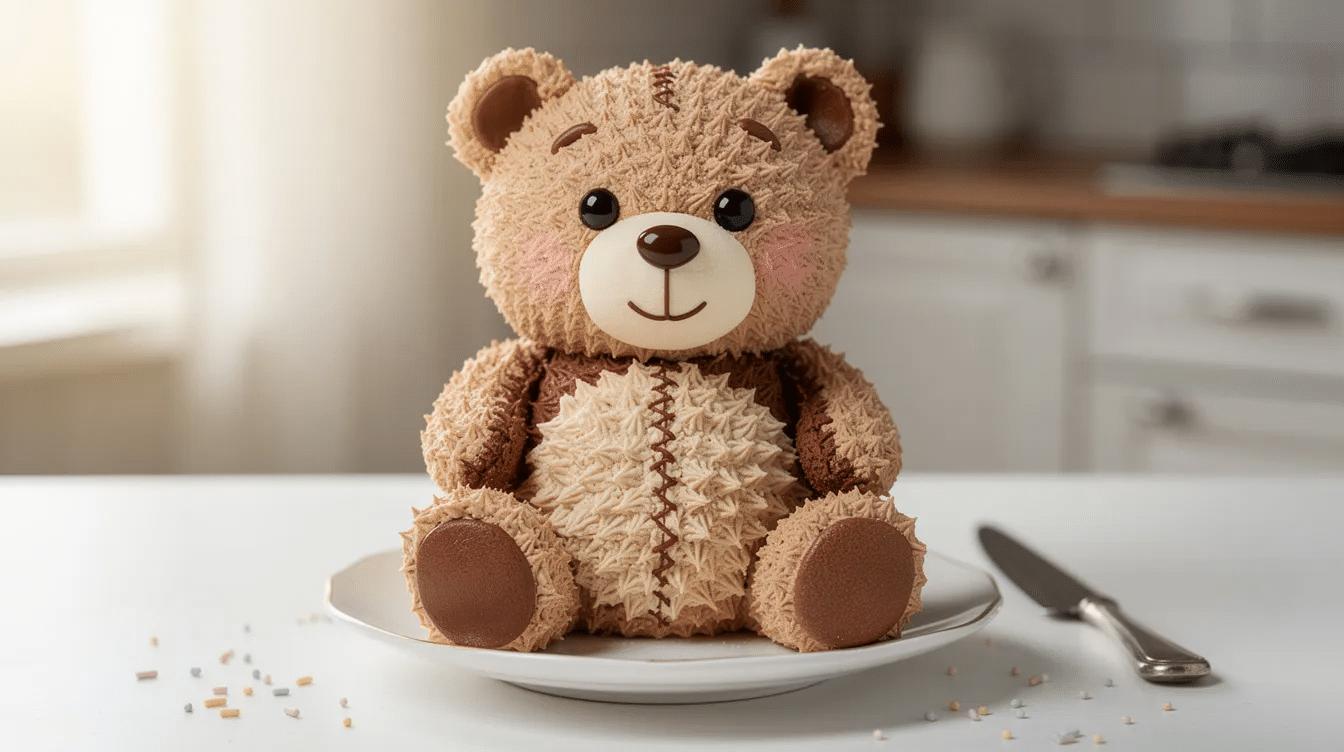
Why This Easy Teddy Bear Cake Is Perfect for Families
Picture this: it’s the night before your daughter’s birthday party, and instead of stressing over fondant and wooden dowels, you’re calmly piping chocolate stars onto a bear-shaped cake while your little one presses chocolate buttons into the paws. That’s exactly the kind of baking experience this teddy bear cake delivers.
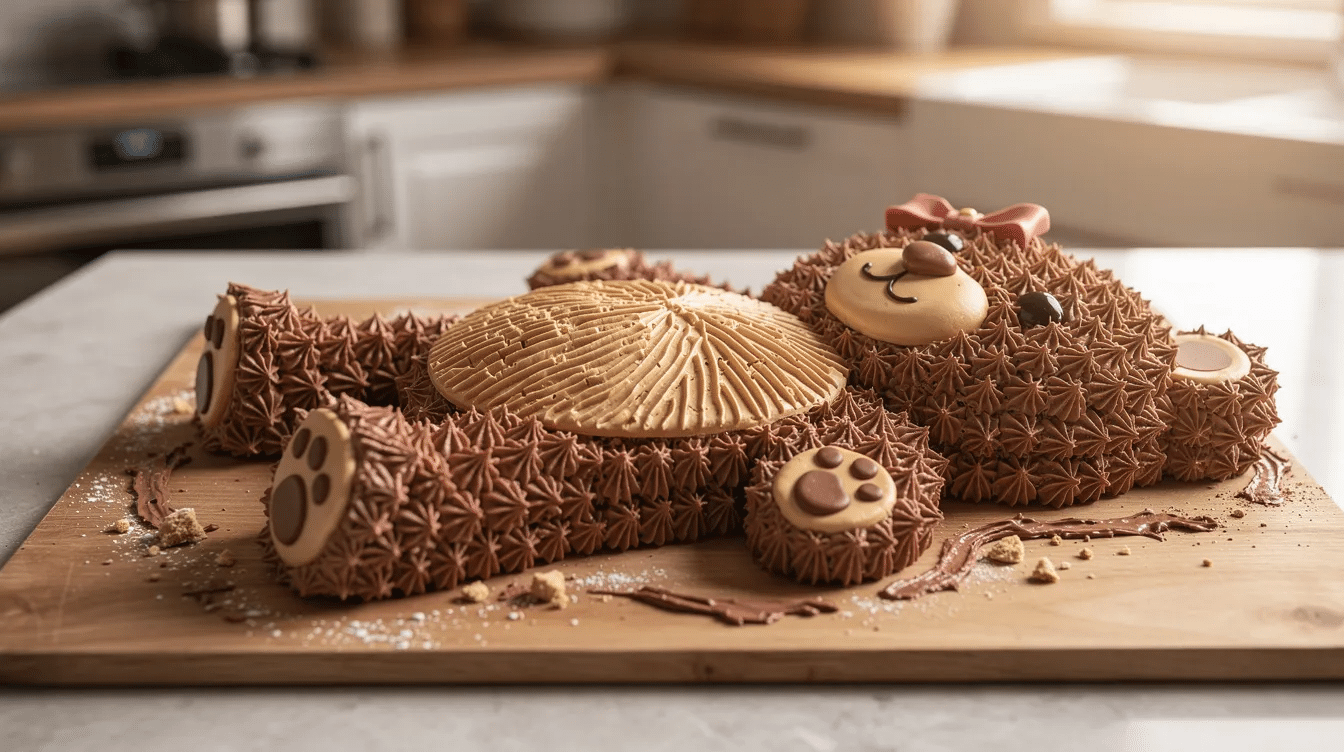
The design is intentionally flat – a semi-3D, lying-down teddy – so beginners can manage the round shape without carving or sculpting. Using standard round cakes eliminates the need for a carved pan entirely, and a teddy bear cake can be made using standard cake pans you probably already own. Teddy bear cakes can be made without advanced decorating skills, which is exactly why this project fits the Little Button Diaries approach: everyday equipment, low cost, and loads of kid involvement. Kids and parents often seek crafts, recipes, and activities for creative fun, and this cake checks every box.
Compare this to a fully 3D standing bear cake that needs internal dowels, carved layers, and hours of fondant work. Our version gives the same “wow” at the party table – just with about one-tenth of the hassle. If you’ve ever tackled our Tractor Birthday Cake, you already know the satisfaction of a shaped cake done the simple way. For more general party-planning inspiration, check out our full Birthday Cakes guide.
What You’ll Need: Pans, Tools, and Ingredients
Pans and Bakeware
Item | Purpose |
|---|---|
Two 8-inch round cake pans | Body and head |
Standard 12-cup muffin tin | Ears, paws, and snout |
Wire cooling racks | Even cooling |
Large cake board or foil-covered tray | Assembly base |
Some bakers prefer to use a 9-inch springform pan for the bear’s head to get a slightly larger circle, which works beautifully if you want a bigger bear. A standard teddy bear cake uses 3 layers of cake when stacked, but our flat version keeps things simpler. If you do own a dedicated teddy bear cake pan, it holds about 4-5 cups of batter and gives a classic molded shape – but it’s absolutely not necessary here. For the cupcake portions, you might also enjoy making Easy Miniature Cupcakes with leftover batter.
Ingredients
- Chocolate cake: all-purpose flour, cocoa powder, sugar, eggs, milk, vegetable oil, baking powder, baking soda, salt, vanilla extract (or two 15.25 oz boxed chocolate cake mixes for super-speed)
- Optional flavor booster: a splash of hot coffee deepens the chocolate flavor
- Buttercream frosting: unsalted butter, powdered sugar, cocoa powder, vanilla extract, milk or cream
- Decorating extras: black icing or melted chocolate for facial features, chocolate buttons or chocolate chips for paw prints, optional fondant or ribbon for a bow
Tools
Mixing bowls, hand or stand mixer, serrated knife or sharp knife, palette knife or offset spatula, piping bags, a star tip (Wilton #18) or grass tip (#233), and parchment paper for lining pans.
Yield
This recipe serves approximately 12–16 slices – plenty for a small birthday party or family baby shower.
Step 1 – Bake the Chocolate Teddy Bear Cake Layers
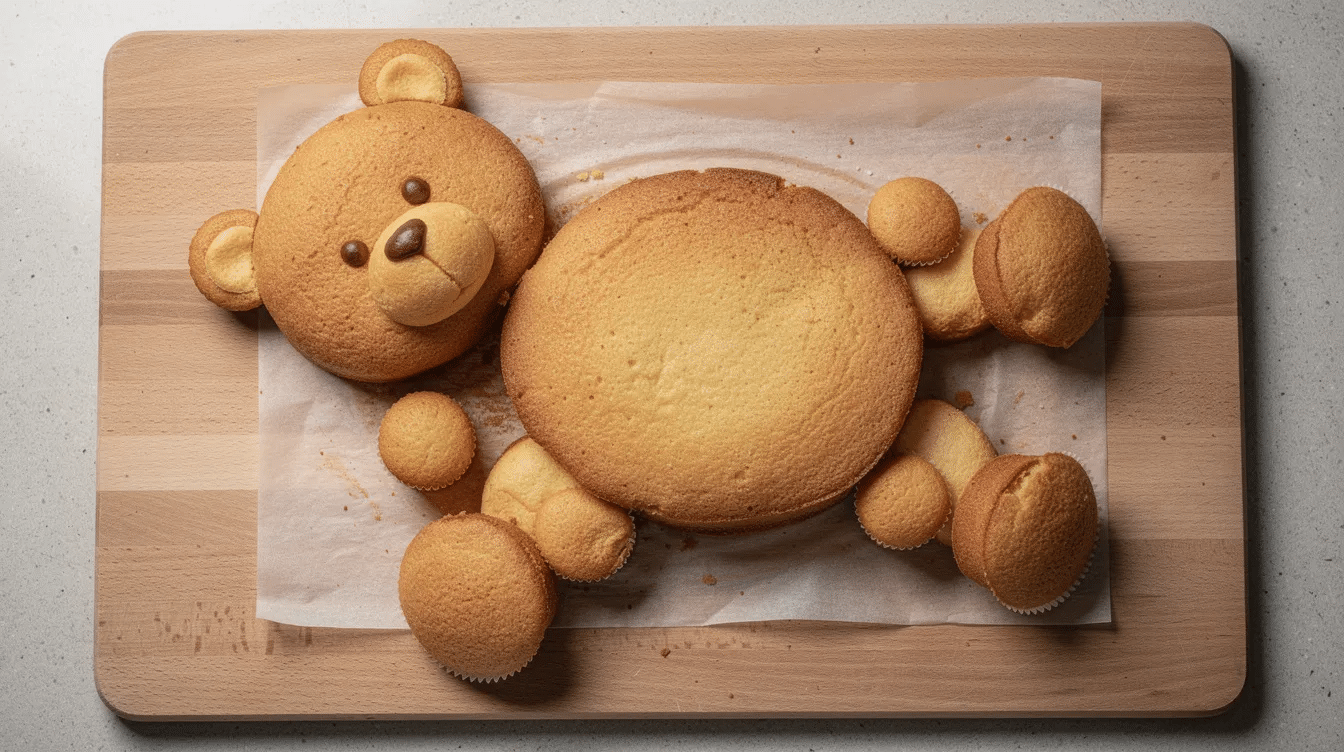
Prepare your chocolate cake batter – whether from scratch or from two boxed mixes – and divide it between the two greased and lined 8-inch round cake pans and six cupcake cavities in your muffin tin. Line the bottoms of your round pans with parchment paper for easy release, which is especially helpful when kids are helping tip the cakes out.
Baking guidelines:
- Oven temperature: 350°F (180°C)
- 8-inch rounds: 25–30 minutes
- Cupcakes: 18–20 minutes
- Doneness test: Insert a skewer into the center; it should come out clean or with a few moist crumbs
Let everything cool completely on wire racks. You can bake the cakes the day before the party – say, Friday evening for a Saturday celebration – and wrap them tightly once cooled.
For ultra-early prep, wrap each cooled cake layer in plastic wrap, then foil, and freeze for up to one month. Defrost overnight in the fridge before decorating. Food Network’s freezing guide confirms unfrosted layers hold up beautifully in the freezer.
Step 2 – Make the Chocolate and Vanilla Buttercream Frosting
A simple American buttercream frosting is all you need. Here’s the base ratio:
Ingredient | Amount |
|---|---|
Unsalted butter (softened) | 1 cup (2 sticks) |
Powdered sugar (sifted) | 4 cups |
Cocoa powder | ⅓ cup (for chocolate batch) |
Vanilla extract | 1 tsp |
Milk or heavy cream | 2–4 tbsp |
Beat the softened butter until pale and fluffy – about 3 to 5 minutes. Gradually add the powdered sugar in batches, starting the mixer on low to avoid sugar clouds (a genuinely helpful tip when baking with small children nearby). Add vanilla and milk a tablespoon at a time until you reach a soft but pipeable consistency.
Split the frosting: the larger portion becomes chocolate buttercream by mixing in cocoa powder for a darker brown color. For larger cakes or thicker fur coverage, note that chocolate buttercream requires 2-3 batches for thick layers. Keep a smaller portion as vanilla buttercream – leave it ivory or tint it with gel coloring for a light brown color or pink frosting depending on your theme.
For richer detail work, tint icing in three shades of brown for teddy bear details: a darker chocolate frosting for the body fur, a medium shade for shading, and a light brown frosting for the snout and belly. Chocolate cake layers can be filled with vanilla buttercream between layers if you want extra flavor contrast, and you can also use chocolate ganache or whipped cream as cake fillings.
Shop-bought chocolate icing works perfectly for a last-minute baby shower or son’s birthday – no judgment here.
Step 3 – Shape the Bear: Head, Body, Ears, and Paws
Lay the first 8-inch cake horizontally on your cake board or foil-covered tray – this is the teddy bear’s body. Trim a flat edge on the second 8-inch cake with a sharp paring knife or serrated knife so it sits snugly against the body as the head.
Chill both cakes for 30–60 minutes before trimming. Cold cake resists crumbling, which makes handling much easier – especially if little helpers are hovering. Use wooden dowels for support in multi-layer cakes if you decide to stack layers for extra height.
Now for the cupcake pieces:
- Ears: Slice two cupcakes in half; position two halves at the top of the head with flat sides down.
- Bear’s snout: Stack one or two cupcake halves slightly overlapping the lower edge of the head circle.
- Paws: Place the remaining whole cupcakes around the bottom edge of the body, flat sides touching the body cake and rounded sides facing outward.
If you plan to use fondant for the ears, fondant ears should be made a day before assembly so they have time to firm up. You can also use chocolate cookies for teddy bear paws and ears as a shortcut. No complex carving required – the entire cake comes together from basic round shapes on a flat board.
Step 4 – Crumb Coat and Chill for Neat Decorating
Think of a crumb coat as a thin “undercoat” – a thin layer of frosting that traps stray cake crumbs under the final decorating layer so your piped fur comes out clean. A crumb coat traps stray cake crumbs under the final frosting layer, which means no brown flecks poking through your beautiful stars.
Using a palette knife or offset spatula, spread a thin layer of chocolate frosting over the body, head, ears, snout, and paws. Don’t worry about making it perfect – it just needs to seal the surface.
Chill the cake for 20 minutes before decorating (30 minutes is even better if your kitchen runs warm). Pop the entire cake board into the fridge. This is a natural pause point – use it to wrangle preschoolers into nap time or prep other party food.
Step 5 – Pipe the Teddy Bear’s Fur with Buttercream
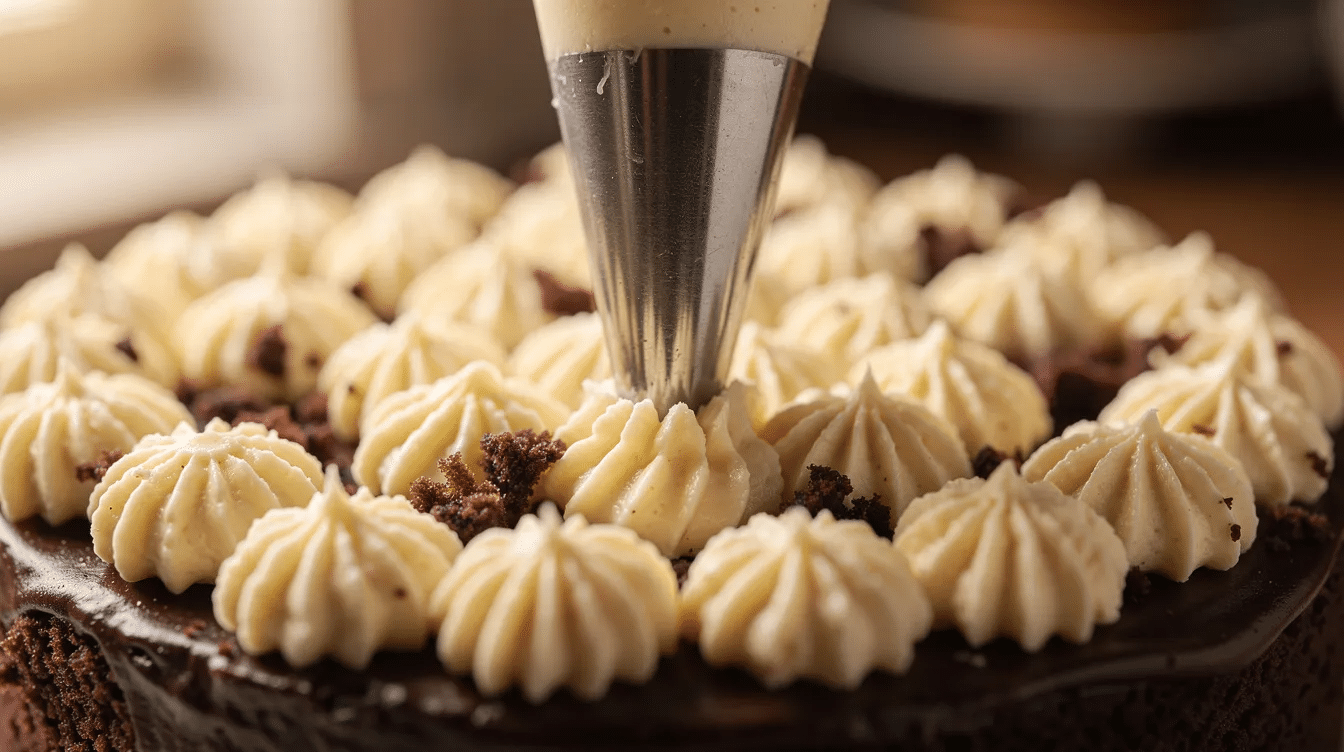
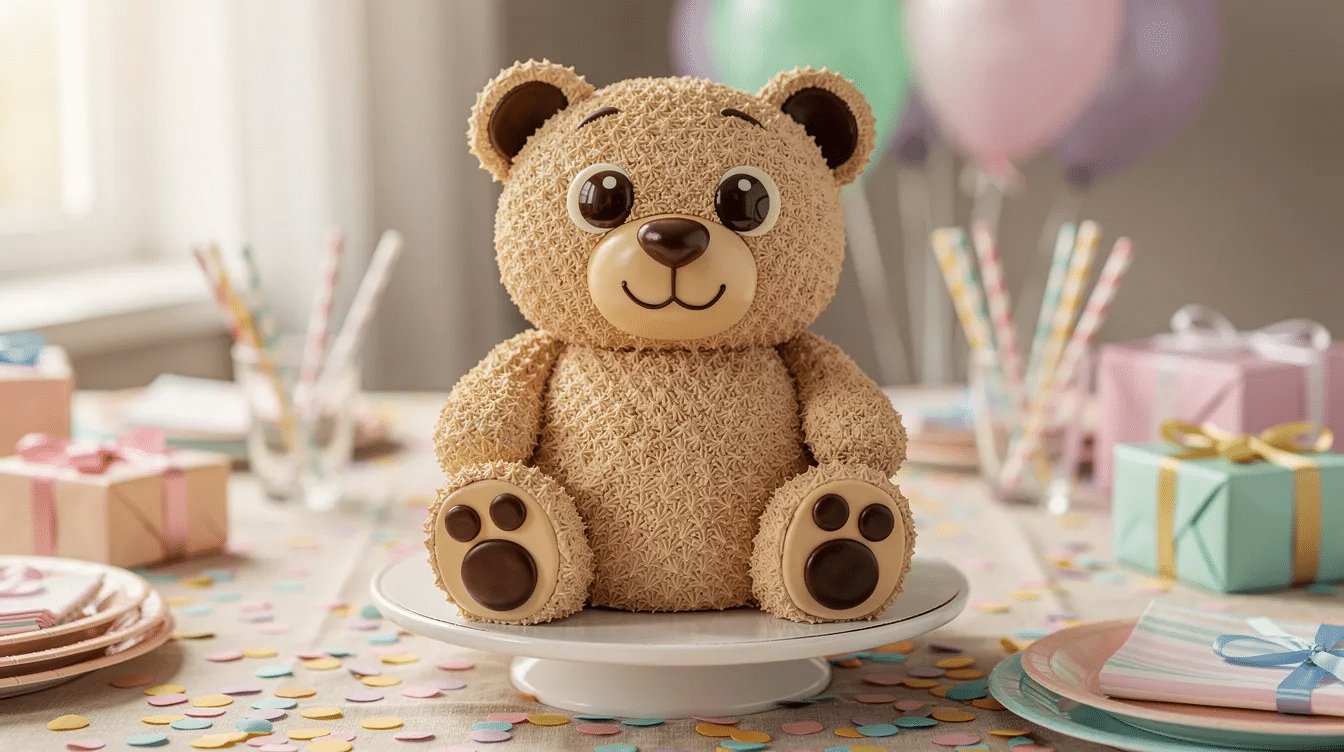
This is where the magic happens. Fill a piping bag fitted with a small star tip (Wilton #18) or grass tip with chocolate buttercream. Piping tip 233 creates the bear’s fur texture especially well – each squeeze produces little strands that look remarkably like fluffy fur. Use a grass tip to pipe fur on teddy bear cakes for the most realistic effect.
Basic piping motion:
- Hold the piping bag at a 45° angle close to the cake surface.
- Squeeze until a small star or tuft of frosting forms.
- Release pressure and pull away.
- Repeat, overlapping each star slightly, until you cover the area.
Start piping on the body, then move to the head, ears, and paws. Leave a bare oval area on the tummy and the bear’s snout where the lighter frosting will go. Frosting with a textured finish is forgiving for beginner decorators – gaps and imperfections simply disappear under overlapping stars.
Encourage kids to help on the body and paws while an adult handles the bear’s face for a neater finish. Any gaps can be filled with extra piped stars at the end.
Step 6 – Add the Face, Belly, and Cute Details
Switch to the pale vanilla buttercream and spread or pipe an oval patch on the teddy bear’s belly and a rounded area over the cupcake snout. Using simple shapes makes facial features easier to create – you’re just working with circles and ovals.
Face details:
- Eyes: Use black icing, or pipe two small dots with a large round piping tip like 2A. A round cake decorating tip #5 works well for finer detailing around the mouth. Candy can be used for cake facial features instead of piping – edible candy eyes are a favorite shortcut.
- Nose: Pipe or place a larger upside-down triangle of black fondant or darker chocolate frosting on the bear’s snout.
- Mouth: Draw a simple curved smile line from the bottom of the nose using black icing or melted chocolate squeezed from a small piping bag.
Press chocolate buttons, chocolate chips, or small candies into the paw cupcakes for paw prints and “toe beans.” You can also use white chocolate pieces for contrast, or try white fondant or gum paste shapes for a polished look. Use fondant to create the bear’s ears and face accents if you want extra dimension, and consider adding black fondant details for the nose and eyes.
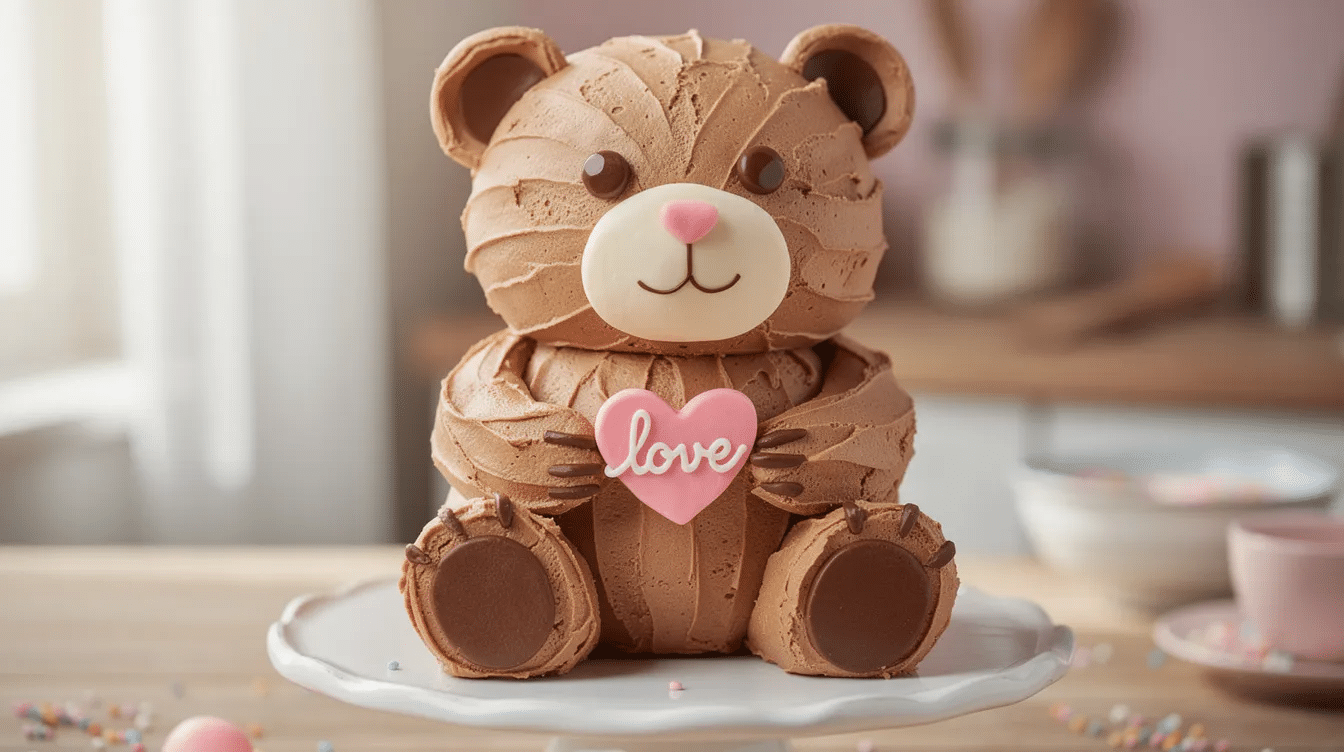
A simple decoration can complete the look of a teddy bear cake – try a ribbon bow on one ear, a tiny fondant heart on the chest, or a personalized message banner with the child’s name. Teddy bear cakes can be decorated with limited colors for ease, so don’t feel pressured to go overboard. Even with just two cakes assembled simply, you’ll have the cutest cake at the party.
Theme Ideas: Turning Your Bear Cake into a Party Centerpiece
This cute cake anchors a whole party theme beautifully. Here are three ideas:
- Teddy Bear Picnic: Lay a gingham cloth on the dessert table, scatter a few favorite teddy bears from your child’s room, and add paper paw-print cutouts leading guests to the table. Coordinate with bowls of teddy graham crackers, bear-shaped sandwiches, and honey-flavored cupcakes around the main bear cake.
- Cozy Winter Birthday: Think warm tones, fairy lights, and a hot chocolate station. The teddy cake sits center stage on a cake stand wrapped in faux greenery.
- “Our Little Bear” Baby Shower: A gender-neutral palette of cream, sage, and soft yellow. Pair with a Birthday Decorations with Balloons setup and handmade party hats.
Keep decorations inexpensive – upcycled jars as vases, cardboard signs, and hand-drawn paw prints are completely on-brand for a frugal, crafty celebration.
Make-Ahead, Storage, and Serving Tips
The creative process is much less stressful when you spread the work across a few hours or even a few days:
- 1 month ahead: Bake and freeze all the cakes and cupcakes, wrapped tightly.
- 1–2 days ahead: Make buttercream frosting and refrigerate in an airtight container.
- Day before: Assemble, crumb coat, and decorate. The fully decorated teddy cake can sit in the fridge for up to 24 hours.
- 45–60 minutes before serving: Bring to room temperature for the best texture.
For serving, use a long serrated knife to cut neat slices from the body. The cupcakes (ears, paws) can be pulled off and served as individual portions for younger kids. Store leftovers in an airtight container at room temperature for 2–3 days, or freeze individual slices wrapped well.
Easy Variations for Different Ages and Occasions
- Polar bear version: Use vanilla cake with white buttercream and a pastel blue cake board – absolutely adorable for a winter birthday.
- Mini bear: A single 8-inch cake plus four cupcakes for a more intimate celebration. This also makes a charming first birthday smash cake.
- Dietary swaps: Use a gluten-free flour blend in your chocolate cake recipe, or swap in dairy-free margarine and plant milk for the buttercream. Among all the cakes we’ve shared, this one adapts the most easily.
- Color changes: Pastel pinks and mints for a baby shower, bright primaries and a fondant party hat on the bear for a 5th birthday party. You could even try a funfetti base like our Confetti Birthday Cake.
One batch of cake batter is enough for the smaller mini version; double it for the full-sized teddy. The entire cake design is flexible – swap flavors, swap colors, and make it yours.
FAQ
Do I really not need a special teddy bear cake pan?
Not at all. The design is built entirely from basic round cakes and standard cupcakes – no special pan required. That said, if you happen to own a teddy bear cake pan (which typically holds about 4-5 cups of batter), you can certainly use a teddy bear cake pan for best results with a molded shape. But for this recipe, two 8-inch round pans and a muffin tin are everything you need. You can even use a 9 inch springform pan for the bear’s head if you want a slightly larger face.
How far in advance can I make this teddy bear cake?
Cake layers can be baked and frozen up to one month ahead. Buttercream frosting stores in the fridge for a week or the freezer for up to three months. Assemble and decorate the day before, keep it in the fridge, and bring it to room temp about an hour before serving. If using fondant accents, fondant ears should be made a day before assembly.
Can children help decorate the bear cake?
Absolutely. Let kids pipe fur stars on the body and paws, press chocolate buttons into the inner ears and paw pads, and add sprinkles. An adult should handle the sharp knife work, the bear’s face details, and any hot coffee additions to the batter. The entire decorating process is forgiving – wonky stars just look like fluffier fur.
What if I don’t have a piping bag or special tips?
Fill a sturdy zip-top bag with frosting and snip a small corner. You won’t get perfect star shapes, but you can pipe dots or short lines that mimic fluffy fur. Alternatively, spread the frosting with a spoon or the back of a fork to create a rough, furry texture across the entire cake.
Will this teddy bear cake work with vanilla or other cake flavors?
Any firm, moist cake recipe works – vanilla, red velvet, funfetti, or lemon. Chocolate cake with darker chocolate frosting looks most like a classic brown teddy, but the flavor is entirely flexible. You can also experiment with royal icing accents or white chocolate details for a lighter look. The bear design doesn’t depend on color; it depends on shape.


