

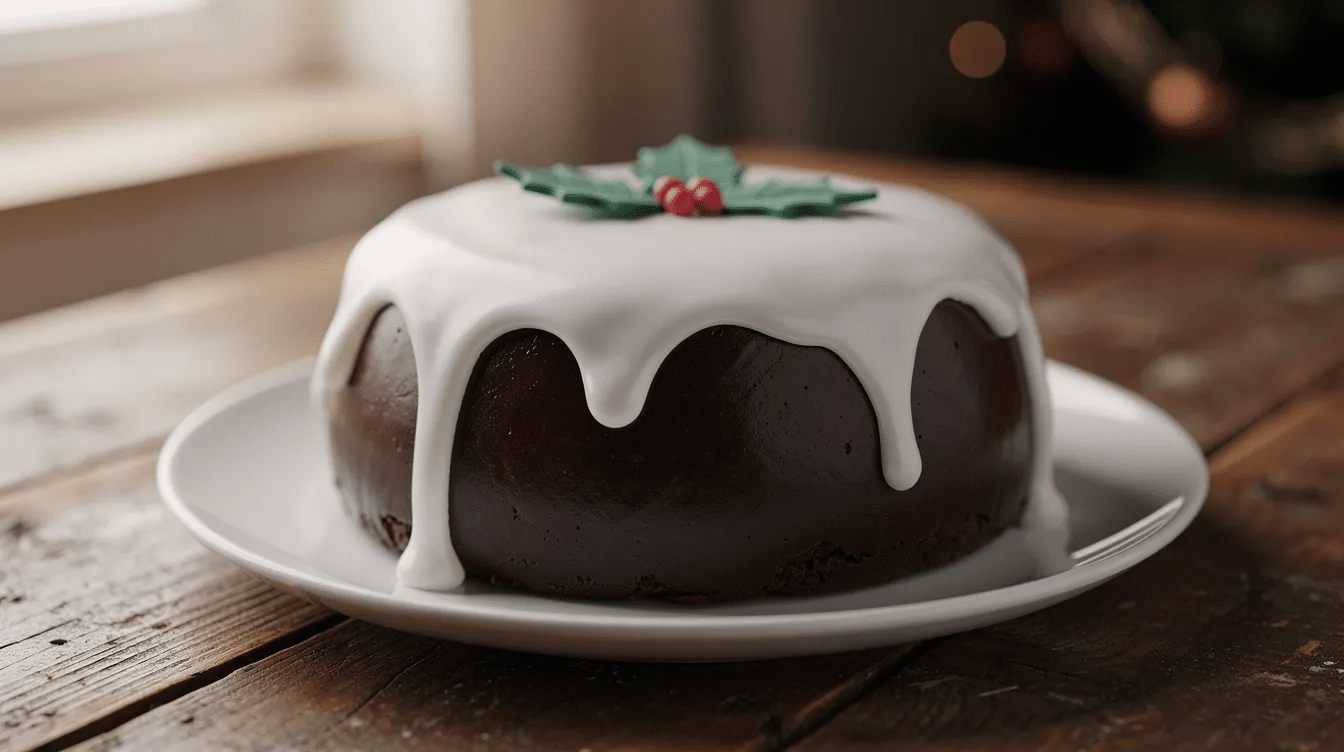
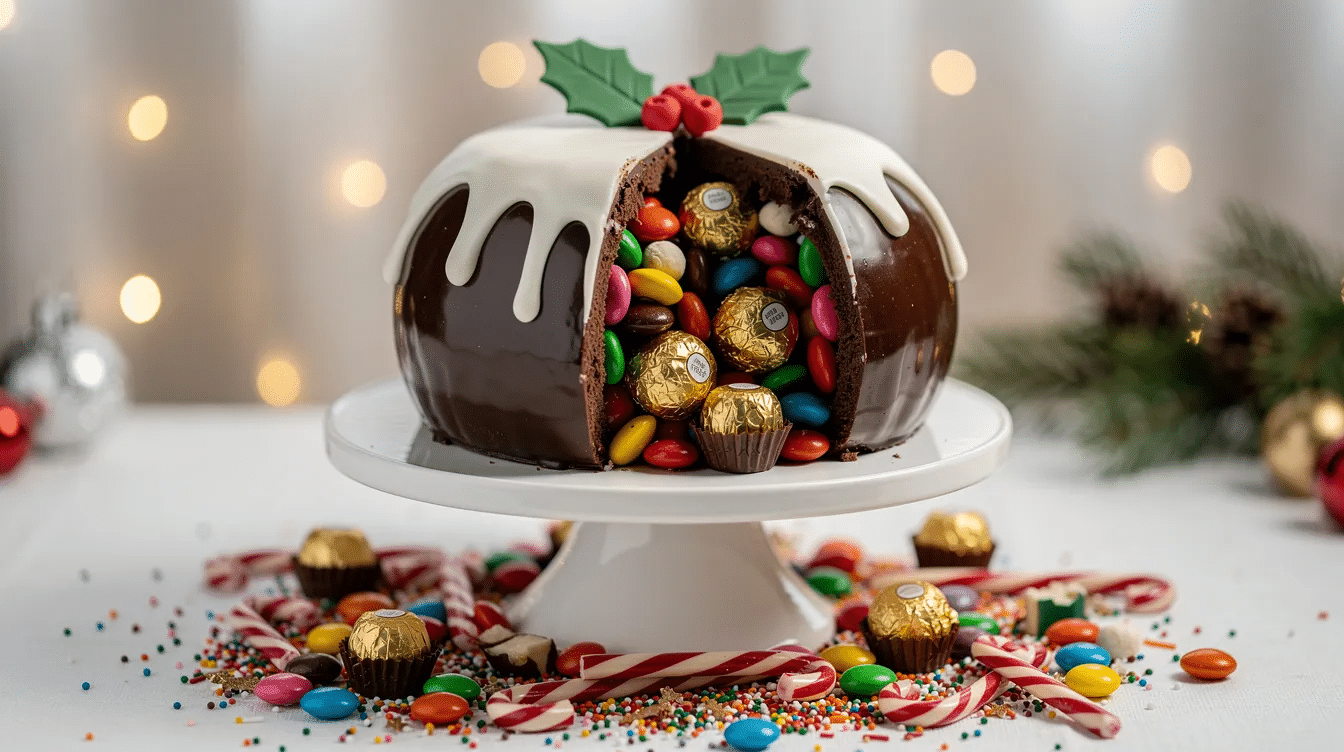
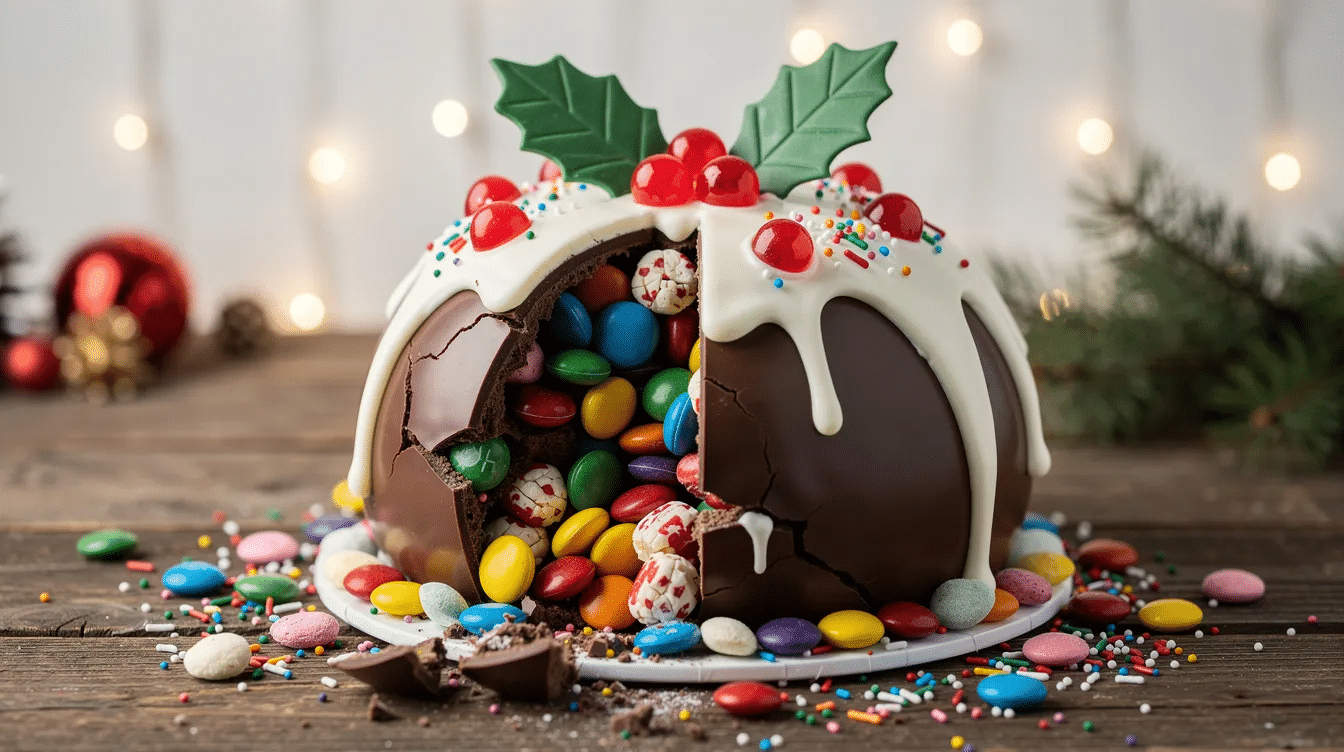
This Christmas pudding piñata cake looks like a classic British pud on the outside but hides a candy-filled center that spills out the moment you slice into it. Four chocolate sponge cake layers, two with circles cut from the middle, stack together around a secret stash of festive sweets. The whole cake gets coated in dark chocolate frosting and topped with a white “custard” drip and fondant holly, so it reads as a traditional Christmas pudding from across the room. Then you cut it open, and the fun begins.
Key Takeaways
- A piñata cake has a candy surprise inside; this version is a modern twist on the traditional Christmas dessert, shaped and frosted to look like a steamed Christmas pudding.
- The method uses four simple round sponge layers. Two middle layers have circles cut out to create a cavity you fill with candy or treats.
- Surprise inside cakes are great for celebrations; this one suits Christmas parties, school fairs, family gatherings, and Christmas Eve dessert.
- The filling can be tailored with red, green, and white candies, mini cookies, chocolate chips, or sprinkles. Step-by-step photos and an optional video tutorial guide the trickier steps.
- If you can stack a simple layer cake, you can make this piñata cake. No advanced decorating skills or specialty tools required.
Festive Overview: What Is a Christmas Pudding Piñata Cake?
Picture a cake that looks like a traditional steamed Christmas pudding: round, dark, chocolatey, with thick white “custard” icing dripping down the sides and a sprig of holly on top. Now picture slicing into it and watching a cascade of colorful candy tumble onto the cake plate. That is a Christmas pudding piñata cake.
A piñata cake is a layer cake with a hollow center filled with sweets. A typical piñata cake uses four layers of cake: two solid layers (top and bottom) and two middle layers with matching holes cut from their centers. The cavity holds the treats, and the cake’s surprise element is revealed when it is cut open. Piñata cakes can be filled with various candies, from chocolate drops to sprinkles to mini marshmallows.
A traditional Christmas pudding is a steamed dessert made from dried fruits and spices. Traditional Christmas pudding typically contains alcohol and is served warm, often with brandy butter or custard. This cake borrows that look but replaces the dense, boozy interior with light sponge and a candy surprise, making it far more appealing to children.
This project is designed with families in mind, fitting Little Button Diaries’ focus on accessible, creative fun for parents and preschoolers. The post covers ingredients, step-by-step method (including the middle layers and second layer), decorating tips, and ideas for getting kids involved.
Ingredients & Tools You’ll Need
You can use your favorite chocolate sponge recipe or a box mix to keep things simple. Use a box mix for easier cake preparation if you’re short on time. Quantities below suit a four-layer 8-inch round cake, though you can also use four 9-inch round cake pans for a piñata cake with slightly thinner layers.
Cake ingredients:
- 2¾ cups flour
- 1½ cups sugar
- ¾ cup cocoa powder
- 2 tsp baking powder
- 1 tsp baking soda
- 1 tsp salt
- 4 eggs
- 1 cup milk or buttermilk
- ½ cup unsalted butter, softened (or vegetable oil)
- 2 tsp vanilla extract
Frosting and drip:
- Chocolate buttercream or dark chocolate ganache (for the “pudding” exterior): powdered sugar, cocoa, butter, and milk
- White chocolate ganache for the “custard” drip: white chocolate chips and heavy cream at roughly a 3:1 chocolate-to-cream ratio by weight
- Green fondant for holly leaves, red fondant or candy for berries
Piñata filling:
- Red and green chocolate candies (holiday M&Ms work well)
- Mini marshmallows, festive sprinkles, tiny candy canes, or small chocolate coins
Tools:
- Three or four 8-inch round cake pans
- Parchment paper
- Mixing bowl (or several)
- Stand mixer fitted with paddle attachment, or electric hand mixer
- Offset spatula or palette knife
- Sharp knife and serrated knife
- 3.5–4 inch round cutter, small bowl, or drinking glass
- Cooling rack
- Turntable or cake stand (optional but helpful for smooth frosting)
- Large serving plate or cake board
- Spoon for drizzling ganache
Optional decorations: glace cherries, edible gold stars, icing sugar for “snow” dusting.
Planning & Timing Your Christmas Pudding Piñata Cake
This is a great make-ahead dessert. Splitting the work across two or three days prevents last-minute stress.
Suggested timeline:Suggested timeline:
Day | Tasks |
|---|---|
Day 1 (e.g., Dec 23) | Bake sponges, cool completely, wrap tightly, store at room temperature or in the fridge |
Day 2 (e.g., Dec 24) | Cut middle layers, assemble and fill the piñata center, crumb coat, chill, apply final frosting |
Day 3 (e.g., Dec 25) | Add white “custard” drip and holly decorations; bring to room temperature before serving |
Approximate prep time per stage:
- Mixing batter and baking: ~1 hour
- Cooling: 1–2 hours (or overnight)
- Carving and assembly: ~45 minutes
- Crumb coat and chilling: 30–45 minutes
- Final decorating: ~30 minutes
Store the frosted cake in a cool room or fridge, covered. Bring it back to room temperature for about an hour before serving so the chocolate sponge isn’t too firm. If your December weekends are packed, bake during nap time one day and decorate during another; the process breaks into small, manageable chunks.
Step-by-Step: Baking the Cake Layers
You can use a trusted family sponge recipe or a boxed mix. The goal is even, stackable layers rather than bakery perfection. The piñata cake can include various flavors such as chocolate or vanilla; chocolate gives the most convincing pudding color.
- Line three or four round cake pans with parchment paper and lightly grease the sides. Preheat the oven to 350°F (180°C / 160°C fan).
- In a stand mixer fitted with the paddle attachment (or using a hand mixer), cream butter and sugar until fluffy. Beat in eggs one at a time, then add vanilla extract.
- In a separate bowl, whisk the dry ingredients: flour, cocoa, baking powder, baking soda, and salt.
- At low speed, fold dry ingredients into the wet mix in three additions, alternating with milk, until the batter is smooth. Do not overmix.
- Divide batter evenly between pans. Weighing the batter on a kitchen scale helps, but eyeballing is fine. Tap each pan gently on the counter to release air bubbles.
- Bake for 20–30 minutes (7–8 inch layers). A skewer inserted in the center should come out clean and the tops should spring back when lightly pressed.
- Let the cakes cool in pans for 10–15 minutes, then turn them out onto a cooling rack. Peel off parchment paper and let them cool completely before trimming or stacking.
Use a serrated knife to level the cake layers if any have domed tops. Slightly chilled cakes are easier to carve and frost, so you can wrap cooled layers in plastic wrap and refrigerate overnight.
Creating the Piñata Center: Cutting the Middle Layers
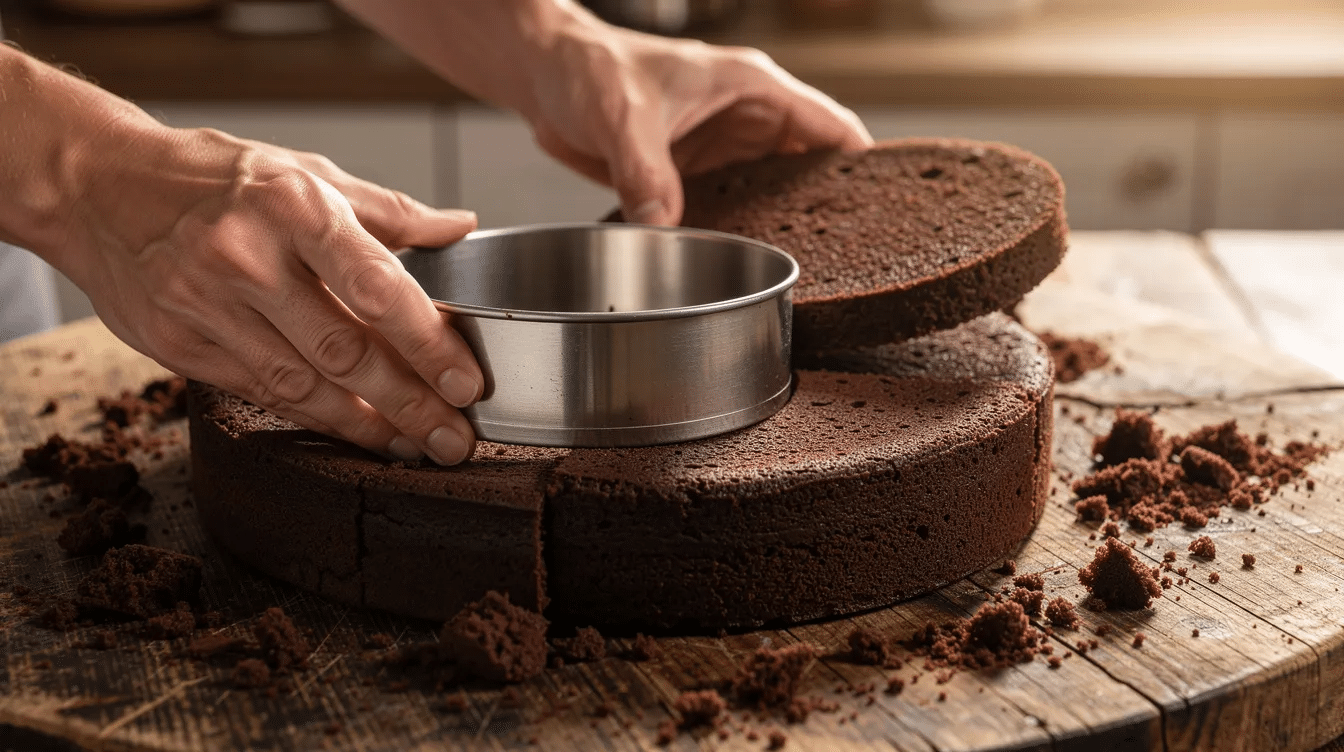
The magic happens in the two middle layers. You will cut holes in the middle layers to create space for candy, turning two of your cakes into rings that hold the sweet surprise.
Start by loosely stacking all cooled cakes to see which are flattest. Choose the neatest for the top and bottom (the final layer and the base). The other layers become your cut-out middle layers.
To cut the center hole in each ring layer:
- Place a 3.5–4 inch round cutter, small bowl, or drinking glass in the center of one layer.
- Trace around it with a sharp knife, cutting straight down.
- Carefully lift out the circle of sponge. Save it for cake pops, trifle, or snacking.
Cut a hole in the middle layers for candy filling, and keep the same size hole in both so the cavity lines up into one smooth tunnel. Place the cut-out from the first layer on top of the second as a size hole guide before cutting.
Do not cut the hole too close to the edge. Leave at least 1.5–2 inches of cake ring on all sides so the structure stays strong, especially if you plan to transport the cake to a family gathering. The cuts do not need to be perfect; frosting hides small wobbles and candy distracts from minor imperfections.
Assembly: Stacking, Filling, and Adding the Second Layer
This is where the cake transforms into a true pinata cake. The order matters: bottom solid layer, first ring, second ring, candy, top solid layer.
- Place the bottom (uncut) layer on a cake board, cake stand, or plate. Secure it with a dab of frosting so it does not slide.
- Spread an even layer of chocolate frosting on top of this bottom frosted layer, right to the edges but not spilling over.
- Carefully place the first middle layer (ring with a hole) on top, aligning edges. Add the next layer of frosting on the ring surface, taking care not to let frosting fall into the hole.
- Set the second middle layer on top. Check that the cut-outs line up to form a smooth cavity.
- Fill the cake’s center with candies or treats. Pour in your chosen sweets, mixing textures and colors. A 4-inch hole across two ring layers holds roughly 3–4 cups of candy. Leave a small gap at the top so the final layer sits flat. Add additional candies if there is room, but do not overfill.
- Spread a thin layer of frosting around the rim of the third layer, then carefully place the top intact layer on. Press gently to seal the edges while keeping the entire cake level.
Stand back to check if the cake leans. Rotate if needed. Scrape away any frosting that oozes out. The whole cake is now ready for its crumb coat.
Crumb Coating and Chilling for a Smooth Finish
A crumb coat is a thin “undercoat” of frosting that traps crumbs so the final coat is smooth. Frost the cake with a crumb layer before final icing; this step matters especially on a dark, pudding-style cake where stray crumbs would show against the finished surface.
- Using an offset spatula, spread a thin layer of chocolate frosting over the top of the cake and down the sides. This does not need to look neat.
- Fill any gaps between layers and smooth over uneven spots from trimming. Aim for a rounded pudding shape on top.
- Chill the assembled cake for 30 to 45 minutes in the fridge, or longer if your kitchen is warm, until the frosting feels firm to the touch.
Use this chilling time for a kid-friendly activity: washing bowls together, making paper chains, or working on Holly & Ivy 3D Sun Catchers to go with your Christmas table. Chilling also lets the candy center settle and reduces the risk of the cake shifting when you add the final frosting.
Decorating: Turning Your Cake into a Christmas Pudding
This is where the cake stops looking like a brown cylinder and starts looking like a Christmas pudding. The exterior is designed to resemble a traditional Christmas pudding, and kids can help with nearly every step here.
- Spread a thick, smooth coat of chocolate buttercream over the set crumb coat, rounding the top slightly to suggest the classic pudding dome. The cake can be decorated with frosting and sprinkles at this stage.
- For a deeper, more realistic pudding color, mix a bit of black cocoa or espresso powder into the chocolate frosting.
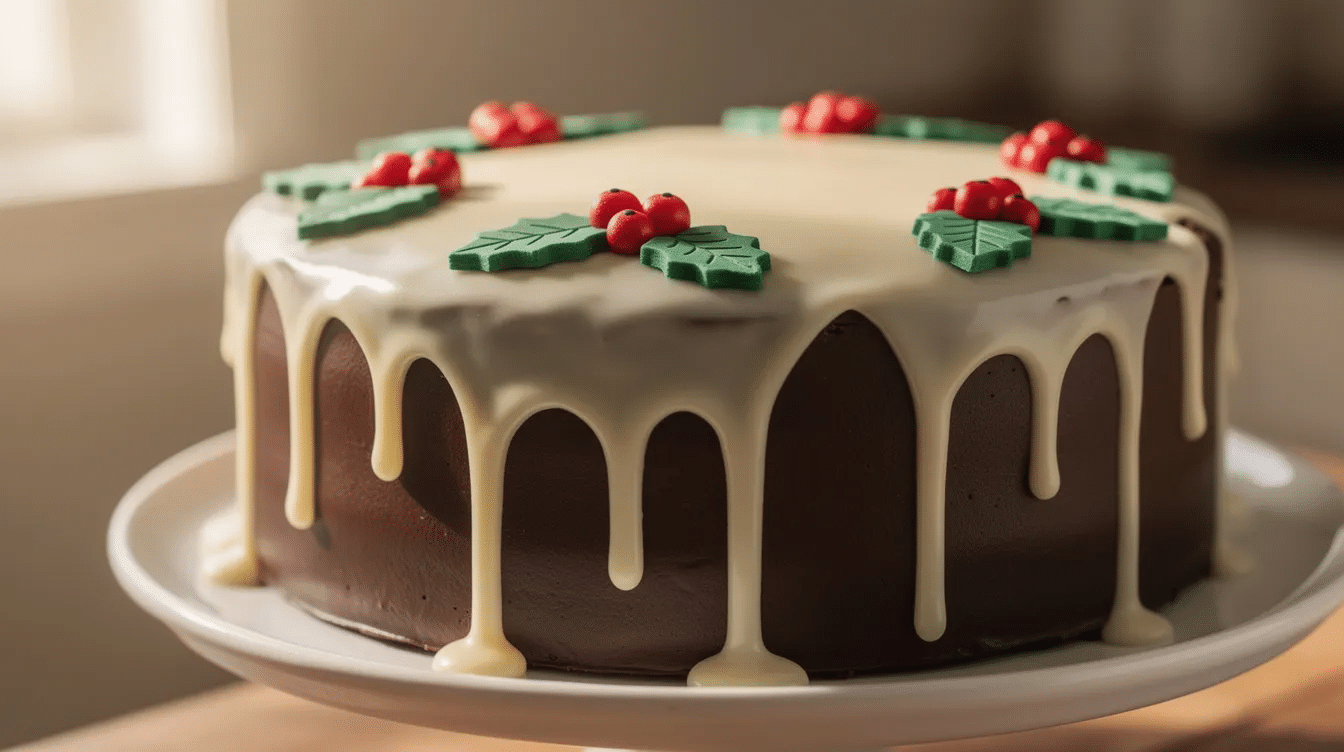
- Create the “custard” or “brandy sauce” effect: spoon white chocolate ganache onto the top of the cake and nudge it gently toward the edges so it drips down the sides in natural-looking dribbles. The ganache works best when cooled to about 91–93°F so drips form cleanly without sliding to the bottom.
- Roll out green fondant, cut holly leaves with a small cutter or knife, shape red fondant berries, and position them on top while the white icing is still slightly soft.
- Finish with a dusting of powdered sugar “snow,” edible gold stars, or tiny gingerbread figures around the base.
The finished cake should read as a Christmas pudding from across the room. The piñata surprise stays hidden inside until the big reveal.
Baking with Kids: Safe, Fun Jobs for Little Helpers
This recipe works best as a shared activity rather than a perfect showpiece. If you enjoy baking with kids, nearly every stage has a job for small hands.
Kid-friendly tasks by age:
Age | Jobs |
|---|---|
Toddlers (2–3) | Tip pre-measured ingredients into the bowl, press fondant berries, sprinkle powdered sugar “snow” |
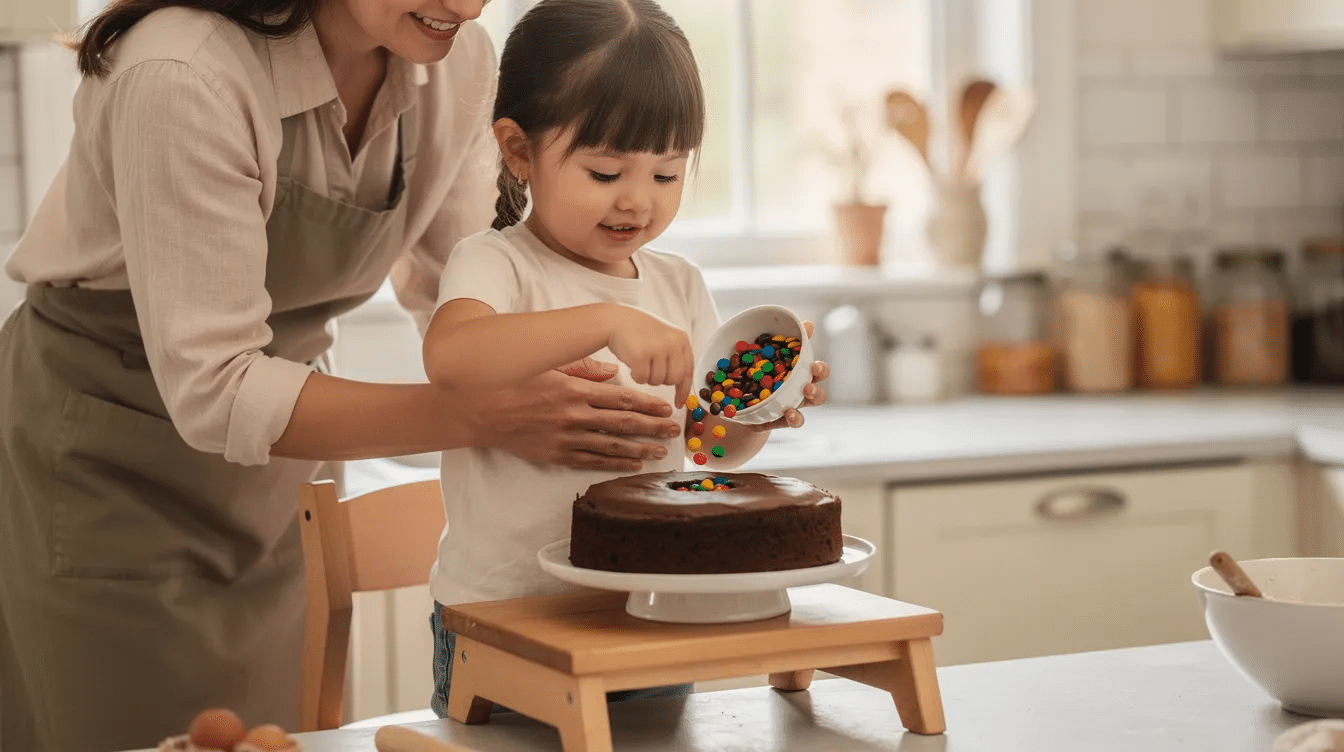
Preschoolers (4–5) | Help mix batter at low speed under supervision, sort candy by color, pour sweets into the piñata center, cut fondant holly with a blunt plastic knife |
Older kids (6+) | Practice smoothing frosting with an offset spatula, spoon the white ganache drip, arrange decorations |
Safety reminders: Adults should handle the hot oven, sharp knife work, heavy mixing, and melted chocolate. Kids should stand on stable stools and wash hands between handling raw egg batter and candy.
Turn the bake into a full morning’s Christmas activity. While layers cool, make a homemade piñata from a cardboard box as a table centerpiece, draw a “menu” for Christmas dinner, or craft simple paper holly place cards.
Variations: Flavors, Sizes, and Dietary Tweaks
The basic piñata cake method is flexible enough to adapt for different tastes, allergies, and family traditions.
Flavor ideas:
- Classic fruitcake-style sponge with mixed spice and dried fruit for a true pudding flavor
- Orange-chocolate sponge (add orange zest to the batter)
- Gingerbread sponge with cinnamon and nutmeg
Size variations:
- Mini Christmas pudding piñata cakes in 4-inch tins for individual servings
- A larger 9-inch version for big gatherings or school Christmas fairs
Dietary tweaks:
- Nut-free: check all candy labels carefully
- Egg-free: substitute with flax “eggs” (1 tbsp ground flax + 3 tbsp water per egg)
- Dairy-free: use plant-based butter, milk, and dairy-free chocolate
Alternative fillings: fudge pieces, dried cranberries mixed with chocolate chips, cookie bits, or candy canes. If you love chocolate bakes, try pairing this idea with a Salted Caramel Chocolate Swirl Cake for a two-cake Christmas spread. The same piñata method works for a Confetti Birthday Cake or an Easter nest version with pastel-colored sweets.
Serving, Storage, and Transport Tips
For the best reveal, use a long, sharp knife and cut a generous wedge straight through the center. Have a plate ready to catch the candy cascade. The moment those sweets spill out in front of friends and family is the payoff for all your work.
Serving suggestions: pair slices with vanilla ice cream, custard, or softly whipped cream. A rich chocolate sponge benefits from something cool and light alongside it.
Storage: keep leftover slices in an airtight container at cool room temperature for 2–3 days. Refrigerate if your frosting is cream-based, and bring back to room temperature before eating. Candies with fragile shells can fade or go sticky in the fridge; if using delicate sweets, consider filling the center closer to serving time.
Transport: chill the fully decorated cake for at least an hour before travel. Place it on a non-slip mat inside a sturdy box in the car, and avoid leaving it in a hot vehicle.
Optional Extras: Video Tutorial and Printable Checklist
While the written instructions above cover every stage, some readers prefer a video tutorial to see tricky steps in motion. A short video showing batter mixing, cutting the middle layers, filling the piñata center, smoothing the final frosting, and the candy spill reveal can clear up any uncertainty. Close-up shots of cutting the center holes and creating neat white “custard” drips help beginners see the right texture and thickness.
A one-page printable checklist summarizing the steps in order (bake, cool, trim, cut middle layers, stack, fill, crumb coat, chill, decorate, serve) is a delicious idea for baking day; stick it on the fridge and let kids tick off each step. Sign up to the Little Button Diaries newsletter to get updates when new seasonal piñata cake tutorials and craft projects go live.
Christmas Pudding Piñata Cake FAQ
How far in advance can I make this Christmas pudding piñata cake?
Sponge layers can be baked 2–3 days ahead, wrapped tightly in plastic wrap, and stored at room temperature or in the fridge. Full assembly with candy filling is best done no more than 24 hours before serving so the sweets stay crisp. The fully frosted cake can sit in the fridge overnight in a cake box. Bring it to room temperature for 45–60 minutes before cutting.
Will the candy go soft inside the cake?
Most chocolate candies and sprinkles hold their texture for about 24 hours inside the cake, provided the kitchen or storage area is cool. Avoid chewy sweets that absorb moisture from the sponge and frosting. If you want to include something fragile, like meringue kisses, add them to the center shortly before serving.
Can I make this as a smaller cake for just our family?
Use 6-inch or 4-inch round tins and scale the sponge recipe down by roughly one-third or half. The method for cutting the middle layers and filling the center stays the same; just use a smaller cutter (about 2.5 inches for a 4-inch cake). Mini versions are fine for a small family Christmas or for gifting to friends and neighbors.
What if I don’t have four cake pans or much freezer space?
Bake the layers in batches, reusing two cakes’ worth of pans. Let pans cool completely before re-greasing and re-lining with parchment paper. A three-layer version (one base, one layer with a cut-out in the middle, one top) still holds a generous amount of candy and is easier to stack, though the reveal will be slightly less dramatic.
How do I adapt this if my child has allergies?
Start with a trusted free-from sponge recipe (gluten-free, dairy-free, or egg-free) that already works for your family, then apply the same piñata assembly method. Choose allergy-safe candies and check every label for nuts, dairy, or gluten. If baking with siblings who do not share the same restrictions, use separate utensils and keep cross-contamination in mind during decorating. Test a smaller version before committing to a full-size cake on Christmas Day.


