

There is something about a giant bubble floating across a backyard that makes every kid (and most adults) stop and stare. This tutorial walks you through building your own diy giant bubble wands, mixing a reliable bubble solution from pantry supplies, and getting those huge bubbles airborne with your preschooler in under 30 minutes of prep.
Key Takeaways
- You can build diy bubble wands in under 30 minutes using two sticks, cotton cord, eyelet screws, and a washer.
- The tested giant bubble solution recipe below uses just three ingredients: cool water, dish soap, and glycerin, with quick tweaks for hot or humid days.
- A classic tri-string wand produces curtain-sized giant bubbles, while a coat-hanger version works for younger kids aged 3 to 5.
- Letting your giant bubble mix rest for 1 to 2 hours (or overnight) before play produces noticeably stronger, longer-lasting bubbles.
- Grass is the safest surface for making giant bubbles; patios and decking get slippery fast from dripping bubble solution.
Why Giant Bubble Wands Are Perfect for Summer Play
Picture a warm summer afternoon, a bucket of soapy water on the lawn, and your four-year-old shrieking as a bubble roughly the length of her arm drifts overhead. Giant bubble wands turn an ordinary backyard into a spectacle, and the whole setup costs less than a takeaway coffee.
Here is why this activity is worth making space for this season:
- A single session of making bubbles keeps most kids occupied for 30 to 60 minutes, which is far longer than a standard bottle of small bubbles lasts.
- Spreading a bubble wand wide requires big arm movements, building shoulder strength and coordination. Contrast that with the tiny wrist flick of a plastic wand.
- The supplies are mostly stuff you already own: sticks from the garden, string from a kitchen drawer, dish soap from under the sink.
- Giant bubble wands are a hit at birthday parties, playdates, and end-of-summer water play sessions, giving you one activity that scales from two kids to twenty.
- This tutorial sticks to plastic-free or low-plastic materials wherever possible, using wooden sticks, cotton cord, and reusable containers.

Supplies Checklist for DIY Giant Bubble Wands
Gather everything before you start. Here is what you need, split into two groups.
For the wand:
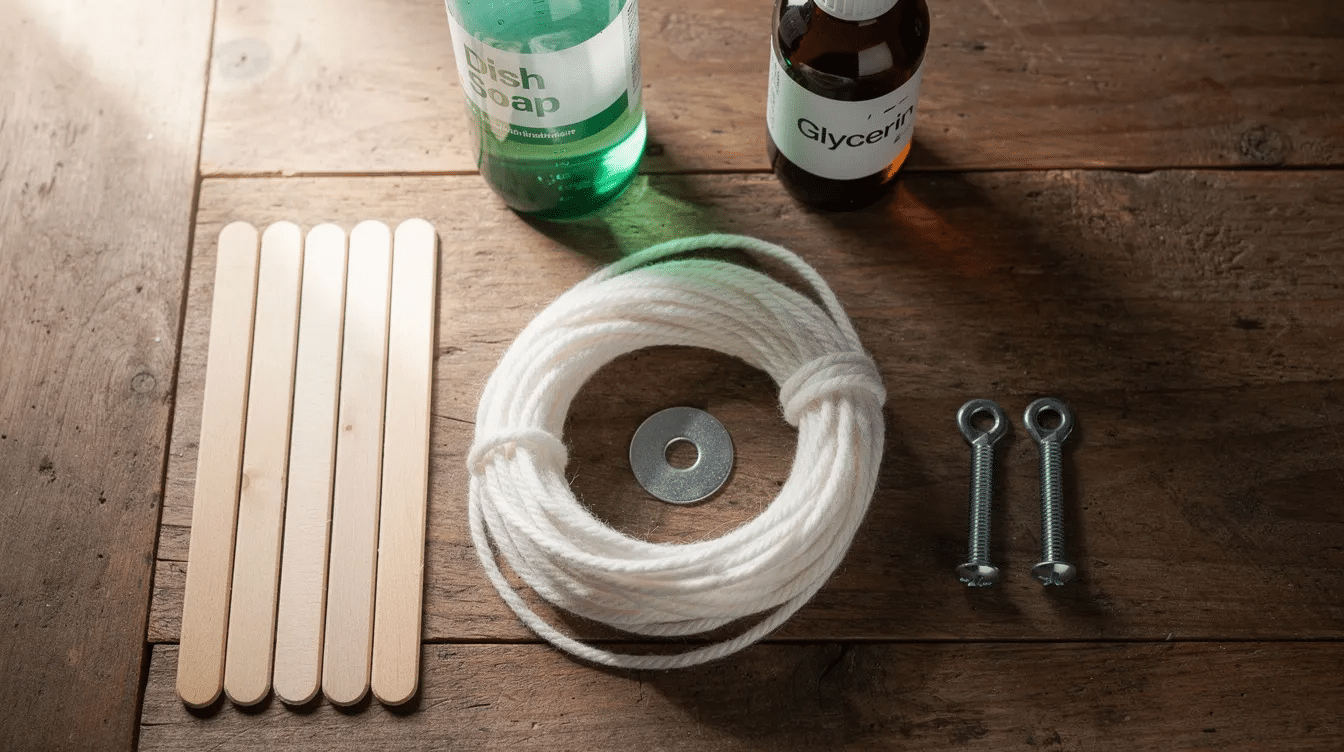
- Two wooden sticks or garden canes, each about 45 to 60 cm long (roughly 18 to 24 inches). Bamboo stakes, dowels, or even sturdy sticks from the garden all work.
- Cotton cord or braided cotton rope, about 5 mm thick. Cut one piece of cord 2 meters long and another 1 meter long. Cotton or wool string absorbs liquid better than synthetic rope, which tends to be too slick to hold the bubble mix.
- Two metal eyelet screws (one per stick).
- One metal washer per wand.
For the bubble solution:
- Cool tap water. Using distilled water improves bubble solution quality because minerals in hard tap water can interfere with the soap film.
- Concentrated dish soap (Dawn Original or a similar clear formula).
- Vegetable glycerin or corn syrup.
- A wide, shallow container or baking dish for dipping; a standard roasting pan works well.
Optional extras: acrylic paint or washi tape to decorate the sticks, a funnel for pouring, and a lidded box to save leftover solution.
The eyelet screw threads into the top of each stick and creates a small metal loop. You thread the cord through these loops. The washer sits on the longer cord and hangs at the bottom point of the triangle shape, pulling it downward so the loop opens smoothly in the air. Using a large, flexible loop like this enhances bubble size and stability.
How to Make a Classic Tri-String Giant Bubble Wand
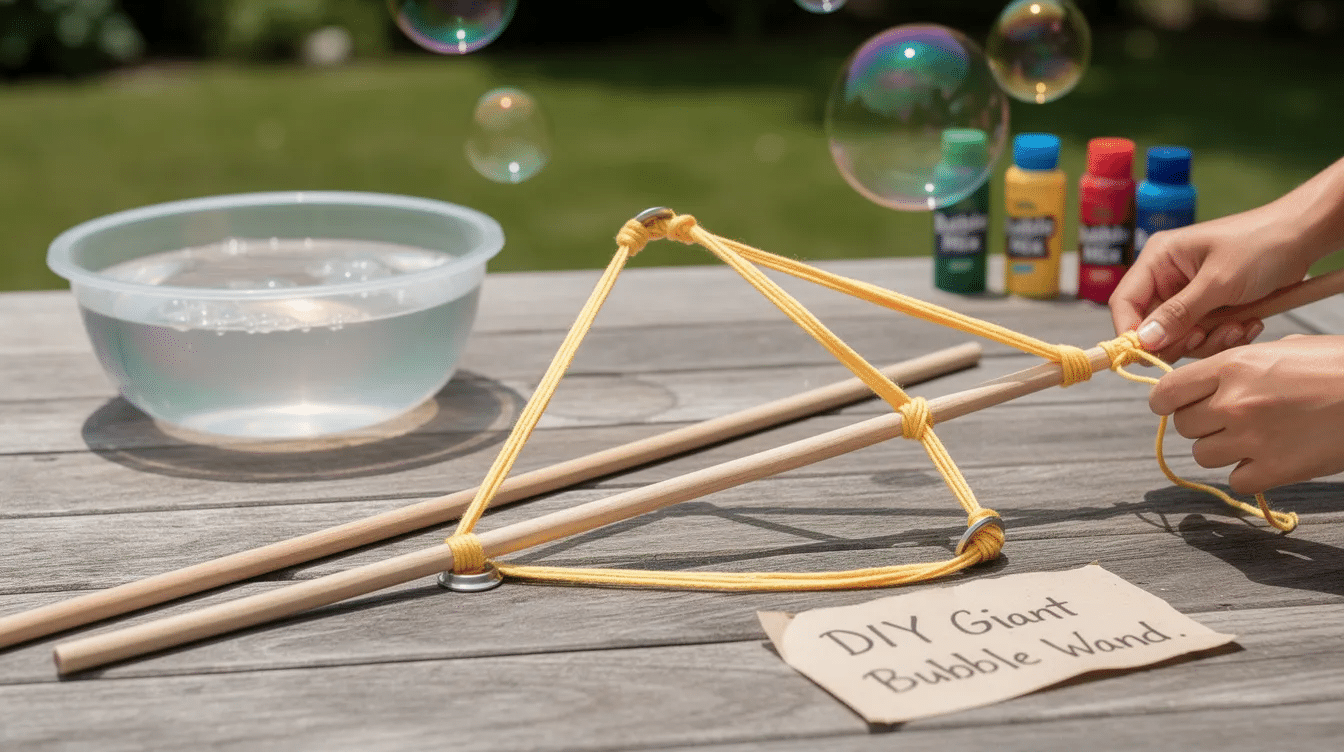
This is the main design. A classic design for a bubble wand is two sticks with three strings, forming a triangle that, when opened, produces curtain-like giant bubbles and long tubes of bubbles that can stretch over 3 meters in good conditions.
- Screw one eyelet screw into the top of each stick. Twist it in by hand or use pliers for the last few turns. The screw should sit firmly; if the wood splits, pre-drill a small pilot hole.
- Take the longer cord (2 meters). Thread one end through the eyelet on one stick. Slide the washer onto the cord so it will hang at the middle. Then thread the other end through the eyelet on the second stick. Tie a washer to the longer cord for weight; this weighted bottom string helps maintain the shape of the bubble wand by keeping the loop taut.
- Take the shorter cord (1 meter). Tie one end to the eyelet on one stick and the other end to the eyelet on the second stick. This shorter top string, combined with the longer bottom string, forms the triangle shape.
- Check that the washer hangs at the lowest point and that neither cord is twisted. A twisted loop traps air unevenly and bubbles pop before they form.
- Seal the cord ends. Lightly knot them, then wrap a small strip of tape around each knot. Using natural yarn or cord is essential for bubble wands because it holds moisture evenly; fraying tips disrupt the film. An adult can also pass synthetic cord tips through a flame briefly to melt-seal them.
Creating giant bubbles requires a good wand and a strong bubble film. Once this wand is assembled, it is ready to produce great bubbles for dozens of sessions before the cord needs replacing.
Easy Toddler-Friendly Giant Bubble Wand (Coat Hanger Version)
Younger children aged 3 to 5 often have a hard time managing two sticks at once. This simpler version uses a single wire coat hanger and takes about 10 minutes to build. If you have tried our straw bubble wand tutorial, this is a similar idea scaled up.
- Pull a metal coat hanger into a circle (or a heart shape if your little sister wants something fancy). The opening should be small enough to dip into your bubble solution container.
- Bend the hook so it sits in line with the circle, then tape it firmly to a short wooden stick or wooden spoon handle. This gives younger kids a safe, easy grip.
- Wrap all sharp ends and joins with several layers of duct tape. The tape also helps the bubble solution coat the wire evenly by giving it a slightly rough, absorbent surface.
- Dip, lift, and wave gently. This version makes a big bubble (roughly 20 to 30 cm across) rather than the enormous curtains the tri-string produces, but it is still awesome for small hands.
Step-By-Step Giant Bubble Solution Recipe
A basic bubble juice recipe includes water and dish soap, but adding glycerin transforms it into a giant bubble solution that holds together long enough to float across the garden. Here is the recipe we use:
Ingredient | Amount |
|---|---|
Cool water | 6 cups (about 1.4 liters) |
Concentrated dish soap | ½ cup |
Vegetable glycerin | 3 tablespoons |
Mixing steps:
- Pour the water into a large bowl or tub first.
- Add the dish soap slowly. Stir with a spoon; do not whisk or shake. Avoid creating foam when mixing bubble solution, because suds sitting on the surface block the film from forming evenly.
- Stir in the glycerin. Glycerin helps make stronger bubble solutions by slowing evaporation and adding viscosity to the film. Stronger bubble solutions create more elastic and stable bubbles.
- Let the giant bubble mix sit for at least 1 to 2 hours. Bubble solutions work better after sitting for 24 hours because surfactant molecules distribute fully and trapped air rises out. If you are making a big batch the day before a party, cover and store it overnight.
Frugal tweak: Store-brand dish soap and supermarket glycerin produce good results. A single batch of homemade bubble mix costs under $2 and lasts several play sessions; that is far cheaper than buying small bottles repeatedly. For parents wanting to experiment, researchers at University Paris-Saclay found that adding a tiny amount of polymer (like guar gum, about 1 gram per liter) alongside glycerin extended bubble life in lab conditions to up to one hour.
Storage: Label the container with the date (for example, “Giant Bubble Mix, 12 August 2026”) and keep it covered. A lidded container stored out of the sun keeps the solution usable for 3 to 5 days.
Personal lubricant (such as J-Lube or Surgilube) can be used in bubble solution recipes as a polymer additive; some enthusiast communities report bubble tubes stretching over 6 meters with these additions.
How to Use Your Giant Bubble Wand (Play Instructions)
Proper technique for launching includes dipping, lifting, and pulling apart slowly. Here is the sequence:
- Hold the two sticks together so the cords hang down in a bundle. Lower the strings fully into the bubble solution. Use a shallow container for easy dipping of the bubble wand; a roasting pan or under-bed storage box works.
- Count to five while the cords soak. Absorbent materials are essential for holding bubble solution, and cotton needs a few seconds to saturate.
- Lift the wand out slowly, then pull the sticks apart to open the triangle. Walk backwards or let a light breeze do the work. Slow, smooth motions when launching bubbles help prevent popping. Blowing hard almost always tears the film.
- To release, bring the sticks together or give a gentle twist. The bubble will pinch off and float away.
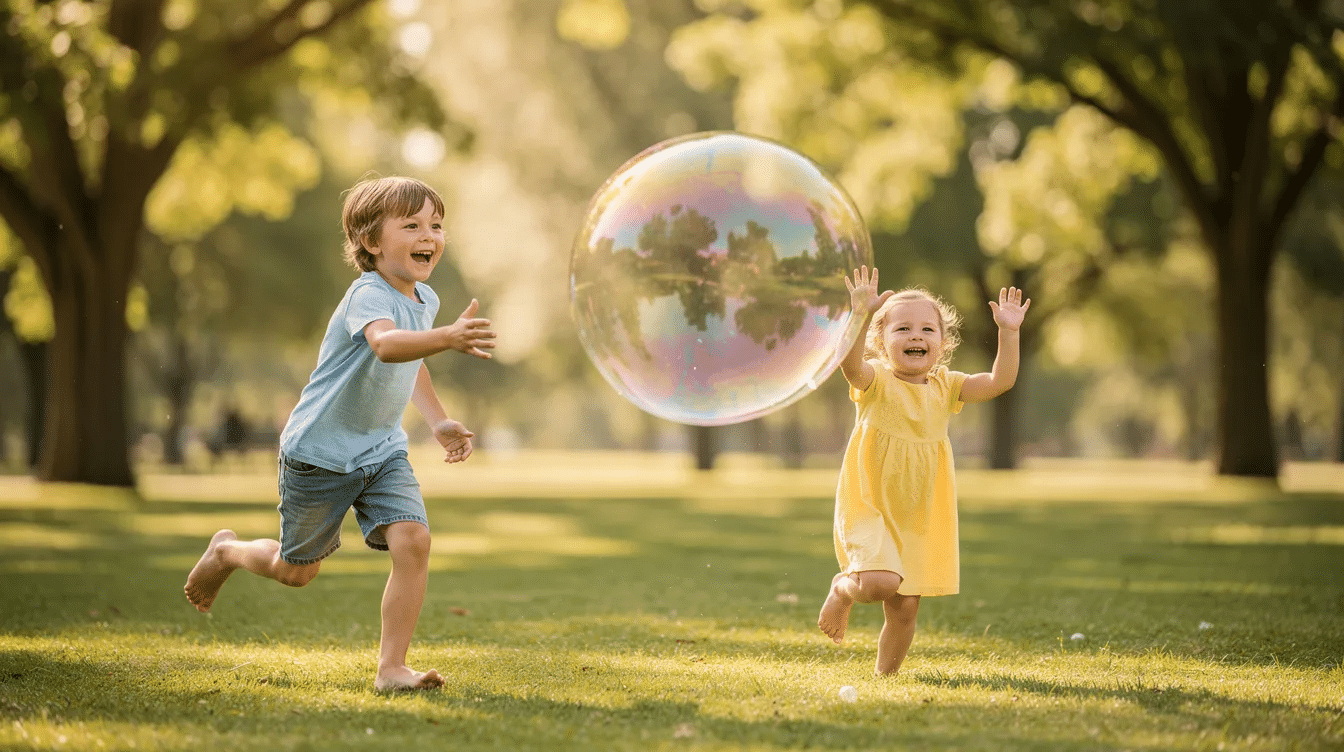
Age guidance: Adults or older siblings can handle the dip and spread. Younger kids get the fun part: chasing, counting, and trying to pop each bubble before it lands. Two children can each hold one stick of the same wand and walk together to create one enormous bubble.
Keep play on grass. Patios and decking get slippery from drips. Have an old towel and a bucket of clean water nearby for rinsing soapy hands and faces.
Tips, Tricks & Troubleshooting for Giant Bubbles
Expect a learning curve. It often takes a little practice (about 10 to 15 minutes) before kids regularly produce complete bubbles.
- If bubbles keep popping on launch, add a splash more dish soap and another tablespoon of glycerin to your mix. UW Extension’s “Better Bubbles” project tested two ratios and found that the higher-glycerin formula produced longer-lasting, more elastic films.
- Humidity is beneficial for larger bubbles as it slows evaporation. Play on a cool morning or a slightly humid evening rather than at noon on a dry day. Bubbles tend to pop faster in dry and windy conditions.
- If the mix develops foam on top, skim it off with a spoon before dipping.
- If your string feels too stiff, soak it in plain water for 10 minutes before the first dip. If it is too floppy, use a slightly thicker cotton cord (6 mm instead of 4 mm).
- A cool variation for days when single bubbles are hard to release: walk slowly and trail the open wand behind you to make a long tunnel of connected bubbles. Kids find this just as fun.
- Turn it into a counting game: how many giant bubbles can you produce in a row? Talk about why bubbles always form a sphere, regardless of the hole shape of the wand.
Outdoor Learning & Gross Motor Play with Giant Bubbles
Lifting and spreading the wand wide strengthens shoulders, arms, and core; it is genuine gross motor play disguised as a game. For ages 3 to 7, this kind of full-body movement supports coordination milestones.
- Cooperative play: Two children each hold one stick and slide their feet sideways together to open the wand. This requires communication, timing, and shared control.
- Prediction games: Ask children which way a bubble will float. Will it head over the fence or drift toward the shed? Chase bubbles and talk about air and wind.
- Bubble station at parties: Set up several wands and a large tub of solution as a group activity. One batch of solution can serve 6 to 8 children rotating through the station.
- Science chat: Bubbles are always round (spherical) because a sphere has the smallest surface area for a given volume of air. Even when giant bubble wands form a triangle, the bubble itself curves into a sphere the moment it detaches. That is a concept preschoolers can observe without a textbook.
Safety, Mess Management & Clean-Up
Bubble play is generally mild, but a few precautions keep it comfortable for everyone.
- Supervise younger children (under 5) closely. The bubble solution contains dish soap; if a child gets it in their eyes, rinse with plenty of clean water and move them away from the play area. If irritation lasts more than a few minutes, contact a health professional.
- Dress kids in old clothes or aprons. Shoes with good grip matter if anyone steps onto a soapy patio.
- If a toddler tastes the bubble mix (it happens), rinse their mouth with water. Standard dish-soap solutions are low-toxicity but unpleasant; keep the bucket out of reach of babies.
- After play, hose down hard surfaces. Pour used solution onto grass rather than down indoor drains; the diluted soap breaks down on soil without issue.
- Hang the wands over a fence or clothesline to dry in the sun. The cord lasts longer when it dries fully between sessions. Store your remaining solution in a covered container for next time.
Sign up for our weekly newsletter to get more hands-on, frugal activity ideas delivered to your inbox every week. Save this recipe, grab your sticks, and head outside.
FAQ: DIY Giant Bubble Wands & Solution
Can I make giant bubbles without glycerin?
Yes. A basic mix of water and dish soap will form bubbles, but the film is thinner and evaporates faster; expect bubbles to last only a few seconds before they pop. Adding glycerin (or corn syrup as a substitute) thickens the film and slows evaporation, giving you the extra seconds needed for a bubble to close and float away.
How long does homemade giant bubble solution keep?
Stored in a lidded container out of direct sunlight, most recipes stay usable for 3 to 5 days. Give it a gentle stir before each use. If the mix smells off or looks separated after a week, make a fresh big batch.
What type of string is best for giant bubble wands?
Cotton cord or braided cotton rope around 5 mm thick is the go-to. It soaks up solution evenly, holds enough liquid to form a film, and tangles less than thin yarn. Avoid fishing line or nylon; synthetic materials are too slick to hold the bubble mix.
Will any dish soap work in a giant bubble mix?
Most concentrated formulas work. Clear or blue varieties (like Dawn Ultra) tend to create stretchier films than “eco” or moisturizing versions, because those eco formulas often contain fewer surfactants per milliliter. If your first attempt is disappointing, switch brands before adjusting the recipe.
Can I use these bubble wands indoors?
Indoor use is not recommended. Giant bubbles drip soapy water constantly, making floors slippery within minutes. Garages with concrete floors, covered patios, driveways, and gardens are all safer choices. If rain forces you inside, try our no-mess activities for 2 year olds instead.


