
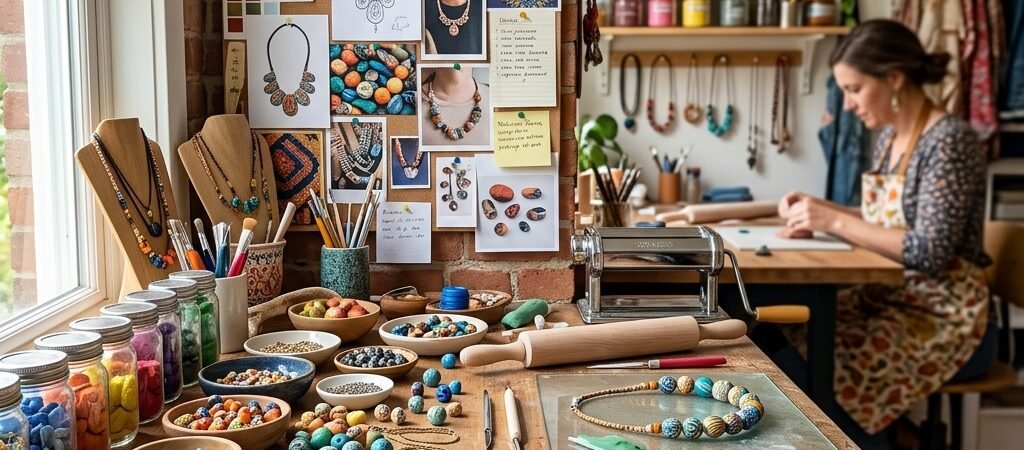

TL;DR: Making a clay necklace is more accessible than it looks. With polymer or air-dry clay, basic tools, and a little patience, beginners can create beautiful, wearable jewelry at home. This guide walks through everything—from shaping your first bead to selling your pieces online.
I’ll be honest with you. The first clay necklace I ever made looked like a string of deformed olives. Not exactly the boho-chic aesthetic I was going for. But here’s the thing—I kept going, and now my kitchen table is permanently dusted with clay and I have absolutely zero regrets.
If you’ve ever picked up a handmade clay necklace at a market stall and thought, “I could probably make that,” you’re right. You absolutely could. Clay jewelry is one of those crafts that’s wonderfully forgiving for beginners, endlessly exciting for experienced makers, and deeply satisfying no matter where you land on the skill spectrum.
This guide covers everything—from the history of clay jewelry (fascinating, genuinely!) to selling your creations online. Whether you’re picking up clay for the first time or looking to level up your technique, grab a snack and settle in. We’ve got a lot of ground to cover.
- A Brief (and Surprisingly Interesting) History of Clay Jewelry
- What Materials and Tools Do You Actually Need?
- Step-by-Step Tutorial: Making Your First Clay Necklace
- Advanced Techniques Worth Exploring
- Design Inspiration: Where to Find Your Creative Direction
- Troubleshooting: When Things Go Wrong (And They Will)
- How to Care for Your Clay Necklace
- The Business of Clay Jewelry: Turning a Hobby Into Income
- Start Creating—Your First Clay Necklace Is Closer Than You Think
- Frequently Asked Questions
A Brief (and Surprisingly Interesting) History of Clay Jewelry
Clay jewelry isn’t a new trend. Humans have been fashioning beads and pendants from clay for thousands of years—ancient Egyptian faience beads, Native American pottery pendants, and African clay ornaments all speak to a deep, cross-cultural love of wearable clay art.
What’s changed is accessibility. Today, polymer clay brands like Sculpey and Fimo have made it possible for anyone to create professional-quality jewelry at home, without a kiln, without years of training, and without spending a fortune. The contemporary clay jewelry movement exploded on social media around 2020, and it hasn’t slowed down since. Pastel earrings, abstract pendants, and hand-rolled bead necklaces have become a staple of independent jewelry brands worldwide.
The beauty of clay jewelry lies in its versatility. Every piece is unique, every color combination is a creative decision, and every necklace tells a story about the person who made it. That’s a pretty compelling reason to start.
What Materials and Tools Do You Actually Need?
Before you dive in, let’s talk supplies. The good news? You don’t need much to get started.
Choosing the Right Clay
Polymer clay is the most popular choice for jewelry making, and for good reason. It’s pliable, holds fine detail beautifully, and hardens in a standard home oven at low temperatures (usually around 275°F / 130°C). Sculpey III, Premo, and Fimo Professional are all solid options. Premo is particularly loved by jewelry makers for its durability after baking.
Air-dry clay is another option—no oven required, which sounds appealing. The trade-off is that air-dry clay tends to be more brittle than polymer clay, making it less ideal for delicate necklace pieces that need to withstand daily wear.
For beginners, polymer clay is the clear winner.
Essential Tools
- A smooth work surface: A ceramic tile or glass cutting board works perfectly.
- A clay roller or acrylic rod: For conditioning and flattening clay evenly.
- Clay cutters and blades: Basic shapes to start; you can get fancy later.
- Texture sheets or stamps: For adding surface interest.
- A toothpick or skewer: The most underrated jewelry tool in existence—perfect for poking bead holes.
- Sandpaper (400–800 grit): For smoothing and finishing.
- A bead baking rack: Prevents flat spots during baking.
A quick safety note: Polymer clay is non-toxic when used correctly, but you should always bake it in a well-ventilated area and avoid using the same tools for food afterward. Keep a separate set of utensils dedicated to your clay work.
Step-by-Step Tutorial: Making Your First Clay Necklace
Step 1: Conditioning Your Clay
Fresh out of the packet, polymer clay can feel stiff and crumbly. Conditioning—simply working it in your hands until it’s soft and pliable—is a non-negotiable first step. Roll it, fold it, twist it. After a few minutes of kneading, it should feel smooth and cooperative.
Pro tip: warm hands help. If your clay is being particularly stubborn, try sitting on it for a minute. Yes, really. Body heat works.
Step 2: Shaping Basic Beads and Pendants
Roll small pieces of clay between your palms to create round beads. For oval beads, apply a little extra pressure at each end. For a flat pendant, roll out a sheet of clay to an even thickness (about 3–4mm works well for pendants) and use a cutter or freehand a shape with a blade.
For bead holes, push a toothpick or skewer straight through the center of each bead before baking. This is much easier to do when the clay is still raw—trying to drill holes after baking is a headache nobody needs.
Step 3: Texturing and Embellishing
This is where things get fun. Press texture sheets, lace fabric, leaves, or the back of a fork into the surface of your clay for instant pattern. You can also:
- Blend colors: Twist two colors together and roll them smooth for a marble effect.
- Add inclusions: Glitter, mica powder, or dried flowers can be pressed into the surface.
- Layer shapes: Cut smaller shapes and layer them onto your pendant before baking for a dimensional look.
Step 4: Baking and Finishing
Follow the temperature instructions on your specific clay brand—overbaking causes discoloration and underbaking leaves brittle, bendy pieces. Most polymer clay bakes at 230–275°F (110–130°C) for 15–30 minutes, depending on thickness.
Once cooled, sand your pieces progressively through finer grits of sandpaper (starting at 400 and working up to 800 or higher) for a smooth finish. Finish with a thin coat of liquid polymer clay or a dedicated clay varnish to add durability and a subtle sheen.
Thread your finished beads or pendants onto cord, chain, or wire, add a clasp, and—voilà. You made a necklace.
Advanced Techniques Worth Exploring
Once you’ve mastered the basics, the rabbit hole gets delightfully deep.
Mokume Gane
This Japanese metalworking technique translates beautifully into polymer clay. Stack multiple thin sheets of contrasting colors, use tools to create indentations from below, then slice thin layers from the top to reveal a stunning wood-grain pattern. It looks incredibly complex and is—once you’ve practiced a few times—completely achievable at home.
Millefiori Caning
The millefiori technique involves building a “cane”—a log of clay with a pattern running through it—and slicing thin rounds to reveal the design. Flower patterns and geometric designs are popular starting points. The technique requires patience (and a sharp blade), but the results are genuinely jaw-dropping.
Mixed Media and Resin
Combining clay with resin opens up a whole new dimension. Press dried flowers, gold leaf, or glitter into a clay pendant, seal with UV resin, and cure under a UV lamp for a glossy, professional finish. Mixed media clay pieces have a high perceived value, which also makes them great for selling.
Design Inspiration: Where to Find Your Creative Direction
Stuck on what to make? Here are a few starting points:
- Nature themes: Leaves, moons, mushrooms, and abstract organic shapes are perennial favorites.
- Color palette curation: Try working within a limited palette—three complementary colors max. Terracotta, cream, and sage is a combination that basically sells itself.
- Cultural influences: Look into traditional motifs from different cultures for meaningful, story-rich designs. Just be mindful of cultural sensitivity when borrowing from traditions that aren’t your own.
- Abstract and minimalist: Sometimes a simple, imperfectly round disk in a beautiful color is all you need.
Troubleshooting: When Things Go Wrong (And They Will)
Cracking: Usually caused by air-dry clay drying too quickly, or polymer clay that wasn’t conditioned enough. Work more slowly and keep unused clay covered.
Bubbles on the surface: Trapped air from conditioning. Fold and roll your clay gently rather than aggressively kneading it.
Uneven baking: Thin areas cook faster than thick areas. Aim for consistent thickness across each piece, or tent your pieces with aluminum foil during baking.
Breakage after baking: This usually means the clay was underbaked. Try baking at a slightly lower temperature for longer—this often produces stronger results than a short high-heat bake.
How to Care for Your Clay Necklace
Clay jewelry is durable, but it appreciates a little TLC.
- Cleaning: Wipe with a soft, damp cloth. Avoid harsh chemicals or submerging in water.
- Storage: Store flat or hanging to avoid warping. Keep away from direct sunlight, which can cause some colors to fade over time.
- Repairs: Small chips or cracks can often be fixed with a tiny amount of liquid polymer clay, rebaked gently to cure.
The Business of Clay Jewelry: Turning a Hobby Into Income
If your friends start asking “can I buy one of those?”, you might be sitting on something worth pursuing.
Where to sell: Etsy remains the most popular platform for handmade jewelry, with a built-in audience actively searching for unique, artisan pieces. Instagram and TikTok are powerful tools for building an audience organically—short process videos perform particularly well.
Pricing: A common mistake new sellers make is underpricing. Calculate your material costs, add an hourly rate for your time, then factor in platform fees and packaging. Your work has value—price it accordingly.
Marketing: Lifestyle photography makes an enormous difference. Natural light, clean backgrounds, and photos of your pieces being worn (rather than laid flat) consistently outperform product-only shots.
Legal basics: If you’re selling, look into whether you need to register as a small business in your area and keep records of your material costs for tax purposes.
Start Creating—Your First Clay Necklace Is Closer Than You Think
The deformed olive necklace I mentioned at the start? It lives in a small dish on my dresser. I can’t bring myself to throw it away, because it reminds me that everyone starts somewhere.
Clay jewelry is one of those crafts where improvement happens fast—sometimes within a single afternoon session. The learning curve is real, but so is the reward. There’s something genuinely special about wearing something you made with your own hands.
So grab some clay, clear off a corner of your kitchen table, and make something. It doesn’t have to be perfect. It just has to be yours.
Frequently Asked Questions
What type of clay is best for making necklaces?
Polymer clay—particularly brands like Premo or Fimo Professional—is the best choice for clay necklaces. Polymer clay is durable, holds fine detail, and hardens in a home oven without a kiln. Air-dry clay is a lower-commitment alternative but tends to be more brittle, making it less suitable for jewelry worn daily.
How do you keep clay necklaces from breaking?
The most common cause of breakage is underbaking. Ensure you follow the manufacturer’s temperature guidelines and bake for the full recommended time. Using a stronger clay like Premo (rather than beginner-grade clay) also significantly improves durability. Finishing with a clay-compatible varnish adds an extra layer of protection.
Can you make clay necklaces without an oven?
Yes—air-dry clay hardens at room temperature without any heat source. However, air-dry clay is more prone to cracking and breakage than polymer clay. For jewelry that’s meant to last, polymer clay baked in a standard home oven produces far stronger results.
How long does it take to make a clay necklace?
A simple bead or pendant necklace can take as little as one to two hours from start to finish, including baking and cooling time. More complex techniques like Mokume Gane or millefiori caning can take several hours or multiple sessions, depending on complexity.
Is selling clay jewelry on Etsy profitable?
Selling clay jewelry on Etsy can be profitable, particularly for makers with a distinctive aesthetic and strong product photography. Success depends on realistic pricing (factoring in materials, time, and platform fees), consistent posting, and active use of social media to drive traffic to your shop. Many clay jewelry sellers report Etsy as their primary income source after one to two years of consistent effort.
What tools do I need to start making clay jewelry?
To get started, you need polymer clay, a smooth work surface (like a ceramic tile), a clay roller or acrylic rod, basic cutters or a blade, a toothpick for bead holes, and an oven. Sandpaper and a clay varnish are useful for finishing. Most of these items are inexpensive and widely available online or at craft stores.


