

Salt dough is one of those crafts that never gets old. Three ingredients, one bowl, and an afternoon of creative play with your little ones. Here at Little Button Diaries, we’ve been making salt dough with preschoolers for years, and this guide covers everything you need: the recipe, drying methods, Christmas decorations, rainy day projects, troubleshooting, and storage.
Key Takeaways
- Salt dough requires three ingredients: flour, salt, and water. The standard salt dough recipe uses a 2:1:1 ratio by volume (2 cups flour, 1 cup salt, up to 1 cup water).
- Baking salt dough typically requires an oven temperature of 200 to 250°F. Flat ornaments (0.5 cm thick) take about 90 minutes to 2 hours. You can also air dry salt dough for at least 48 hours if you prefer not to use the oven.
- This easy salt dough recipe works for christmas ornaments, handprint keepsakes, beads, pretend food, and dozens of other salt dough ideas for kids aged 2 and up.
- Salt dough is non-toxic to humans but toxic to pets. Dogs and cats can develop salt poisoning from ingesting even small amounts, so keep all dough and finished pieces out of their reach.
- Once pieces are completely dry and sealed with mod podge or spray sealer, salt dough ornaments can last for years when stored properly in a dry cupboard.
What Is Salt Dough & Why We Love It for Kids’ Crafts
Salt dough is a homemade modelling “clay” made from plain flour and salt mixed with water. Unlike air dry clay, which you buy pre-made, salt dough costs pennies to mix from value-range supermarket ingredients most families already have in the cupboard.
We love it at Little Button Diaries because it ticks so many boxes at once. Salt dough crafts help develop fine motor skills in children through rolling, cutting, and shaping. Measuring cups of flour and salt doubles as early maths practice. And the sensory experience of kneading, squishing, and pressing shapes into the dough keeps even the wriggliest toddlers focused.
Concrete projects we come back to again and again: christmas tree decorations, handprint keepsakes, name plaques, homemade beads, pretend biscuits for play kitchens, and story-play characters. Once dry and sealed properly, salt dough christmas decorations survive years of careful unpacking each December. If you enjoy homemade playdough, salt dough is the next step; same simplicity, but you get a permanent keepsake at the end.
This guide focuses on family-friendly, low-stress crafting rather than professional sculpting. If a three-year-old can help make it, it belongs here.
Easy Salt Dough Recipe (Standard Oven Version)
Start here if you’re new to making salt dough. This great recipe produces a smooth, workable dough that holds cookie cutter shapes and dries rock hard in the oven.
Ingredients:
Ingredient | Volume | Weight (approx.) |
|---|---|---|
Plain flour (not self rising flour) | 2 cups | 260 g |
Fine regular table salt | 1 cup | 300 g |
Lukewarm water | ¾ to 1 cup | 180–240 ml |
Cooking oil (optional) | 1–2 tsp | – |
You can also scale down to mix 1 cup of flour with 1/2 cup of salt and water for a smaller batch.
Method:
Combine the flour and salt in a large mixing bowl and stir with a wooden spoon. Add warm water gradually, starting with ¾ cup. Stir until the mixture forms a shaggy ball. If the dough feels too wet or sticky, add more flour, one tablespoon at a time. If it’s crumbly, add water by the teaspoon until you reach the proper texture. A teaspoon or two of cooking oil makes the dough slightly smoother and easier for small hands to work.
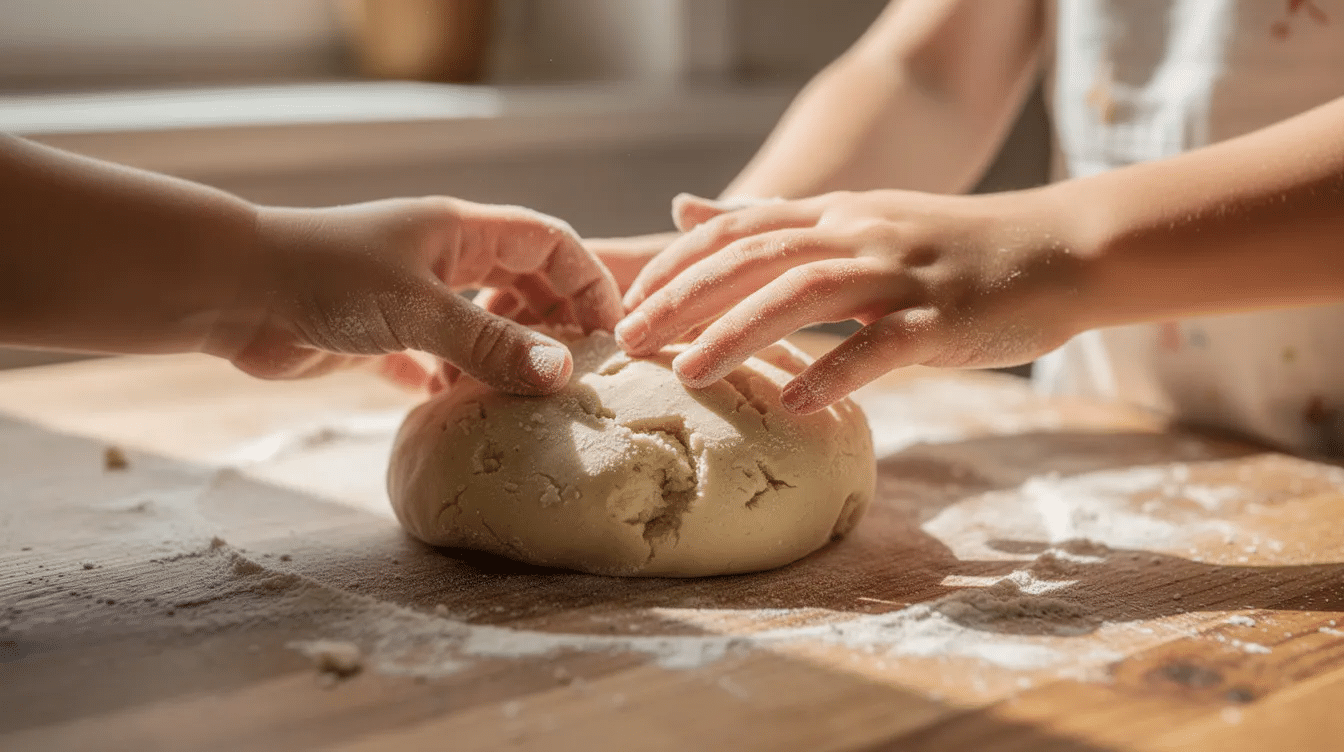
Turn the dough out onto a lightly floured surface and knead for 7 to 10 minutes until smooth and pliable, like firm playdough. Salt dough is not edible despite being made from common kitchen ingredients, so remind children not to taste it.
For oven drying, preheat to 100–120°C (210–250°F). Line a baking sheet with parchment paper. Roll your dough to 0.5–1 cm thick (about ¼ inch). Shape the dough and maintain a thickness of no more than 0.5 inches for even drying. Cut shapes, poke hanging holes with a straw, and place on the tray.
Step-by-Step: How to Make Salt Dough with Kids
This process is built for preschoolers to help at every stage, with adults handling knives, skewers, and the oven.
Set up: Lay an oilcloth or wipe-clean tablecloth over your work surface. Give each child an apron, a small bowl, a child-safe rolling pin, and a selection of cookie cutter shapes. Having a large bowl of extra flour nearby keeps things moving when surfaces get sticky.
Mixing and kneading: Let children pour the pre-measured ingredients into the bowl, stir the dry mix, and add water. Adults can finish the knead if little arms get tired before the full 7–10 minutes.
Rolling and cutting: Roll the dough between two sheets of parchment paper. This avoids using extra flour on the surface, which can make dry salt dough crumbly. Give each child their own small ball of dough to roll and cut. This prevents arguments and lets everyone work at their own pace.
Shaping: Press cookie cutter shapes firmly, poke a hole for hanging with a straw, and transfer two pieces or more at a time onto the lined baking sheet. For sensory art activities, try pressing textured fabric or shells into the surface.
Clean-up tips: Keep a damp cloth ready. Brush loose flour into the bin. Wrap leftover dough tightly in plastic wrap, place it in an airtight container, and store in the fridge for up to 2–3 days.
Drying Salt Dough: Oven, Air Dry & Microwave
Three ways to dry salt dough, each suited to different schedules and weather.
Oven drying (most reliable)
Set your oven temperature to 200–250°F (95–120°C). Bake salt dough at 250°F for 30 minutes per ¼ inch thickness. For typical 0.5 cm flat shapes, that means 90 minutes to 2 hours total. Turn salt dough pieces frequently while baking for even drying; flipping halfway through is the minimum. Salt dough should be baked until it turns light golden brown and feels hard when tapped. Oxford Owl’s craft guide recommends leaving pieces in the cooling oven overnight for extra-thorough drying. Allow salt dough creations to cool completely before handling.
Air drying (energy-free, slower)
Place shaped dough on a wire rack or parchment paper in a warm, dry room. Allow salt dough pieces to air dry for at least 48 hours. Thin items (0.5 cm) may dry in 2–3 days; thicker pieces can take up to 7 days. Turn daily so both sides dry evenly. Air dry salt dough works best during summer or in rooms with low humidity. If you have a hot July heatwave, set them on a sunny windowsill and let the weather do the work.
Microwave drying (fastest, least predictable)
Salt dough crafts can be made in 3-4 minutes using a microwave, but results vary. Place pieces on parchment paper on a microwave-safe plate. Use medium power in 10–20 second bursts, checking and turning between each burst. Edges can burn while centres stay wet, so keep shapes thin and uniform. Reserve this method for last-minute christmas ornaments when the oven isn’t an option.
Whichever method you choose, pieces must be completely dry (hard and cool all the way through) before painting or sealing. Hidden moisture causes mould weeks later.

Salt Dough Ornaments & Christmas Decorations
Salt dough is versatile for various creative projects such as ornaments and keepsakes, and December is when it really shines.
Classic shapes: Use a cookie cutter to stamp out stars, christmas tree silhouettes, hearts, and gingerbread figures. Poke a hole at the top with a drinking straw before baking; threading ribbon through after painting is much easier than drilling into baked dough.
Handprint and footprint keepsakes: Press a child’s hand or foot gently into a rolled circle of dough about 1 cm thick. Scratch the year (2026, for instance) into the corner with a skewer. These make “Baby’s First Christmas” gifts that grandparents keep for decades.
Personalisation: Stamp names with alphabet stamps, press lace into the surface for a textured border, or add a tiny rolled clay nose to a snowman form. Pressing items like leaves into the dough creates organic patterns for crafts; real leaves from the garden leave beautiful vein impressions.
Design tips to avoid breakage: Keep shapes chunky. Round off pointed corners. Thin reindeer antlers and narrow star points snap easily, so save those designs for older kids who can handle thicker, sturdier versions.
Display ideas: Hang salt dough ornaments on the christmas tree, tie them to wrapped gifts as tags, string them into a garland over the mantelpiece, or attach them to DIY teacher gifts. How many ornaments you get depends on the cutter size, but a single batch of this recipe typically yields 12–20 medium shapes.
Everyday Salt Dough Ideas for Rainy Days
Salt dough is not just for Christmas. It’s a rainy day lifesaver any month of the year.
Project ideas:
- Pretend bakery biscuits and play pizzas for toy kitchens
- Story stones with simple face impressions
- Nature prints using pine cones, shells, or bark
- Simple beads (you can make 35-40 beads from one batch of salt dough; roll small balls, poke a hole through each with a skewer, and thread onto string after drying)
- Dinosaur fossils pressed with plastic toy dinosaurs
- Number and letter tiles for preschool learning
For craft activities linked to picture books, try making animal shapes to retell a favourite story, or weather symbols to talk about seasons. Not every project has to be baked and kept. Kids can play with the dough like homemade playdough and you can bin it when they’re done.
Salt dough is a solid screen-free activity for siblings of different ages. Older kids can design detailed characters while younger ones enjoy squishing, poking, and rolling out shapes. It fills a fun afternoon whether it’s a wet Wednesday in March or a slow Sunday in August.
Painting, Decorating & Sealing Salt Dough
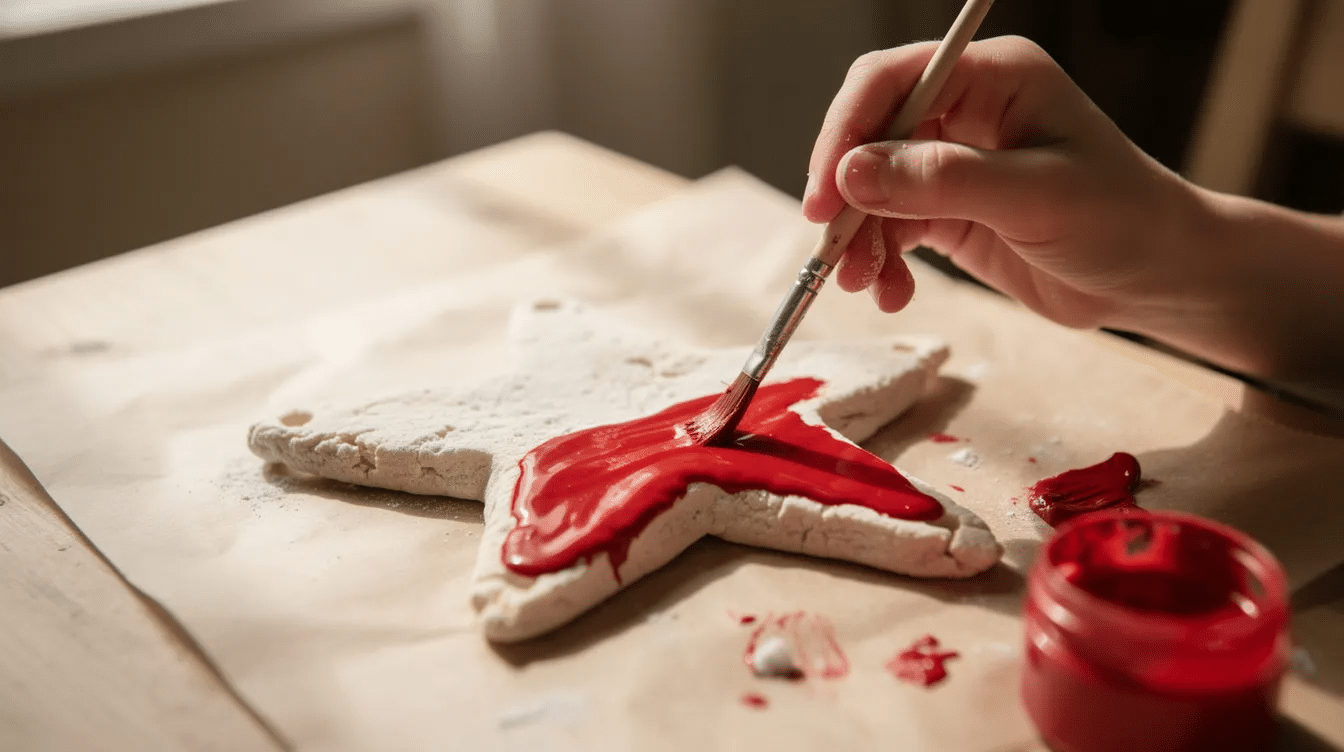
Decorating is the part children look forward to most. Make sure pieces are fully dry and cool before setting out the paint.
Paint options: Salt dough ornaments can be painted with acrylic or washable tempera paint. Washable poster or tempera paints work best for toddlers and preschoolers because they rinse out of clothes. Acrylic paints give brighter, longer-lasting colour for making ornaments that will hang on the tree year after year. Two coats of paint, with drying time between, give the most solid coverage.
Decorating ideas: Solid background colours, polka dots with a cotton bud, stripes with a thin brush, metallic accents, glitter glue details, and felt-tip outlines once the paint layer is fully dry. Pour paint into old yoghurt pots or egg carton cups to keep mess contained.
Sealing: Seal dried salt dough with mod podge or spray sealer to protect against moisture. PVA glue mixed with a little water also works. Apply at least two coats, covering front, back, and edges. Let each side dry before flipping. Proper sealing prevents moisture getting in and reduces mould risk, which matters for christmas decorations stored in lofts between seasons.
Use smocks, cover the table with newspaper, and supervise spray sealers outdoors or by an open window. If you enjoy glue-based crafts, the PVA sealing step will feel familiar.
Troubleshooting: Puffing, Cracking & Mouldy Salt Dough
Most salt dough problems come down to thickness, moisture, or oven temperature. All are fixable on the next batch.
Puffing and warping: This happens when steam trapped inside thick dough expands too fast. Common causes: using self rising flour instead of plain, oven set too hot, or dough rolled thicker than 1 cm. Solutions: always use plain flour, drop the oven temperature to 200°F, poke small vent holes in thick pieces with a toothpick, and bake longer at lower heat. If pieces puff anyway, paint them as “puffy clouds” or “rustic snowflakes” and move on.
Cracking: Dough was too dry going in, thickness was uneven, or heat was too high. Add additional water when mixing next time (a teaspoon at a time), roll to uniform thickness, and keep the oven at the lower end of the range. Sanding rough edges with fine sandpaper after baking smooths out minor cracks.
Mould on stored ornaments: The piece wasn’t fully dry inside before sealing, or storage was damp. Mouldy pieces should be discarded rather than scraped clean, because spores can persist inside the dough. To prevent mould: dry thoroughly, seal all surfaces, and store in a dry cupboard rather than a garage or loft.
Write down any changes you make to the recipe recently; noting the oven temperature, thickness, and water amount lets you repeat what worked.
Safety, Storage & Making Salt Dough Last
Pet safety: Salt dough is non-toxic for children to handle, but it is extremely dangerous for pets. The Pet Poison Helpline warns that dogs and cats can develop salt poisoning (hypernatremia) from ingesting even small amounts, with symptoms including vomiting, seizures, and potentially death. Keep all dough and finished ornaments out of reach of pets at all times.
Child safety: Supervise under-5s closely and discourage tasting. Adults should handle knives, skewers, and the oven or microwave. Label stored raw dough “NOT FOOD.”
Storing unused dough: Store salt dough in an airtight container for up to 3 days in the fridge. You can also store salt dough in a ziploc bag to prevent drying out; squeeze out the air before sealing and write the date on the bag.
Storing finished ornaments: Wrap finished salt dough ornaments in bubble wrap or acid-free tissue. Place them in a lidded box in a dry cupboard. Avoid attics and garages where humidity fluctuates.
Making pieces last for years: Dry thoroughly (pieces should feel rock hard and no longer tacky), apply two coats of sealer covering all surfaces, and avoid damp storage. Each autumn, unpack your christmas decorations and check for soft spots or discolouration before hanging. Involving children in this yearly ritual reinforces memories and teaches them to care for things they’ve made.
Little Button Diaries Tips for Stress-Free Salt Dough Sessions
After years of crafting with toddlers and preschoolers, here’s what we’ve learned:
- Mix the dough during nap time. When children wake up, the dough is ready and so is the workspace.
- Pre-roll and pre-cut a few shapes for very young children (under 3) who get frustrated waiting. Let them decorate while you help older kids cut their own.
- Give each child a tray or chopping board as their “making space.” It contains mess and stops pieces from touching.
- Keep a spare ball of dough in plastic wrap for kids who finish quickly or squash their first attempt.
- Spread the project over two days: make and bake on day one, paint and decorate on day two. Splitting it up keeps attention spans fresh.
Pair salt dough making with a simple snack or storytime while pieces cool. If you’re looking for more screen-free easy craft ideas for rainy days, browse our seasonal craft round-ups for inspiration all year.
Tried this recipe? Comment something below or tag @LittleButtonDiaries on social media. We love seeing what families create.
Salt Dough FAQ
Can I make salt dough ahead of time for a party?
Yes. Mix and knead the dough the day before, wrap it tightly in plastic wrap, and store it in the fridge in a ziploc bag. It stays workable for 2–3 days. Bring it to room temperature for about 10 minutes before rolling; cold dough can feel stiff. For a party with 8–10 children, double the standard batch (4 cups flour, 2 cups salt, up to 2 cups water).
How thin can I roll salt dough without it breaking?
About 0.5 cm (¼ inch) is the practical minimum for shapes that will survive handling and hanging. Thinner than that, and edges crack during drying. If you want flat ornaments, keep the thickness even across the whole piece.
Can I colour salt dough without painting it?
Add a few drops of food colouring or a squeeze of acrylic paints into the water before mixing. This creates a pastel or marbled tone throughout the dough. Heavy colour can slightly extend drying time, so bake for an extra 15–20 minutes and check the centre. For bold colours, painting after baking gives a stronger result.
What should I do if my ornaments still feel soft after baking?
Put them back in the oven at 200°F for another 30–60 minutes, turning halfway. If they’re still not hard, they may be too thick in the centre. Next time, roll thinner or poke vent holes with a toothpick before baking. Pieces should sound hollow when tapped on the back and feel cool and hard all the way through.
What’s the best way for a nursery to do salt dough with a whole class?
Scale the recipe to match your group. For a class of 24 children, about 10 cups of flour, 5 cups of salt, and 5 cups of water produces enough dough for each child to make 2–3 shapes. Pre-portion the dough into labelled balls before the session starts. Set out shared trays of cookie cutters, straws for hole-poking, and damp cloths for wiping hands.


