

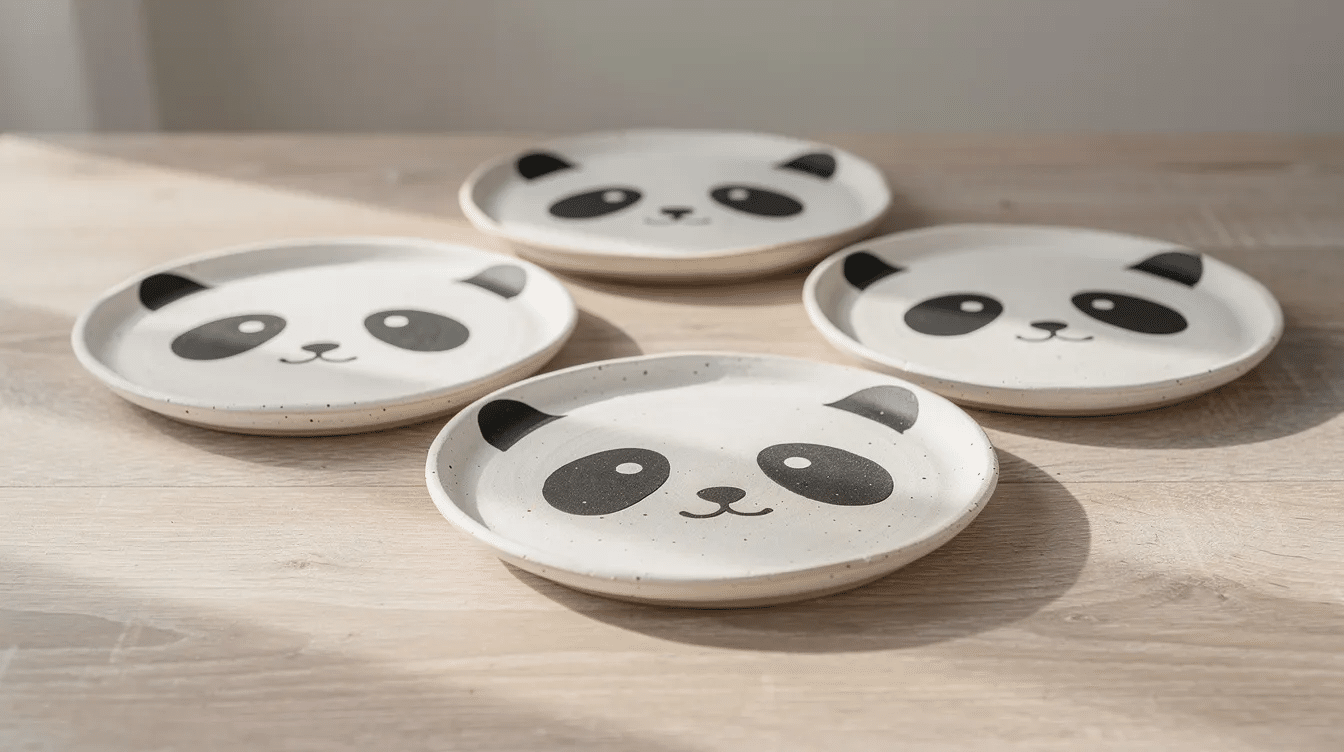
A white plate, some black and white polymer clay, and 30 minutes of crafting time are all it takes to make an irresistible panda face plate your child will want to use for every snack. Here is exactly how we make ours at Little Button Diaries.
Quick overview: what are clay panda plates?
Clay panda plates are white ceramic side plates decorated with polymer clay features (ears, eyes, nose, and mouth) shaped to look like a panda face. They work best for serving dry snacks, for pretend play in toy kitchens, or as bedroom decor. They are not intended for high-heat cooking, microwaving, or dishwasher use.
For this project, we use inexpensive 7-to-8-inch white ceramic side plates (a pack of six from IKEA or Target costs under $10) plus oven-bake polymer clay in black and white. The entire craft, from shaping to cooling, wraps up in under an hour. Kids ages 4 through 8 can handle the rolling and pressing while an adult manages the oven and any cutting.
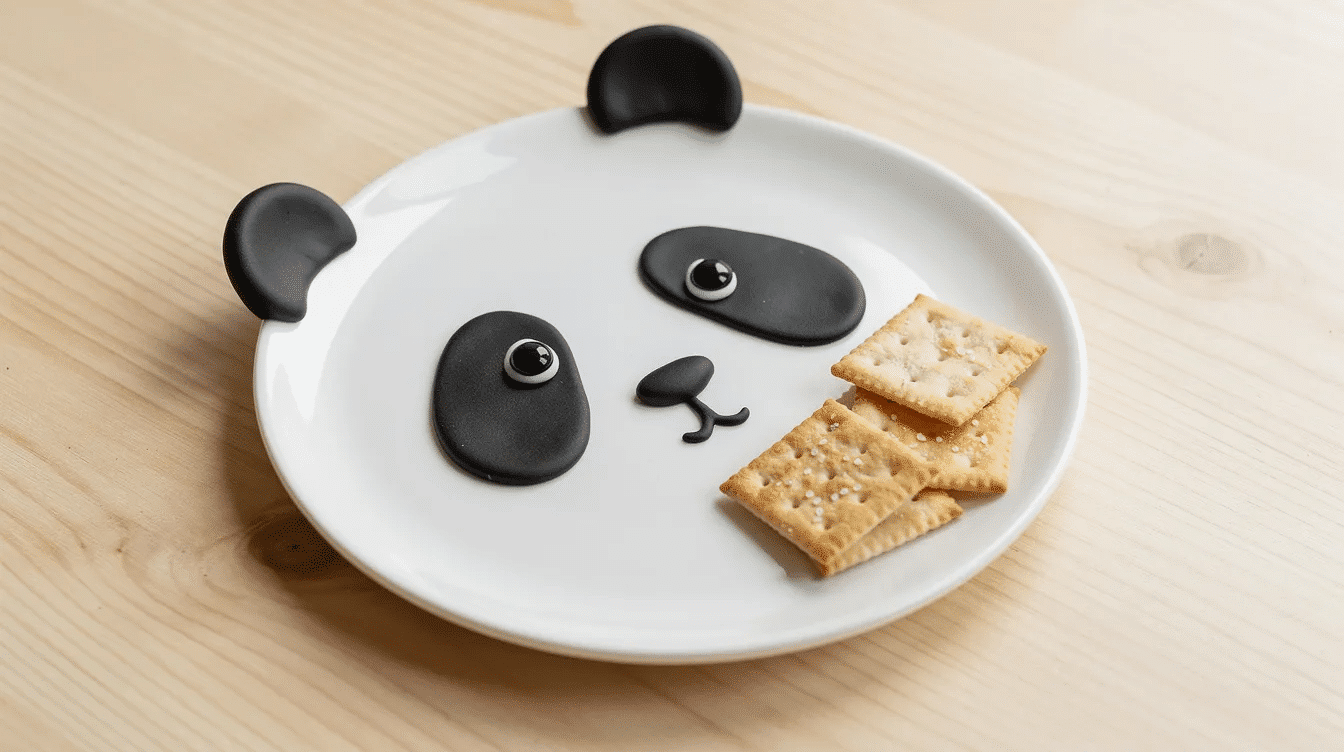
Mass-produced panda dishes often use high-temperature decal technology and kiln firing above 1,000°C. Traditional Japanese ceramics, for instance, feature high-fire stoneware and porcelain to achieve food-safe, vitrified surfaces. Our version skips the kiln entirely and uses a home oven at around 275°F, making it a realistic DIY activity for families without any pottery experience. Clay panda plates are featured in tutorials across craft blogs precisely because the shapes are so forgiving; online tutorials provide guidance for making clay pandas that even first-time crafters can follow.
Here is what to expect from this project:
- Design: a “kawaii” style panda face with rounded ears, oval eye patches, and a small nose, all placed on a plain white plate.
- Use cases: clay panda plates can be decorative art pieces as well as functional objects. Small ceramic panda plates can serve as bread plates or dessert dishes if the food only touches the undecorated ceramic center. Clay panda plates are often used in children’s craft projects for creativity, and ceramic panda plates can be used for serving food or as decorative displays.
- Beyond snack time: panda plates can create a whimsical gallery wall when hung together with plate hangers. Decorative ceramic pieces can also be used as spoon rests or accent art on a kitchen shelf. Ceramic plates can serve as incense burners or small candle holders if repurposed later. Small clay plates work well as bedside trinket dishes for jewelry, too.
- Adaptable: the tutorial focuses on panda faces, but the same technique works for bears, foxes, or cats. Panda plates can be decorated with various designs beyond traditional colors.
- Miniature versions: if you use smaller dishes, miniature dishes can serve soy sauce or hold used tea bags.
Supplies and safety for making polymer clay panda plates
Gather everything before you sit down with your child. Most of these items are already in your kitchen or available at any craft store.
What you need
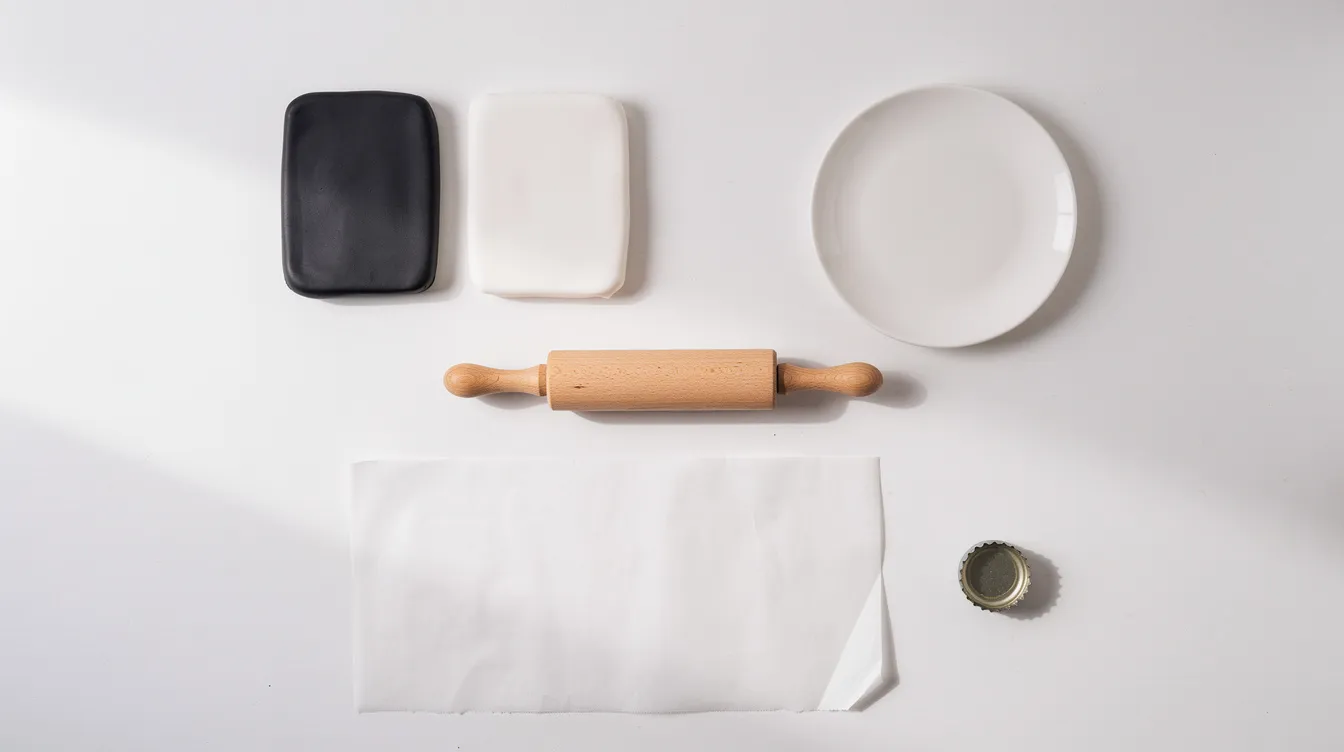
- Plain white ceramic side plates, 7 to 8 inches, labeled oven-safe up to at least 300°F
- Black polymer clay, 2 oz block (Sculpey Premo or Fimo Professional)
- White polymer clay, 1 oz block (same brand for consistent baking temperature)
- Small rolling pin or smooth glass jar
- Craft knife or clay blade (adult use only)
- Small circle cutter or clean bottle cap (about 1 cm diameter)
- Parchment paper
- Baking tray
- Oven thermometer (a $5 device that prevents overbaking)
- Ceramic-safe glue such as E6000 (for reattaching any pieces that lift after baking)
- Optional: clear sealant labeled for decorative surfaces, applied only to non-food-contact areas
Sculpey clay can be used to create panda crafts, and Sculpey Premo specifically bakes at 275°F / 130°C, holds fine detail, and stays durable after curing. Sculpey III and Bake Shop cost less per ounce but tend to crack in thin features like ear tips. For a full rundown of cutters, rollers, and shapers, see our tools for clay guide.
Polymer clay vs. air-dry clay
Handmade clay dishes can be sculpted using oven-bake or air-dry clays, but the two materials behave differently on ceramic surfaces:
Feature | Oven-bake polymer clay | Air-dry clay |
|---|---|---|
Hardness after curing | Firm and slightly flexible | Hard but porous and brittle |
Bond to ceramic | Strong when pressed before baking | Weak; tends to pop off |
Detail retention | Holds fine shapes (pupils, tiny noses) | Cracks in thin areas as it dries |
Food safety | Not food-safe on contact surfaces | Also not food-safe |
Water resistance | Moderate (hand-wash only) | Very low; softens when wet |
Air-dry clay or modeling clay dishes are generally not food-safe, and they lack the flexibility polymer clay retains after curing. If you are curious about painting air-dry clay for other projects, we cover that in painting air-dry clay with watercolors.
Safety checklist
- An adult should handle the craft knife, oven, and hot baking tray at all times.
- Follow the manufacturer’s baking temperature exactly. Sculpey’s FAQ states that exceeding the recommended temperature degrades PVC and releases fumes. Use your oven thermometer to verify; many home ovens run 10 to 20°F above their dial setting.
- Keep polymer clay and all tools separate from cookware used for food prep.
- Restrict clay decorations to the plate’s rim, outer edge, or underside. Food should touch only uncoated ceramic. Non-food-safe clay dishes function as trinket catch-alls for small items, not as direct eating surfaces. Small handmade clay trays are used to hold small accessories or trinkets for the same reason.
- Avoid letting children put unbaked clay in their mouths. Polymer clay carries an ASTM D-4236 non-toxic label for craft use, not for ingestion.
- Set up a wipe-clean tablecloth, put on smocks, and corral supplies on a tray so tiny clay pieces do not roll onto the floor.
Step-by-step: how to make Little Button Diaries clay panda plates
The hands-on shaping takes about 30 to 40 minutes. Baking adds another 15 to 30 minutes, and cooling takes 30 to 60 minutes. Even if you have never touched polymer clay before, this project is built around five basic shapes: balls, ovals, half-circles, a triangle, and a thin line. Your preschooler can roll every one of them.
1. Shape the panda ears
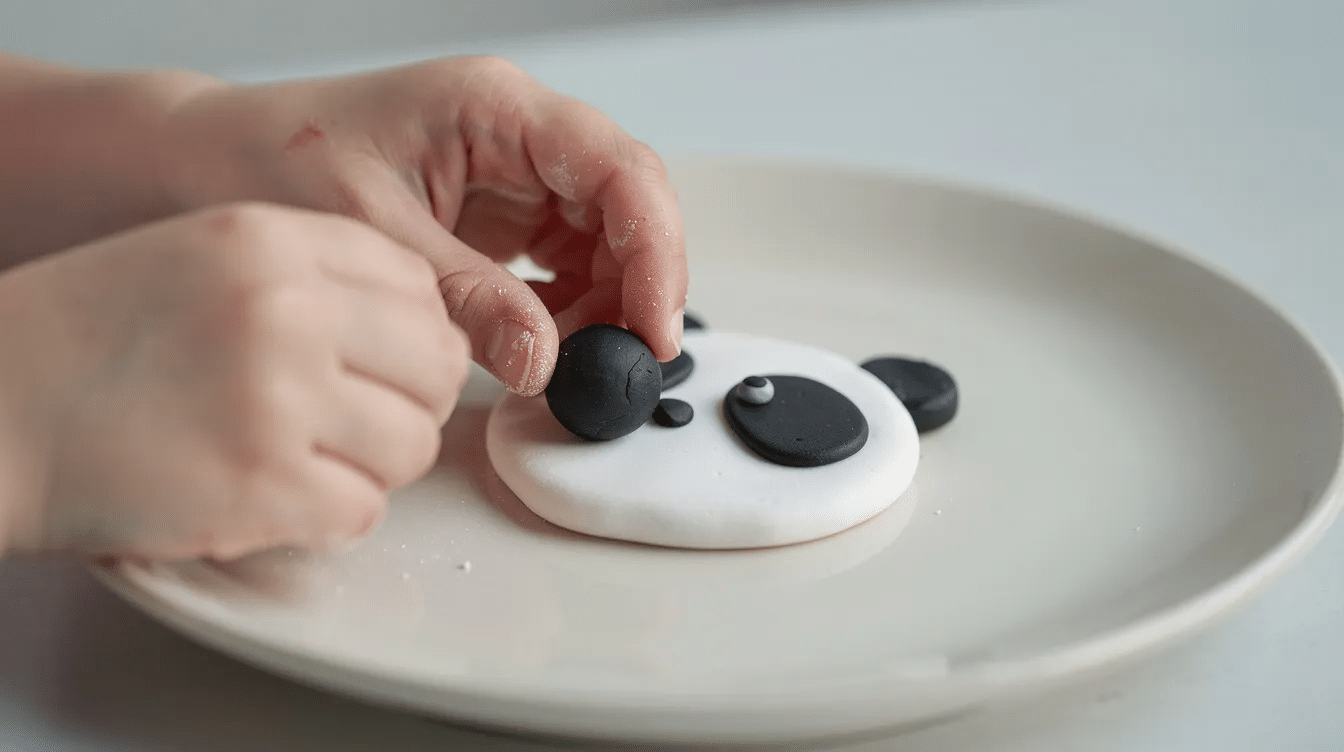
Pinch off two equal pieces of black polymer clay, each roughly the size of a large marble. Roll them into smooth balls, then flatten each ball into a half-circle about 1 to 1.5 cm thick. Position the two half-circles at the top edge of the plate so they peek over the rim like ears. Press them firmly against the ceramic; a solid press before baking creates the strongest bond.
2. Make the eye patches and eyes
Roll two small ovals of black clay, each about 2 cm long and 1 cm wide. Place them on the upper third of the plate, spaced a few centimeters apart, angled slightly outward. On top of each black oval, press a small white circle (roll a tiny ball, flatten it). Then add a pinpoint black pupil to each white circle. Kids love this step because each layer is just “roll a ball, squish it flat.
3. Add the nose and mouth
For a cute nose, form a small triangle or heart shape from black clay and center it below the eyes. Add a tiny curved line of thin black clay underneath for the mouth. Keep all features positioned in the lower half of the plate’s face area for the rounded “kawaii” look that children discover on their own when they see the proportions click into place.
4. Bake the plate
Transfer the plate carefully onto a parchment-lined baking tray. Double-check that every clay piece is pressed flat against the ceramic with no air gaps.
- Place the tray in a cold oven.
- Set the oven to 275°F (130°C) for Sculpey Premo, or the temperature printed on your clay’s packaging.
- Once the oven reaches temperature, bake for 15 to 30 minutes depending on the thickest clay piece. A ¼-inch-thick ear needs about 15 minutes; a ½-inch-thick ear needs closer to 30.
- Turn off the oven and let the plate cool inside for at least 30 minutes before handling.
Tip: tent a sheet of aluminum foil loosely over the plate to prevent browning or scorching from direct radiant heat.
5. Check adhesion and finish
After cooling, gently press each feature. Any sign of lifting means the piece needs a small dot of ceramic-safe glue on its back. Press it back in place and let the glue cure for the time listed on the tube (E6000 needs about 24 hours for full strength).
6. Ways to use your clay panda plates
Panda plates can serve as playful snack stations for children if food-safe ceramic remains the only surface touching food. Here are our favorite uses:
- Dry snack plates: crackers, sliced fruit, cookies. Keep food in the center, away from the clay rim.
- “Panda breakfast” plate: a special weekend treat where toast and berries sit in the middle of the panda face.
- Play kitchen prop: no food contact needed; kids use them in pretend cafés and tea parties.
- Handmade gifts: handmade panda ceramics can be ideal gifts for children or collectors. We made a set of six for a 5th birthday panda party, each plate personalized with a baked clay initial. Pair them with paper party hats for a complete theme.
- Gallery wall: hang three or four panda plates with adhesive plate hangers for a whimsical nursery display.
- Trinket dish: after your child outgrows snack plates, repurpose them as bedside catch-alls for hair clips and small treasures.
7. Adapt the design
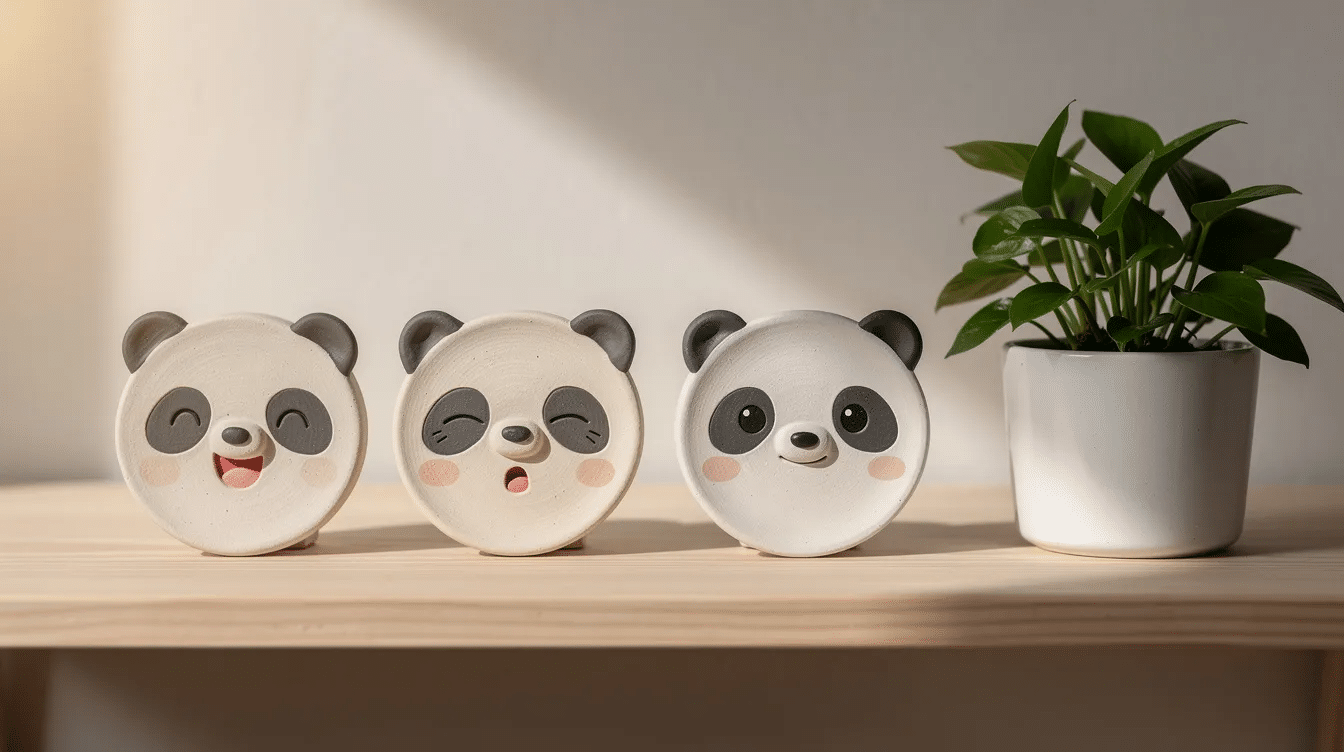
- Add two tiny circles of pink polymer clay as blush dots on the cheeks.
- Press a miniature cone of colored clay on top of one ear for a party hat.
- Stamp each child’s initial between the eye patches using a letter-shaped cutter.
- Swap black ears for orange to make a fox, or gray for a koala. Browse more animal-plate inspiration in our easy craft ideas for kids roundup.
- Panda plates can be decorated with various designs beyond traditional colors; try pastel ears, glitter clay, or metallic accents for older kids who want access to more grown-up aesthetics.
Care instructions
- Hand-wash only with a soft sponge. Avoid soaking.
- Do not microwave or put in the dishwasher.
- Store plates upright in a rack so clay features are not pressed against other surfaces.
If you make a set of clay panda plates, tag us on Instagram or Facebook so we can share your creations. We love seeing what Little Button Diaries readers come up with, and your photos help other parents discover how simple this craft really is. For more projects like this one, check out our full list of cute easy crafts.


