

Quick Overview: What You’ll Make & Who It’s For
In this project you’ll learn how to make diy terrazzo coasters from oven-bake polymer clay in about an afternoon. The total making time is approximately three hours, and the only special thing you need is a regular home oven. Most of the tools are things already sitting in your kitchen drawer.
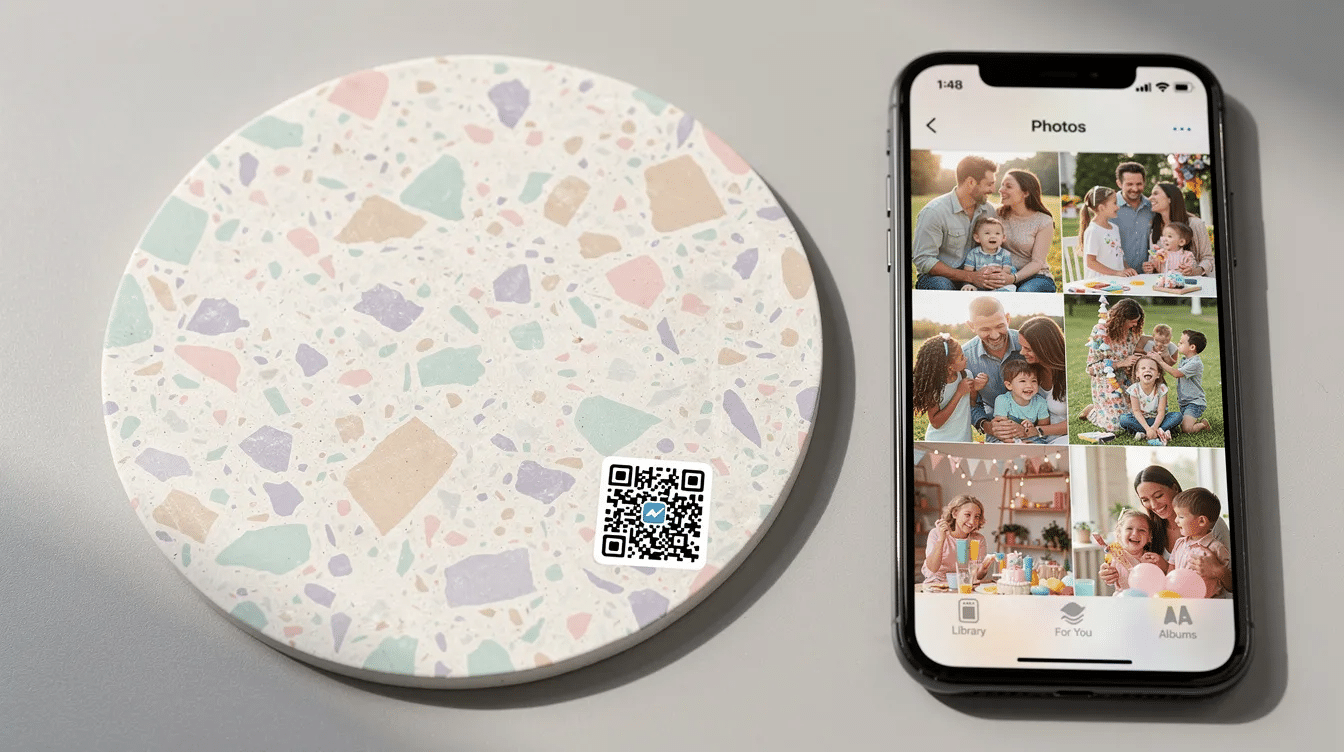
This craft is perfect for children aged 4–6 with adult help. Little ones get the happy jobs – choosing colours, rolling clay, and scattering the terrazzo “chips” – while grown-ups handle sharp tools and the oven. We’ll show you how to create both round and hexagon shapes, and there’s even a bonus step for turning one coaster into a secret qr code stand that links to a family photo gallery or bedtime playlist.
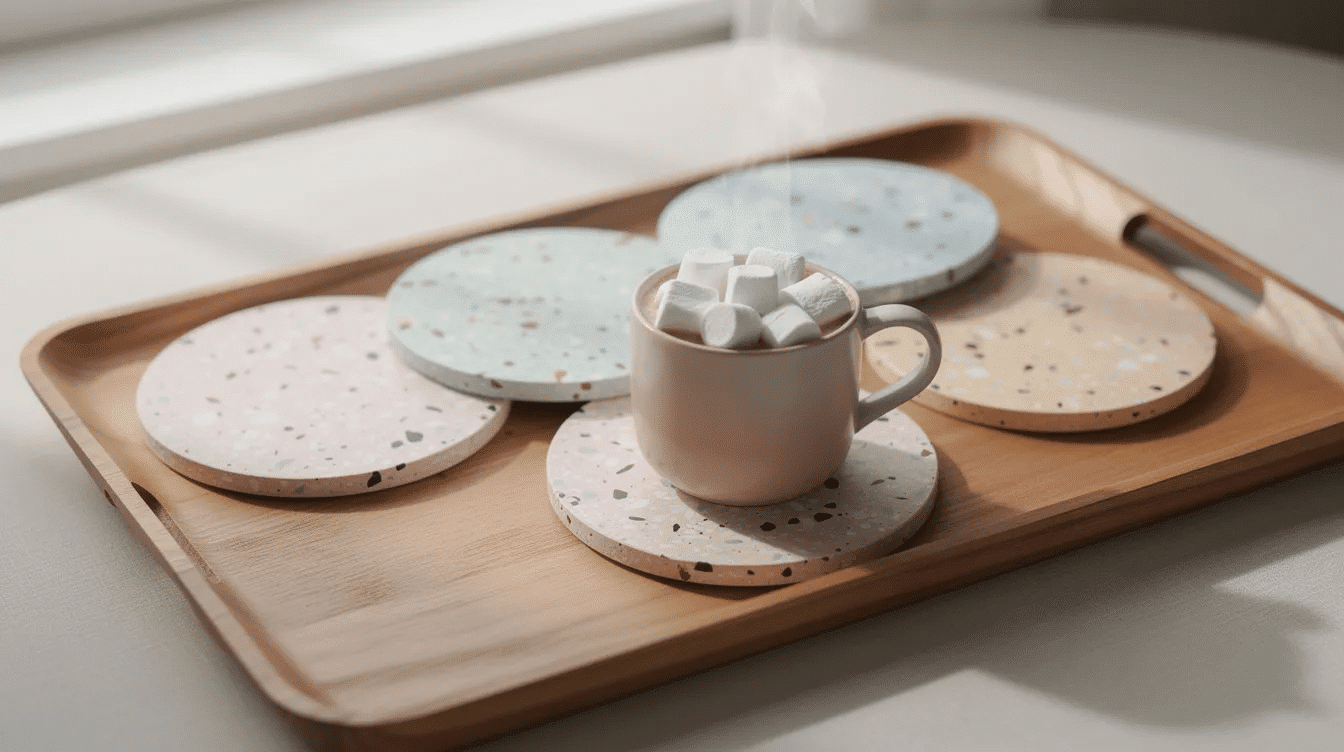
The terrazzo look – tiny colourful flecks scattered through a plain background – has roots stretching back to Venetian artisans who embedded marble chips into floors centuries ago. Our version swaps stone for polymer clay and cement for a rolling pin, making it a beautiful, easy craft for home. Terrazzo coasters can also be made using casting plaster or acrylic resin, but polymer clay is the simplest and safest route for families. DIY terrazzo coasters can even be made using gypsum composite if you prefer a heavier feel, though we love the lightweight result you get with clay.
Supplies & Tools (What You Need to Get Started)
This is a budget-friendly diy terrazzo project. You can find most materials at a supermarket, craft shop, or online. If you prefer a ready-made option, commercial diy kits typically include materials for making three coasters, five pigment colors, silicone molds essential for shaping, and online tutorials for guidance – handy if you want everything shipped to your door. Those kits often suggest coaster dimensions of 11×13 cm and include colours like white, black, magenta, blue, and yellow. A digital kitchen scale is recommended for precise mixing ratios if you work with resin kits.
For our polymer clay version, here’s what you need:
Essentials
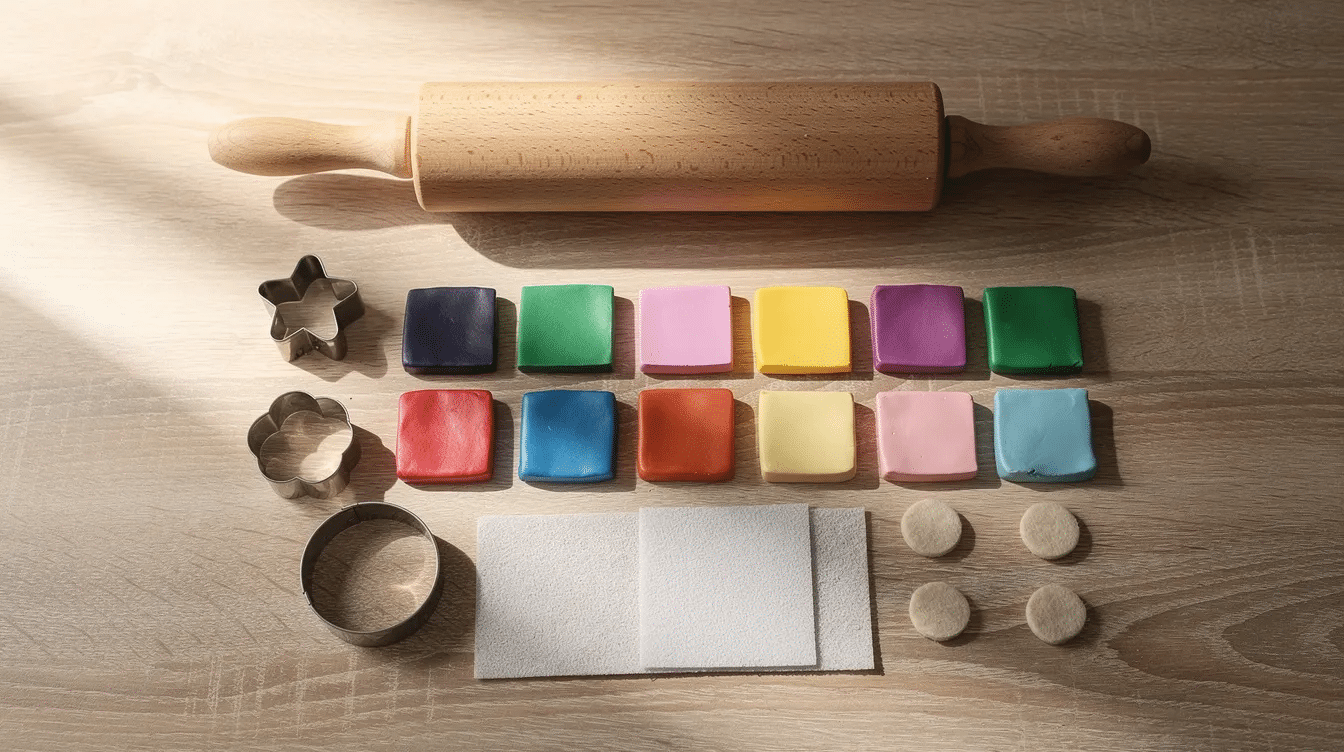
- White clay – 4 × 50 g blocks of oven-bake polymer clay (the base)
- 3–5 coloured clay blocks in pink, teal, mustard, terracotta, or black
- Baking paper or greaseproof sheet
- Rolling pin and two flat wooden strips for even thickness
- Circle biscuit cutter (9–10 cm) or hexagon cutter
- Craft knife (adult use only)
- Fine sandpaper (220–400 grit)
- Felt pads or cork circles for the base of each coaster
- Baking tray
Nice-to-Haves
- Clear-drying craft varnish or a sealer to protect the surface
- Small printed qr code square, clear craft glue, and a phone to test it
- Labelled jar to save leftover clay chips for another diy coasters session
Frugal tip: upcycle an old chopping board as a rolling surface, reuse a line of baking paper from last week’s biscuits, and keep every scrap of clay – nothing goes to waste.
Step-by-Step: How to Make DIY Terrazzo Coasters with Kids
This section walks through the full process from conditioning clay to baking. Each coaster measures roughly 11×13 cm when using a standard cutter, and the whole set takes about three hours including cooling. Curing time for coasters varies based on material used and ranges from 1 to 24 hours – polymer clay is at the quick end.
Prepare your clay. Preheat the oven to 130 °C / 266 °F / Gas Mark ½. Place a sheet of baking paper on your tray. Divide white clay into four portions and soften each piece by kneading it until pliable – children love this step because it feels just like homemade playdough.
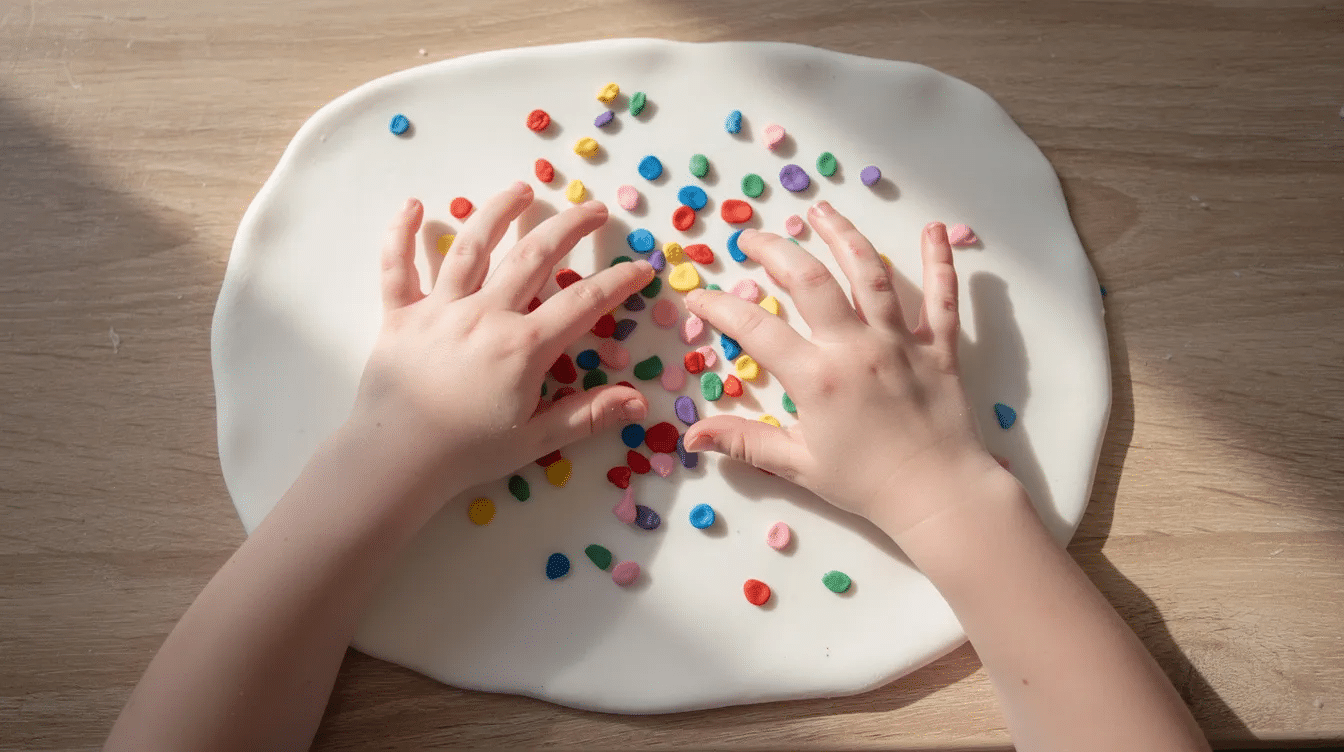
Make terrazzo chips. Roll thin snakes or flat slabs of coloured clay, then cut them into tiny irregular pieces with a craft knife – this is an adult-only step. To make terrazzo chips you can also mix colored casting material and break it into pieces, but slicing clay is simpler with kids around. Keep each colour in a separate pile so children can select which to sprinkle. Colored pigments are what create unique designs in every piece.
Roll the base. Place a portion of white clay between two sheets of paper. Set flat wooden strips either side as spacers, then roll to about 4–5 mm thick so your terrazzo coaster is sturdy and won’t warp.
Arrange the terrazzo. Remove the top paper and let your child scatter chips across the surface – this is the step that builds fine motor skills and feels genuinely special. Press chips in gently by hand, replace paper, and roll once more until the surface is smooth and every piece is embedded.
Cut your shapes. Press a circle or hexagon cutter firmly into the slab, twist slightly for a clean edge, and remove excess clay. Transfer coasters to the lined tray by sliding the paper underneath so they don’t stretch.
Bake and finish. Bake for 30 minutes following your clay brand’s instructions. Let coasters cool completely – do not touch until ready. Lightly sand edges with fine sandpaper to smooth them; sanding also helps reveal the colorful terrazzo chips embedded just below the surface. Adults handle sandpaper while kids can help brush off dust with a clean card or soft cloth.
Use leftover clay to make tiny matching salt spoons or doll-house plates and enter a whole extra round of play.
Kid-Friendly Design Ideas for DIY Terrazzo
One of the things we love about this project is how easy it is to customise colors and patterns for unique designs. Recommendations for color palettes can genuinely enhance the aesthetic of your terrazzo coasters – and children have strong opinions about colour, so let them lead.
Colour palette ideas:
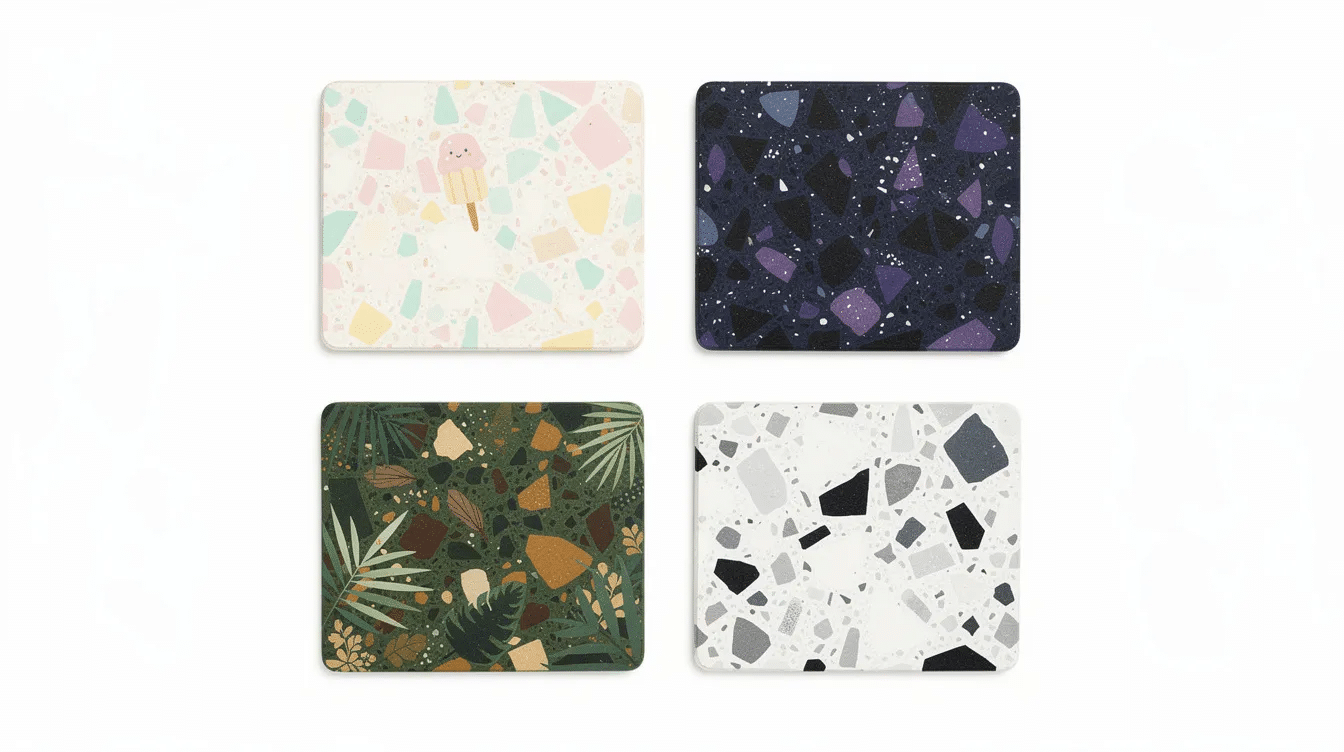
Theme | Colours | Style |
|---|---|---|
Ice Cream Shop | Mint, strawberry pink, vanilla, yellow sprinkles | Pastel and playful |
Space | Navy base, white, silver, neon green chips | Bold and dramatic |
Jungle | Leafy green, tan, rust, black | Earthy and warm |
Monochrome | Grey base, white and black chips | Modern and clean |
Using a clean palette and geometric molds results in durable coasters that look professionally made – even when a four-year-old did half the work.
Matching sets: Make one coaster per family member, each with a different background but repeating chip colours so the set stays coordinated on your table.
Learning tool idea: Ask preschoolers to count chips of one colour, or sort coasters into “warm” versus “cool” colour families – a gentle maths game hidden inside a craft.
Seasonal spins: Try a Halloween set (black, orange, purple), Christmas terrazzo (red, green, gold), or birthday-party favour coasters with initials pressed in before you bake. A set of handmade coasters tied with twine makes a beautiful gift any year.
Bonus Project: Make a QR Code Photo or Storytime Coaster
Here’s a fun idea that blends crafts with a touch of technology. Turn one terrazzo coaster into a little “tech bridge” by adding a printed qr code that links to a private family photo album, a Spotify bedtime playlist, or a favourite read-aloud video on YouTube.
How to do it: Visit a free online qr code generator, paste in your chosen link, then download and print the code at around 3 × 3 cm on regular paper. Once your coaster is baked and cool, trim the printed square, brush the back lightly with clear craft glue, and place it on the centre or corner of the coaster. For a splash-proof finish, seal with a thin coat of clear varnish.
Safety note: Keep qr codes linked to child-safe content only. Check every link before you hand the coaster over, and avoid sharing personal details publicly.
Playful uses kids will love:
- A “Grandparents coaster” that scans to a gallery of Nana and Grandad photos
- A “Calm-down coaster” that opens a relaxation music playlist when feelings run big
- A “Storytime coaster” that launches a page of favourite picture-book readings
Tips, Safety Notes & How to Use Your Terrazzo Coasters
A few tips to keep your handmade coasters looking lovely and your little ones safe throughout the project.
Safety reminders:
- Adults handle knives, the oven, and hot trays at all time
- Children sit while working; supervise small clay pieces around toddlers – they are a choking hazard
- Wash hands after handling raw polymer clay
- A sealer can be applied to protect the surface, but note that polymer clay items are not food safe for direct contact with food or drinks
Care and durability:
- Glue felt pads or a cork circle underneath with strong glue to protect your table from scratches and heat
- Wipe coasters with a damp cloth to keep them clean – no dishwasher
- Avoid placing boiling-hot cups or pans directly on them; they’re ideal under juice cups, mugs, or a bedside water glass
Gift and display ideas: Wrap a set with twine and a child-drawn card for a teacher gift, make a birthday present set in a friend’s favourite colours, or line them up on your kitchen shelf as a little house gallery of your child’s work. Review what you’ve made together – it’s a lot of fun to step back and admire the results.
This is the kind of easy craft that slots into a rainy Sunday afternoon and leaves you with something you’ll actually use every day. If your family enjoyed this, you might also love our guide to painting air dry clay with watercolors or our round-up of creative craft activities for kids. We’d love to receive photos of your terrazzo creations – find us and share them so we can all feel inspired. Happy making!


