

Key Takeaways
- This tutorial shows you how to turn a simple cross stitch panel into a padded, lined sunglasses case that keeps eyewear safe in a handbag or preschool backpack.
- The project works with either cross stitch on Aida cloth or needlepoint canvas, and you can adjust the size for adult sunglasses or tiny children’s glasses.
- You need only a few materials: a small piece of canvas or Aida, embroidery floss, soft lining fabric like cotton or felt, basic sewing tools, and an optional snap or button closure.
- The craft is beginner-friendly and suitable to stitch with older preschoolers (around age 5-6) with adult help, making it a fun family weekend project.
- A video tutorial on YouTube can help visual learners feel prepared before they start stitching; search “cross stitch sunglasses case” to watch a walkthrough.
Introduction: A Simple Cross Stitch Sunglasses Case for Families
A handmade eyeglass case protects mum’s sunglasses, a child’s first prescription glasses, or spare holiday sunnies tossed into a beach bag. This project combines basic cross stitch (or simple needlepoint) with easy hand-sewing so parents and children can craft together on a rainy afternoon. The finished case is soft, padded, and eyewear safe, and you can customize it with initials, hearts, rainbows, or a tiny sun wearing sunglasses.
Here at Little Button Diaries, we love a frugal, stash-busting make. This tutorial uses leftover thread and scrap lining fabric rather than buying a new case. Unlike professionally finished needlepoint sunglasses cases you might find on Etsy, this is a straightforward, family-friendly method you can complete in a weekend. It is also an inexpensive method for teaching kids the beginning of needlework skills they can carry into other needlepoint projects.
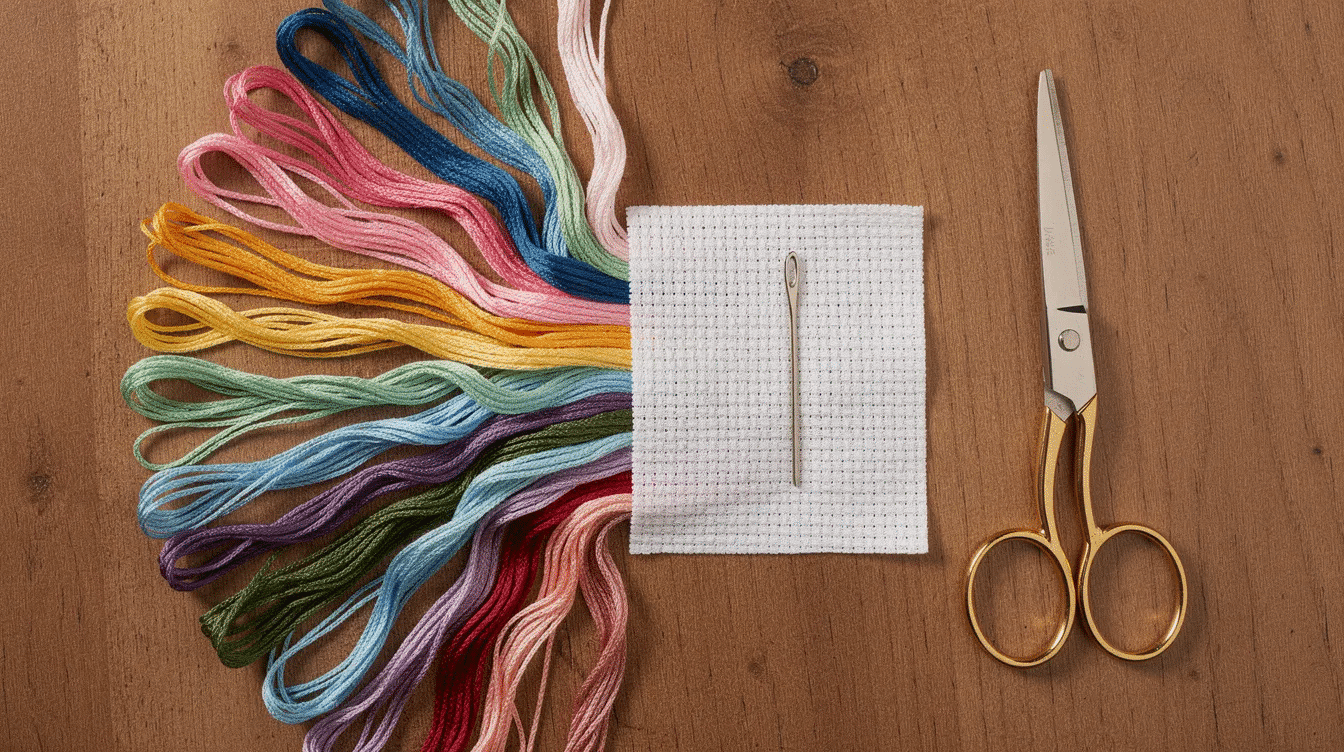
Supplies: What You Need for Your Cross Stitch or Needlepoint Sunglasses Case
All measurements below are sized for an average adult sunglasses case (about 6″ x 3″ / 15 cm x 8 cm). To adjust for children’s eyeglasses, measure the frames and add 1″ (2.5 cm) total ease. Templates for cutting fabric should allow extra room for seams. A cross stitch sunglasses case requires basic stitching tools and materials; here is the complete list.
Base fabric (choose one):
- 14-count Aida cloth for classic cross stitch
- 13 or 18-count needlepoint canvas (stiff fabric mesh) for a sturdier needlepoint sunglasses case
- Plastic canvas if crafting with very young children; it holds its shape without extra support
Cut the cross stitch fabric to 7.5 by 3.5 inches (19 x 9 cm) for a single panel that folds in half, or cut two identical rectangles if you prefer separate front and back panels. You can also use vinyl canvas sized 7.5 by 3.5 inches for a firmer result. If you enjoy padded case projects, a similar approach applies here.
Thread and tools:
- Embroidery floss is needed for stitching; DMC cotton in 3-5 bright colors works well, plus optional variegated thread for accents
- A tapestry needle is required for cross stitching (size 24-26 for 14-count Aida; blunt tip keeps kids’ fingers safe)
- Scissors are needed for cutting thread and fabric
- Ruler, water-soluble fabric pen, and pins or clips
- Sewing thread in a matching color for assembly
Lining and structure:
- Soft lining fabric such as cotton, felt, or self adhesive velvet fabric; a soft lining is crucial to protect sunglasses inside the case because lining fabric protects lenses from scratches and damage
- Use felt interfacing for added support if your base fabric is floppy; interfacing or batting adds structure and cushioning to the case
- A traditional case construction includes a padded cross stitch panel with a lining
Closure options:
- Leave the top open as a slip-in pouch
- A push clip closure, press-stud snaps, Velcro, or a stitched-on button and elastic loop
Start with small kits to avoid discouragement. Print a simple cross stitch chart before you begin; DMC offers many free cross-stitch patterns online that you can print and adapt.
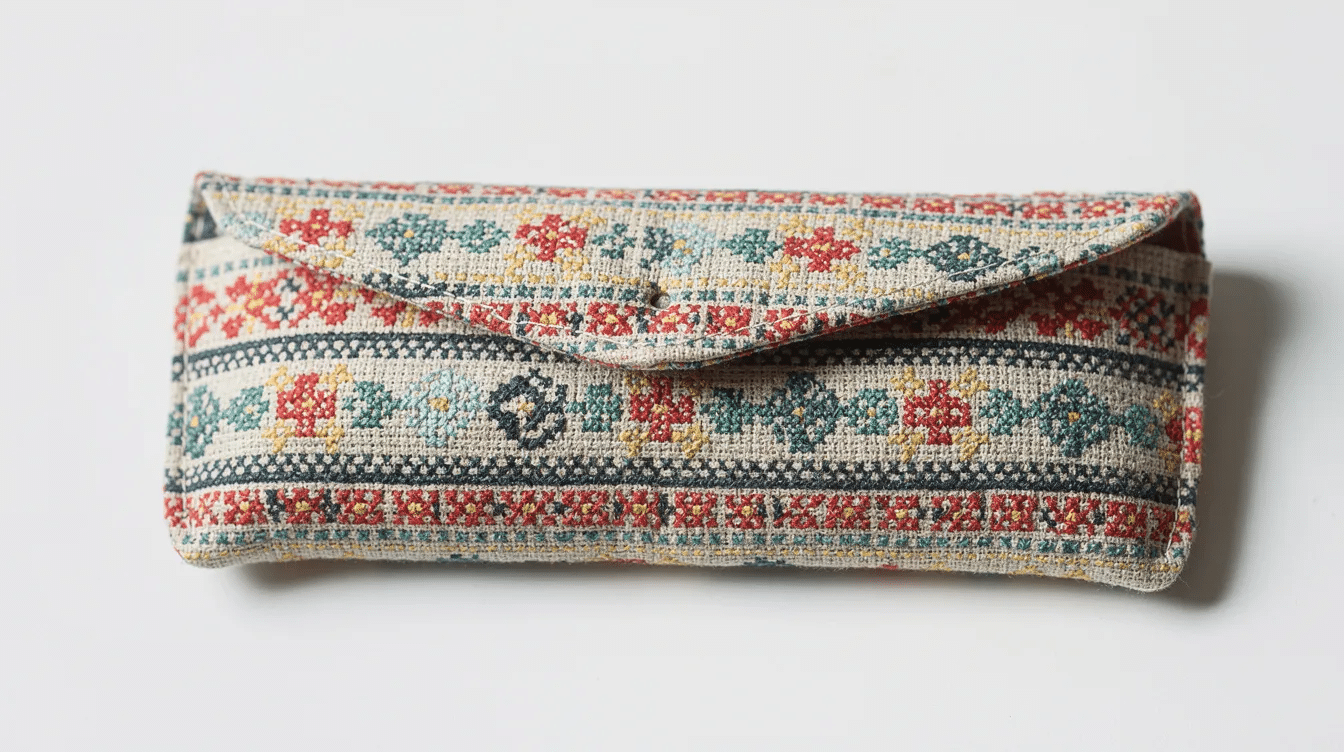
Step 1: Design and Stitch Your Cross Stitch or Needlepoint Panel
If you have never tried cross stitch, this project is a gentle first step. You can use a ready-made pattern or sketch a blocky design on graph paper. Keep the motif no larger than 40 x 25 stitches for a quick make, and leave at least 3 squares of bare canvas around each edge for a neat binding stitch or seam allowance.
Pick a theme kids will enjoy: a sun with sunglasses, bold stripes, a heart, or initials. Use variegated threads for colorful designs that catch the eye without requiring many color changes. Aim for consistent tension for a professional look; pulling too tight warps the canvas. Blocking your canvas prevents distortion in your design, so gently steam or press the finished panel face-down on a pressing cloth before moving on.
Basic cross stitch technique:
- Fold canvas to find the center; start stitching there.
- Use a loop start for a neat back.
- Make all top stitches slant the same direction.
- Secure thread ends under several existing stitches.
For readers using needlepoint canvas instead of Aida, opt for a simple tent stitch or continental stitch worked in one direction for a dense, protective surface. Stitch the full front panel. If making two panels, a simpler back (like stripes) saves time while still looking finished.
Let children choose colors and complete small areas (one stripe or one block) while adults handle counting. Keep sessions to 15-20 minutes for young children. You can also utilize YouTube for learning basic stitching techniques; search “cross stitch for beginners” for helpful videos. If your child enjoys sewing with simple shapes, this is a natural next step in teaching them needlework.
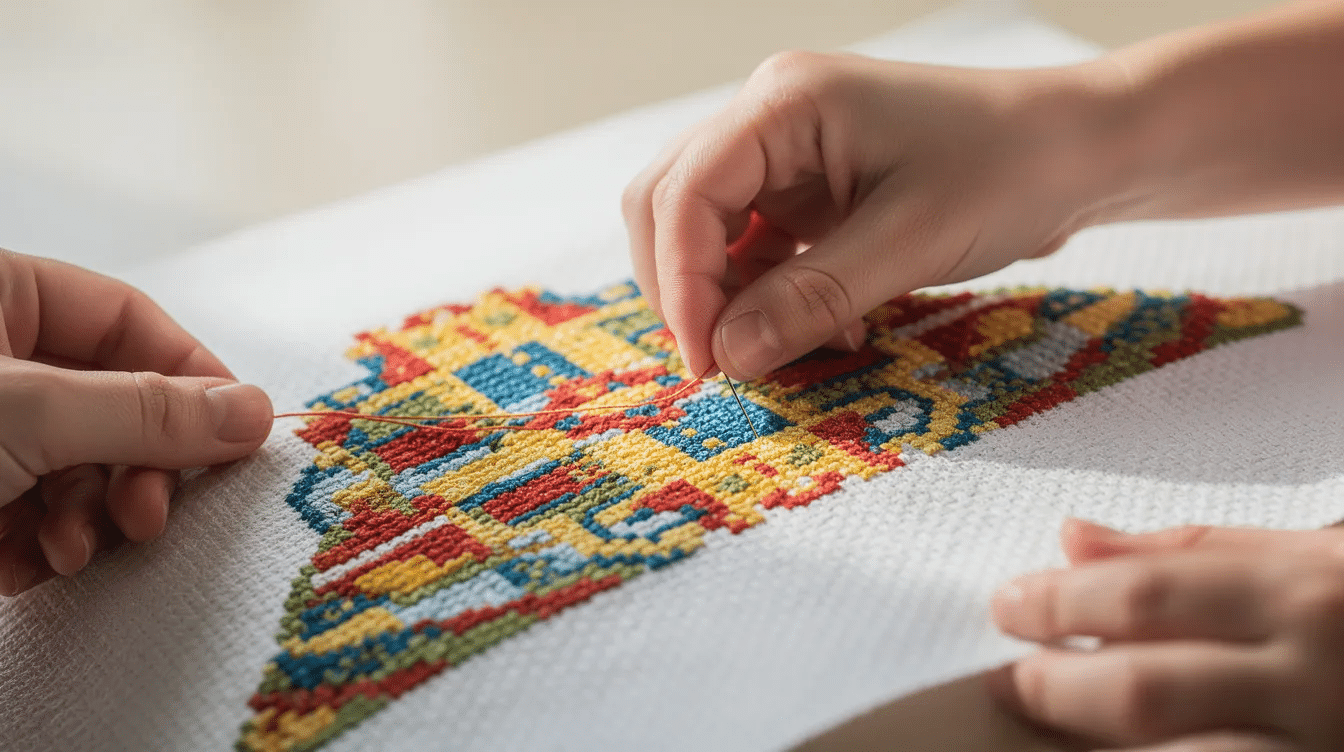
Step 2: Add Lining Fabric and Optional Binding Stitch for a Soft, Safe Interior
Lining matters: it makes the case eyewear safe, hides thread tails, and gives the interior a smooth surface that will not scratch lenses. Cut your lining fabric to the same dimensions as your stitched panel (7.5″ x 3.5″).
Place the lining wrong side against the back of the canvas. Pin or glue-baste around the edges to secure it. If using self adhesive velvet fabric or flocked lining, peel away a small section of the backing at a time, smoothing from the center outward to avoid wrinkles. You can attach a self-adhesive lining fabric to the canvas back in under five minutes this way. The Unwind Studio finishing guide covers this technique in detail.
The binding stitch is a decorative overcast or whip stitch worked around the entire outer edge of the canvas with embroidery floss. It encloses raw edges and stabilizes the shape before folding. Space stitches about one canvas hole apart, catching both canvas and lining fabric. Choose a contrasting or matching color depending on your style.
If you prefer to avoid extra sewing by hand, skip the decorative border and leave a standard 1/4″ (6 mm) seam allowance for machine stitching later. Before moving on, check the inside for knots or bulky thread ends where lenses will sit; trim or secure any bumps.
Step 3: Fold, Sew, and Finish the Sunglasses Case
Two finishing options exist: fold a single long panel in half like a pocket, or sew two separate panels together. Sewing involves joining fabrics to create a pocket structure for the case.
Folded style: Fold the stitched piece right sides together (stitching facing stitching). Align the edges, clip or pin the sides, and leave one short edge open as the top.
Two-panel style: Stack front and back panels with right sides together and lining sides out. Match designs at the top so motifs or stripes line up.
Sew the edges of the canvas, leaving one side open. Use a whip stitch or backstitch around the sides and bottom, catching the binding stitch or seam allowance. Keep stitches close together for durability. This is a good step for patient older children who want to help assemble the case. If you have made a lined zip purse before, the process feels familiar.
Turn the case right-side out using a blunt pencil or chopstick to gently push out corners. Press the finished sunglasses case lightly with a warm iron and pressing cloth; avoid any plastic canvas or snap hardware when applying heat.
Adding a closure: Closure options include snaps, Velcro, or buttons for sunglasses cases. Sew on a small button and elastic loop, insert a magnetic snap, or leave it as an easy slip-in pouch for younger children. A push clip closure works if you want the case to stay shut in a crowded bag.
Do a quick test fit with the family’s glasses. Check that lenses slide in and out easily, and that seams feel sturdy enough for daily use among everyday essentials like keys and wallets.
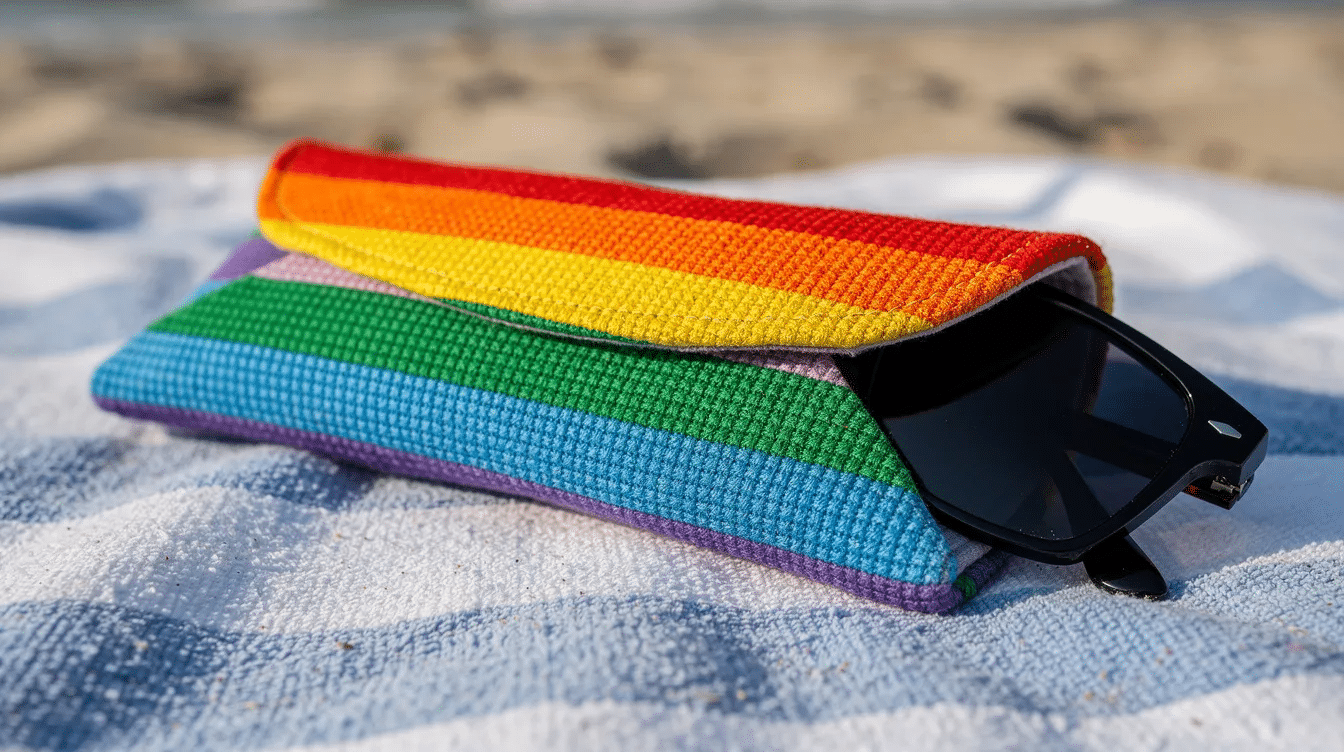
Variations, Kid-Friendly Ideas, and Care Tips
Invite each family member to design their own personalized needlepoint sunglasses case. Children can sketch motifs on graph paper; simple ideas include initials, matching “parent and mini” cases, or rainbow stripes for summer holidays. You can create your own sunglasses case in any style, from a friend’s birthday gift to a stocking stuffer.
To resize for small children’s frames, measure the glasses (length and width), add at least 1/2″ (1.5 cm) ease, and redraw the rectangle before cutting. For a sturdier eyeglass case, use 13-mesh needlepoint canvas and add a layer of batting or fleece between canvas and lining for extra padding.
Care tips: Spot clean with a damp cloth. Avoid soaking metallic threads. Air dry flat. Keep away from high heat to protect plastic canvas or snaps. Encourage children to wipe their case down after a sandy beach day and check for loose threads an adult can secure with a needle. This is a sign of good craft habits forming early.
Share your complete cases on social media and inspire other families to try this craft. Browse more kid-friendly sewing ideas on Little Button Diaries.
FAQ
These FAQs answer quick questions parents and beginners often have when making their first cross stitch sunglasses or eyeglass case.
Can beginners really make this if they’ve never tried cross stitch before?
Yes. Keep the design simple (blocks, stripes, or one small motif) and focus on neat, even crosses rather than perfection. Parents can handle counting and outlines while children fill in color blocks. If you are not absolutely confident, practice a few stitches on scrap fabric first. This is a bit tricky only if you rush; short sessions lead to better results.
How do I adjust the size for oversized sunglasses or tiny children’s frames?
Measure the glasses length and width, then add about 1″ (2.5 cm) to the length and 3/4″ (2 cm) to the width. Make a quick paper template to test the fit before cutting your needlepoint canvas or fabric.
Is needlepoint canvas stronger than Aida cloth for a sunglasses case?
Needlepoint canvas (especially 13 or 14 mesh) creates a firmer, more protective case because the stiff mesh and dense stitches form a thicker surface. Aida cloth feels softer and more flexible. Choose canvas if the case will live in a crowded bag, and Aida if you want a gentler fabric for young children to handle.
Do I have to use a binding stitch, or can I just sew it on my machine?
The binding stitch is optional but helps tidy the edges and makes hand-sewing easier with stiff canvas. If you prefer machine sewing, leave a narrow seam allowance, sew with a straight stitch, then trim or zigzag raw edges.
Where can I find free patterns for this project?
Cross Stitch Quest provides niche patterns including anime and games themes. The r/CrossStitch subreddit shares free designs under the [PATTERN] tag. Local libraries often carry magazines with cross-stitch patterns. Etsy has “kawaii” cross-stitch patterns suitable for beginners, and patterns for sunglasses cases can be found in DIY kits. This blog post has covered the basics; now go explore and find a design that matches your family’s personality.
Can I turn this into a clip-on case for a school bag or stroller?
Sew a short fabric loop into one side seam and attach a carabiner or swivel clip. The sunglasses case can then hang from a backpack, buggy, or belt loop, helping children keep track of their eyewear during day trips and park visits.


