

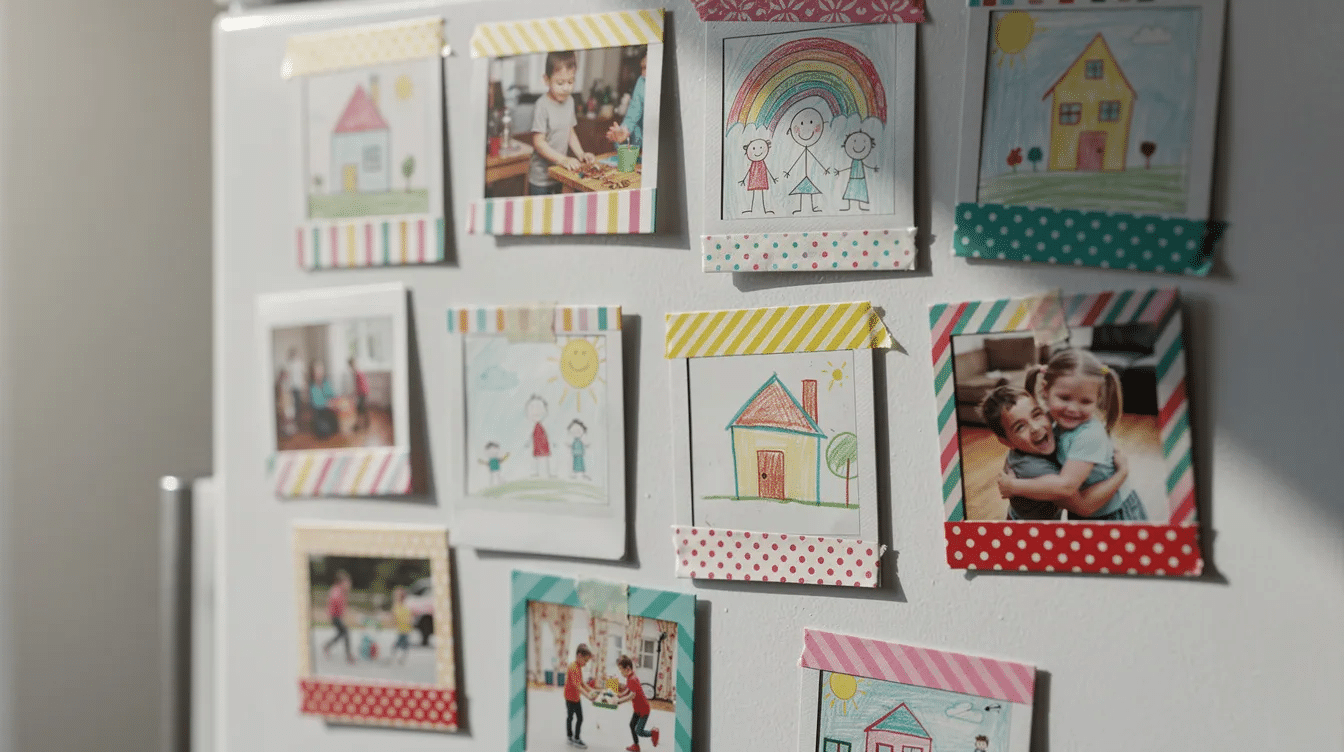
Washi tape polaroid magnets are one of those crafts that look far more impressive than the effort they take. With a scrap of white card, a few strips of colourful tape, and your child’s latest masterpiece, you can create mini keepsakes that stick right to the fridge and spark a smile every time you grab the milk.
Here at Little Button Diaries, we love crafts built from things you already own, and this one ticks every box.
Key Takeaways
- Washi tape polaroid magnets are simple fridge magnets made from kids’ artwork or photos framed in a faux “Polaroid” border using colourful washi tape. They’re vibrant, customizable, and a budget-friendly craft anyone can try.
- This is a 20–30 minute, low-mess project ideal for preschoolers (ages 3–6) with adult help, using basic supplies like white card, corrugated card, magnetic strips, and a glue gun.
- Parents can turn children’s drawings from recent school years into keepsake polaroid magnets for fridges, lockers, and magnetic boards, perfect for preserving memories in a tactile, display-ready format.
- The tutorial comes from Little Button Diaries, a kids’ craft blog focused on frugal, everyday-material projects for families.
What Are Washi Tape Polaroid Magnets?
A washi tape polaroid magnet is a DIY fridge magnet that mimics the classic Polaroid photo shape. You use white card to form the frame, mount a small picture or photo at the top, and leave a thicker white border at the bottom where you can handwrite a date, name, or tiny caption like “First Day at Nursery 2025.”
You’re not using real Polaroid film. Instead, you’re recreating the style with printer photos, smartphone prints, or cut-down kids’ drawings mounted on card. Washi tape and Polaroid photos create vibrant, customizable magnets because washi tape comes in various colors and patterns, is semi-translucent and repositionable, and adds a fun tactile element without damaging photos. Children select their own designs-stripes, dots, florals-and use the tape to decorate the borders and frame the pictures.
Creating custom Polaroid-style magnets is a budget-friendly craft that fits busy families. It uses scraps of card and leftover magnetic strips from other projects, and doubles as upcycling. Washi tape is ideal for customizing everyday items, so your child can make each magnet completely unique. Polaroid magnets can be customized with your photos, too-just print a snapshot from your phone.
Think of a row of polaroid magnets on the fridge showing each month of your child’s school year, or a set of artwork magnets wrapped with twine as a Christmas gift for grandparents. Polaroid magnets are perfect for fridges and lockers-anywhere with a magnetic surface.
Supplies You’ll Need
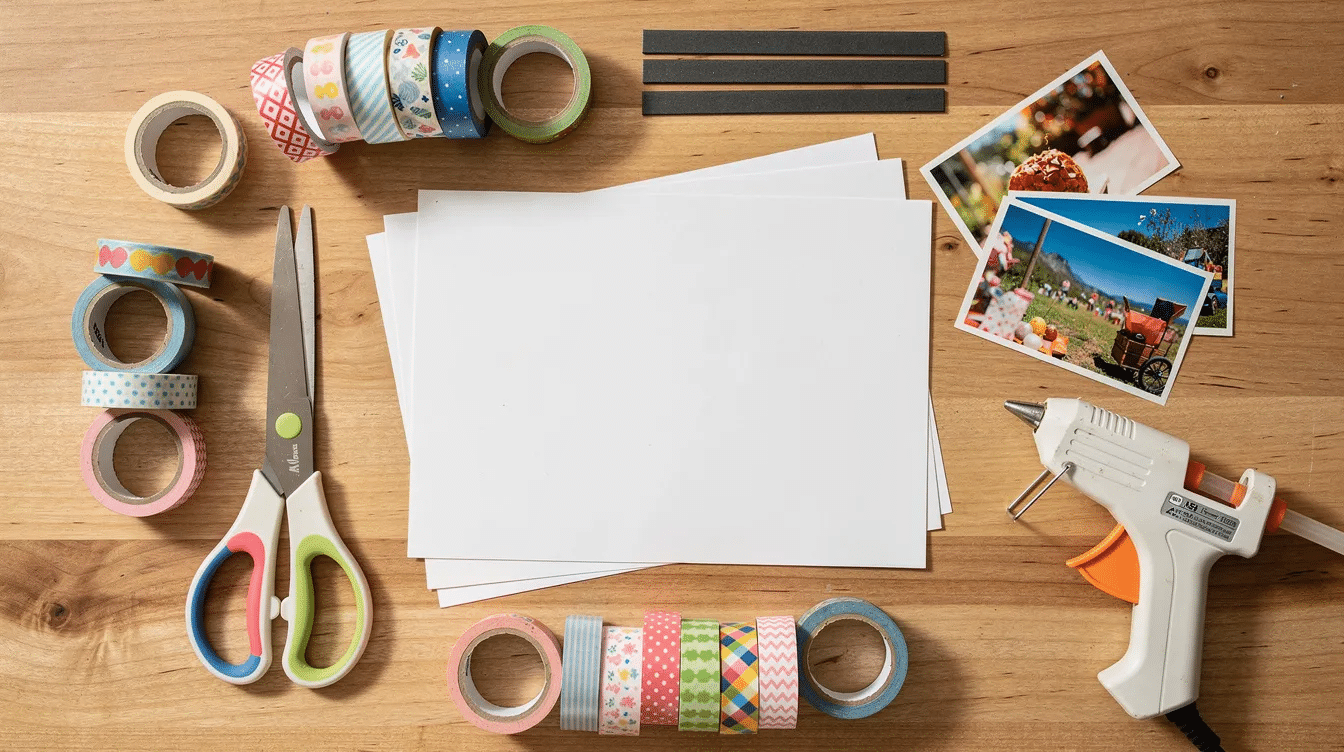
Most of these materials are likely already at home in your craft cupboard. Grown-ups handle cutting and glue gun work; little ones handle the fun parts.
Supply | Details |
|---|---|
White card | Smooth A4 white card, around 200–250 gsm. This forms the “polaroid” front with a neat, bright border. Quality matters-heavier card won’t warp or droop on the fridge. |
Corrugated card | Recycled corrugated cardboard from a cereal box or delivery parcel. A single-wall piece (about 3–4 mm thick, known as C-flute) adds rigidity and a sturdy, chunky feel that’s easy for small hands to grab. |
Magnetic strips | Self-adhesive magnetic strips or small magnetic rectangles. One strip along the back is enough for each polaroid magnet to grip the fridge or a magnetic memory board. Adhesive magnetic sheets provide a flat fridge magnet solution if you prefer a peel-and-stick option. Strips rated for light-duty crafts (around 0.5 lb pull strength) work well. |
Washi tape | Pick 2–3 patterns (stripes, stars, pastel dots). Washi tape comes in endless patterns and can be used to decorate magnets, frame photos, or add colour to borders. Wider tape (15–20 mm) is easier for preschoolers to handle. |
Artwork / photos / blackboard Duck Tape | Mini portraits drawn by your child, small printed family photos from your phone, or blackboard Duck Tape pieces as a writable area for changing captions with chalk. Photo magnets are printed on premium glossy or matte paper-matte tends to accept handwriting and tape edges better. |
Glue gun | A low-temperature glue gun (around 250°F / 120°C) is ideal for sticking white card to corrugated card and for fixing the magnetic strip. Adults must handle this step for safety. |
Optional extras: fine-tip permanent pens for captions, child-safe scissors, a ruler and pencil for marking out polaroid borders, and a date stamp to mark the year.
You can substitute with what you have-liquid craft glue instead of a glue gun, or an adhesive magnetic sheet instead of strips. If you love magnet-making crafts, you’ll already have most of these things in a drawer.
Step-by-Step: How to Make Washi Tape Polaroid Magnets
This is a simple four-part process: cut the polaroid shape, add the picture, decorate with washi tape, and turn it into a magnet. The whole order of steps takes about 20 minutes once you’ve gathered your supplies.
1. Cut the Polaroid Base
Measure and cut white card rectangles roughly 7 cm × 9 cm (Polaroid-style magnets measure about 2.2 × 2.75 inches). Keep the bottom border slightly thicker than the top and sides to mimic a real Polaroid. Draw a light pencil rectangle where the photo will sit-about 5 × 5 cm, centred near the top.
2. Mount Your Artwork or Photo
Cut one photo or drawing to fit the marked area. Glue it down carefully with a glue stick or a small dot of craft glue. Let children help decide which way up it goes and which images to select. Using favorite photos from your phone is fast-just upload the image to a printing app or site, print at small size, and trim. Even pages torn from a colouring book work well.
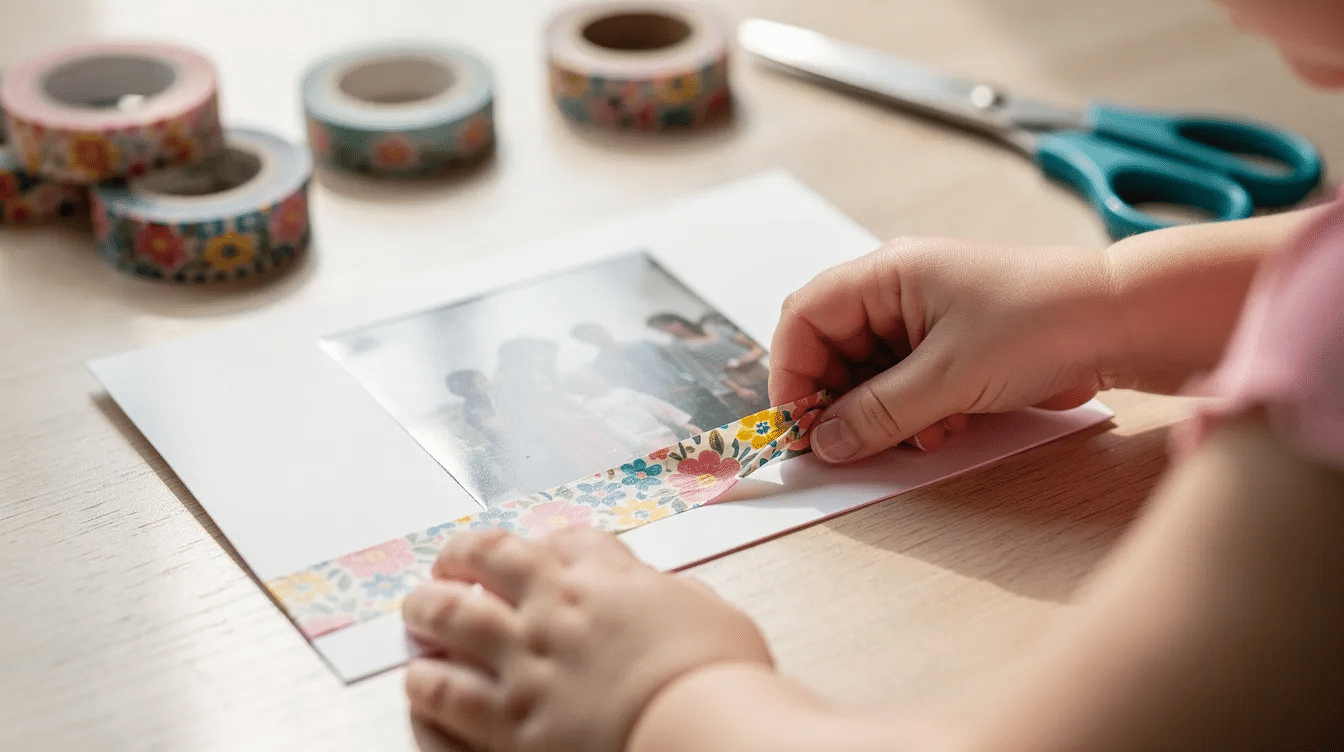
3. Decorate with Washi Tape
This is where kids take the lead. Washi tape can enhance the aesthetic of fridge magnets instantly. Children place strips of washi tape around the photo edges or along the bottom border, trimming the excess with scissors and smoothing bubbles with their fingers. Mini scrapbook magnets can be enhanced with tiny embellishments like stickers or drawn arrows, too.
For some magnets, stick a short strip of blackboard Duck Tape along the bottom border so children can write messages like “Snack Time” or “Chores” and wipe them off later to change the caption.
4. Add the Backing and Magnet
Adults cut slightly smaller pieces of corrugated card, glue them to the back of the white card using the glue gun, and press flat until cool and secure. Then stick or hot-glue a magnetic strip or square to the corrugated card, placed centrally near the top so the polaroid magnet sits flat on the fridge.
5. Arrange Your Gallery
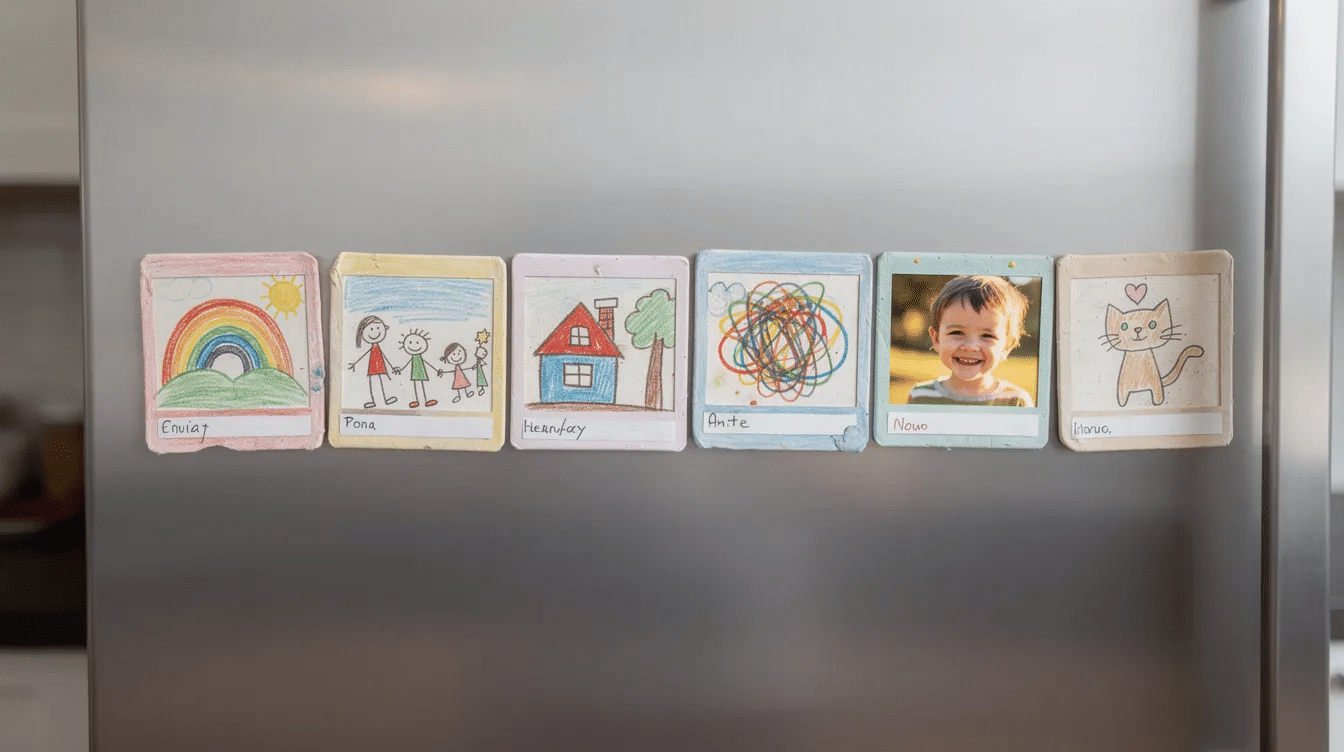
Once dry, encourage your family to arrange several polaroid magnets on the fridge door or a framed magnetic board. Group them by theme-“holidays,” “first day of school,” or “silly faces.” This built-in display turns an ordinary fridge into a rotating art gallery.
Child-participation cheat sheet:
- ✅ Kids can do: choosing tapes, placing photos, pressing tape down, deciding captions, picking patterns
- 🛑 Adults handle: cutting card, operating the glue gun, trimming neat edges, attaching magnets
Fun Ways to Use and Gift Your Polaroid Magnets
Once you have a set of washi tape polaroid magnets, they become memory keepers, learning tools, and handmade gifts. Here are some of our favourite ideas, inspired by what our readers love most.
Visual timeline. Create one polaroid magnet per month across 2026 with a photo or drawing and line them along the bottom of the fridge as a “year in pictures.” It’s a beautiful way to view how your child has grown. 856 people searched for Polaroid magnets on Pinterest recently, and this kind of timeline display is exactly the sort of inspiration driving that interest.
Educational games. Label magnets with simple words (dog, cat, red, blue) or numbers. Play matching games by asking children to find the correct magnet on the fridge or magnetic board. Photo magnets can be displayed on fridges or magnetic boards for easy, hands-on learning.
Gift sets. Polaroid magnets come in a bundle of 4 and make a perfect handmade product-wrap a set with twine as a Mother’s Day present for mom, or post a collection of grandchildren’s artwork magnets to grandparents for Christmas. You can even order supplies from amazon in bulk if you’re making sets for friends. If you’re looking for more easy gift-craft inspiration, we have plenty of ideas.
Parties and seasons. Use kids’ party snapshots to create thank-you gifts, or design Halloween, Easter, and birthday-themed polaroid magnets with seasonal washi tape patterns. Photo magnets can be customized in various shapes and sizes-available sizes include square, round, and heart shapes if you cut the card differently. When ordering printed photos commercially, the minimum order for square magnets is often seven pieces, but DIY lets you make as few or as many as you like.
Display ideas. Combine this craft with a framed magnetic memory board in a bedroom, office, or playroom wall. Clip polaroid magnets to a metal frame using mini pegs and extra washi tape for a gallery feel that’s easy to change whenever new artwork arrives. You can view the whole collection at a glance and swap pictures whenever you fancy.
Care and storage. Wipe magnets gently with a dry cloth. Store them in a tin when not in use, and keep them away from very young children who might chew the corners. Sealing paper prints with clear Mod Podge increases durability if you want them to last for years in places near steam or humidity.
We’d love to see your washi tape polaroid magnet creations! Share them on social media, send us an email, or explore more cute easy crafts and DIY activities that turn household materials into something special. Every user who tags Little Button Diaries gets a feature on our pages-we can’t wait to see what you create.
FAQ: Washi Tape Polaroid Magnets
These FAQs cover the extra practical questions parents often google before starting this polaroid magnet craft with young children. If something isn’t answered here, drop us a message.
Are washi tape polaroid magnets safe for toddlers and preschoolers?
The finished magnets are fine for supervised play with ages 3 and up. Adults should handle scissors, craft knives, and glue guns throughout the process. Use child-safe scissors for any trimming little ones do, and choose larger magnetic strip pieces rather than tiny disc magnets to avoid choking hazards. Look for art materials carrying the AP (Approved Product) seal to make sure everything is non-toxic.
Can I make polaroid magnets without a glue gun?
Yes. Strong PVA or tacky craft glue works well, but drying takes longer. Place the magnets under a heavy book overnight and use self-adhesive magnetic sheets to keep the project completely glue-gun free. Double-sided tape can also hold photos in place while the craft glue sets. It’s a perfect option if you want to add this to a cart of zero-heat crafts for a classroom setting.
Will the magnets damage my fridge or magnetic board?
Flat magnetic strips are gentle on most metal surfaces. Test one magnet on an inconspicuous spot first and keep the backs free from stray dried glue or card fibres. If you notice any residue, a damp cloth removes it fast.
What photos work best for DIY polaroid magnets?
Bright, high-contrast smartphone photos printed on matte or semi-gloss paper at around 5 × 5 cm work best. Focus on close-up faces or simple scenes so details stay visible when shrunk to polaroid size. You can customize the look further by printing in black and white for a vintage feel. If you use an app on your phone, you can upload, select, and print directly-many photo-printing services let you adjust and preview before you order.
How long will washi tape polaroid magnets last?
With good-quality card and tape, magnets can last several years on a fridge. Press tape edges firmly during assembly, avoid placing them in very steamy spots (like directly above a kettle), and re-seal peeling corners with a dab of glue if needed. Switching to higher-quality washi tape and heavier card (250 gsm or above) makes a noticeable difference in longevity.


