

Key Takeaways
- This spooky halloween wreath craft works for ages roughly 2–8, with two versions: a simple tissue-and-googly-eye wreath for preschoolers and a wrapped monster wreath for older kids.
- All you need are everyday materials like cardboard, paper plates, tissue paper, paint, googly eyes, and ribbon – most of which are already in your house or available at your local dollar store.
- Step-by-step instructions are broken into short, manageable steps so parents can supervise without stress, with safety tips for scissors, hot glue, and small parts clearly called out.
- The wreaths can go cute or creepy depending on the decorations your family chooses – friendly ghosts and smiling pumpkins or plastic spiders and glitter skulls.
- Display ideas for the front door, porch, and indoors are included, along with cleanup tips and storage advice so your wreath can survive until thanksgiving and even come back next year.
Introduction: A Spooky Halloween Wreath Kids Can Actually Make
It’s october, the air has that crisp edge, and your kids are already excited about costumes, candy, and all things halloween. If you’re a mom or parent looking for an easy halloween craft to fill a weekend afternoon, you’re in the right place. Here at Little Button Diaries, we love crafts that use what you already have, don’t require a trip to a specialty store, and actually keep little hands busy long enough for you to drink your coffee warm.
This spooky halloween wreath project is designed for preschool and early elementary children. A halloween wreath project can be suitable for children aged 2 to 6 years with the simpler version, and kids up to 8 will love the more detailed monster variation. It works as a quick weekend activity, a rainy-day project, or a daycare group craft idea. The best part? You choose the vibe. Friendly ghosts and bright purple tissue paper for the little ones, or fake spiders and a skull accent for kids who want a scary halloween wreath on their door.
Below, we’ll walk through supplies, two main wreath versions, safety tips, display ideas for your front door, and more ideas to keep the halloween season creativity going.
Supplies: Simple Materials for Kids’ Halloween Wreaths
Before you start, grab your materials. Kids can use safe craft glue for decorating wreaths, so there’s no need for anything fancy. Here’s a straightforward checklist, split into basics and optional spooky extras.
Basic supplies:
- Wreath base: sturdy cardboard from cereal or delivery boxes, cheap paper plates with centers cut out, or a pre-cut foam wreath ring
- Black and orange paint (washable tempera or acrylic), plus white for ghosts or eyes
- Glue sticks and white school glue (PVA)
- Kid-safe scissors, tape, and a hole punch
- Tissue paper squares in halloween colors (black, orange, purple, green)
- Construction paper in black, purple, lime green, and orange
- Googly eyes – large ones for younger kids
- Crayons or markers
- Ribbon or yarn for hanging
Optional spooky extras (ages 5+):
- Plastic spiders, bats, and mini skeletons
- Felt pumpkins, foam stickers, or flowers made from craft foam
- Glitter (better for ages 5+, and yes, it will get everywhere)
- Cheesecloth or old white fabric for a mummy effect
- Glow-in-the-dark paint and metallic pens for “BOO” or “R.I.P.” signs
- A spooky wreath can include painted coffins and glitter letters for older kids who want maximum creep factor
- Four 2.5-inch wide wired ribbons are useful if you want a polished bow
- Some halloween craft kit options include 228 foam stickers, giving you plenty to share across a group
A quick note: hot glue gives a strong hold for heavier decorations but should only be used by adults. For everything kid-handled, stick with glue sticks and white school glue.
Prepare the Wreath Base (Cardboard or Plate)
Every halloween wreath starts with a solid base. Here’s how to get it ready before kids dive into decorating.
Cardboard ring method:
- Place a large dinner plate on cardboard and trace around it for the outer circle.
- Set a smaller bowl in the middle and trace the inner circle.
- An adult cuts out the ring shape using sharp scissors or a craft knife. Use cardboard to create wreath bases for crafts – it’s free and sturdy.
Paper plate shortcut:
- Draw a circle inside a paper plate, about 2 inches from the edge.
- An adult or older child cuts out the center to create an instant wreath ring. Using paper plates for wreaths is inexpensive and kid-friendly, and it’s perfect for group settings.
Once you have your base, paint it black or dark purple. Younger children can sponge-paint or finger-paint while older kids use brushes for more even coverage. While the paint dries for 15–20 minutes, prep tissue paper squares or cut out bats and ghosts so the kids stay on a roll.
Safety reminder: Adults should handle sharp scissors and craft knives for cutting cardboard, especially for children under 6. Keep blades out of reach when not in use.
Spooky “Googly Eye” Wreath for Preschoolers
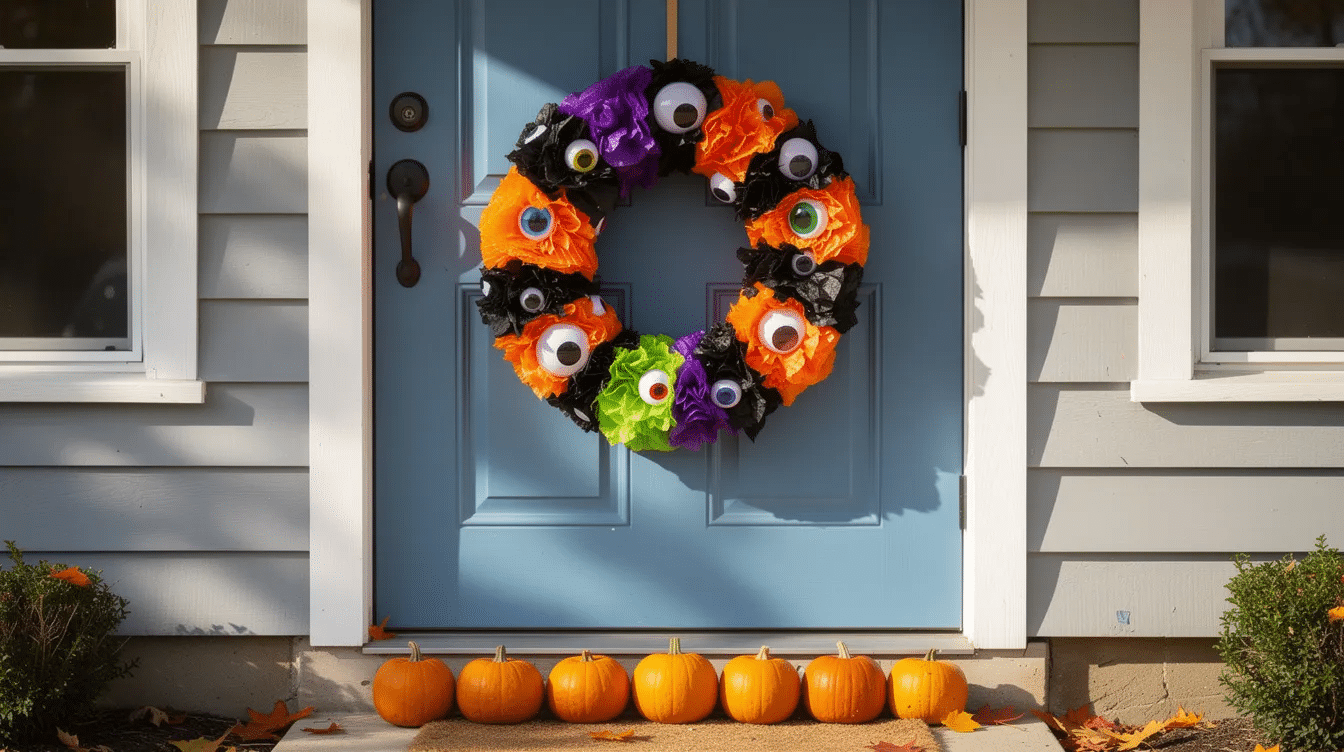
This version is ideal for ages 3–5. It focuses on tearing, scrunching, and sticking – all great for fine-motor development – and uses big, friendly eyes rather than anything too creepy.
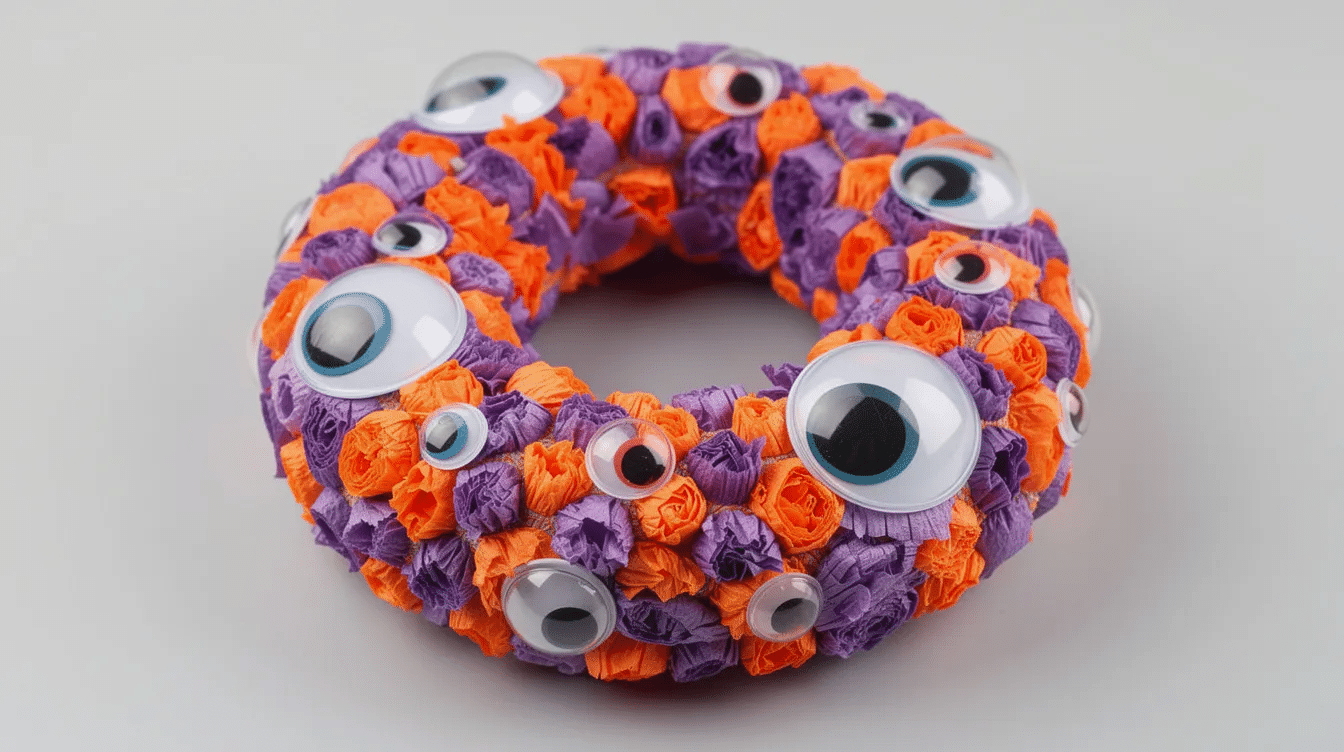
- Prepare tissue paper: Cut or tear black, purple, and orange tissue paper into roughly 2–3 inch squares. Older toddler helpers can tear their own pieces. Kids can use tissue paper and googly eyes for wreaths, and this is the simplest way to do it.
- Glue and scrunch: Have kids brush white glue onto a section of the painted wreath base, then scrunch each tissue square and press it on. Work around the ring until the entire wreath is covered in fluffy, textured color. Use googly eyes and tissue paper for a fun wreath design that looks impressively full with minimal effort.
- Add the eyes: Stick large googly eyes all around the wreath – some in pairs, some solo – so it looks like a cluster of peeking monsters. Kids can draw mouths or fangs with a marker if they like.
- Finish it off: Tie a simple bow at the bottom using ribbon or a strip of fabric for a cute touch. Add a paper “BOO!” sign if your child is into lettering.
Kids can also create wreaths using foam stickers and cardboard – many kits include 12 foam self-adhesive halloween stickers that peel and stick without any glue at all. Kids can create halloween wreaths using foam stickers for a mess-free alternative on rushed afternoons.
Let the wreath dry flat overnight before you hang it. This is a cute idea for a bedroom door, too.
Foam or Paper Plate Monster Wreath for Older Kids
This slightly more detailed version suits ages 5–8 and can lean cuter or creepier depending on your family’s style. Crafting halloween wreaths is suitable for ages 6 and up when you add in more complex wrapping and cutting steps.
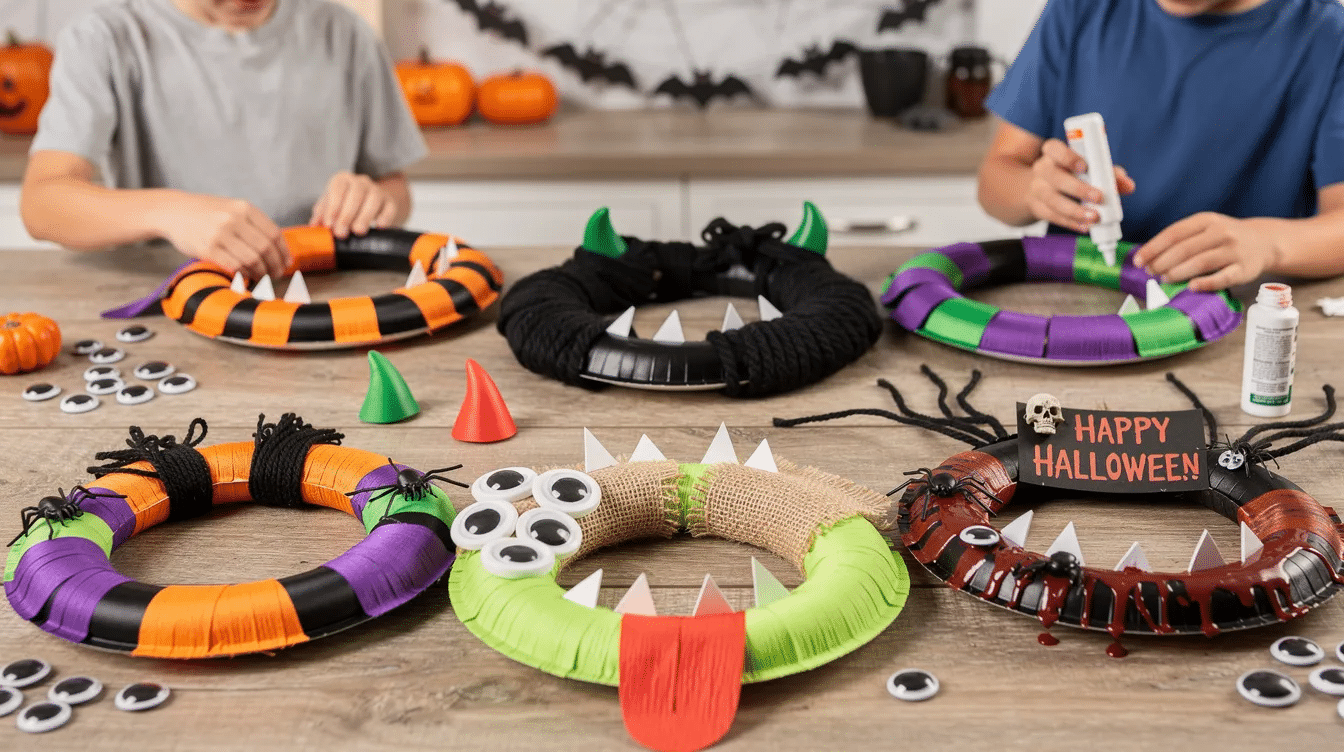
- Wrap the base: Take a foam wreath ring or sturdy paper plate ring and wrap it in strips of crepe paper, ribbon, or torn fabric in halloween colors. Black yarn or burlap ribbon can be used to wrap wreath forms for a rustic look. Wrapping a foam or cardboard base with yarn allows kids to create decorative wreaths with rich texture. Wreath forms can also be wrapped in black satin ribbon for a sleeker finish.
- Secure as you go: Glue or tape the wrapping, overlapping strips for full coverage. Encourage patterns – black-orange-purple or black-green stripes work well.
- Add monster features: Cluster googly eyes in one spot, glue on paper horns or ears, and cut triangle teeth to line the inner circle. A big paper tongue hanging down from the bottom is always a hit.
- Go scary (if they want): To turn it into a scary halloween wreath, swap in fake spiders, plastic fangs, or a pin-on skull. Use red paint for drips and scratchy lettering.
A halloween wreath can be made with deco mesh and ribbons for families who want a fuller look – use 12 pipe cleaners to attach deco mesh to wreath frames for a secure hold. Mesh wreaths have a professional quality that older kids find satisfying.
Letting kids personalize their projects makes crafting more engaging. Encourage them to name their monster wreath and write the name on a little paper tag – “Frankie,” “Spookster,” “Midnight” – then attach it at the bottom.
Ghosts, Bats, and Creepy Crawlies: Decorating Ideas
This section is your menu of easy add-on shapes so kids can customize any wreath with classic halloween characters. Using simple shapes like ghosts and bats adds to the halloween theme without requiring advanced skills.
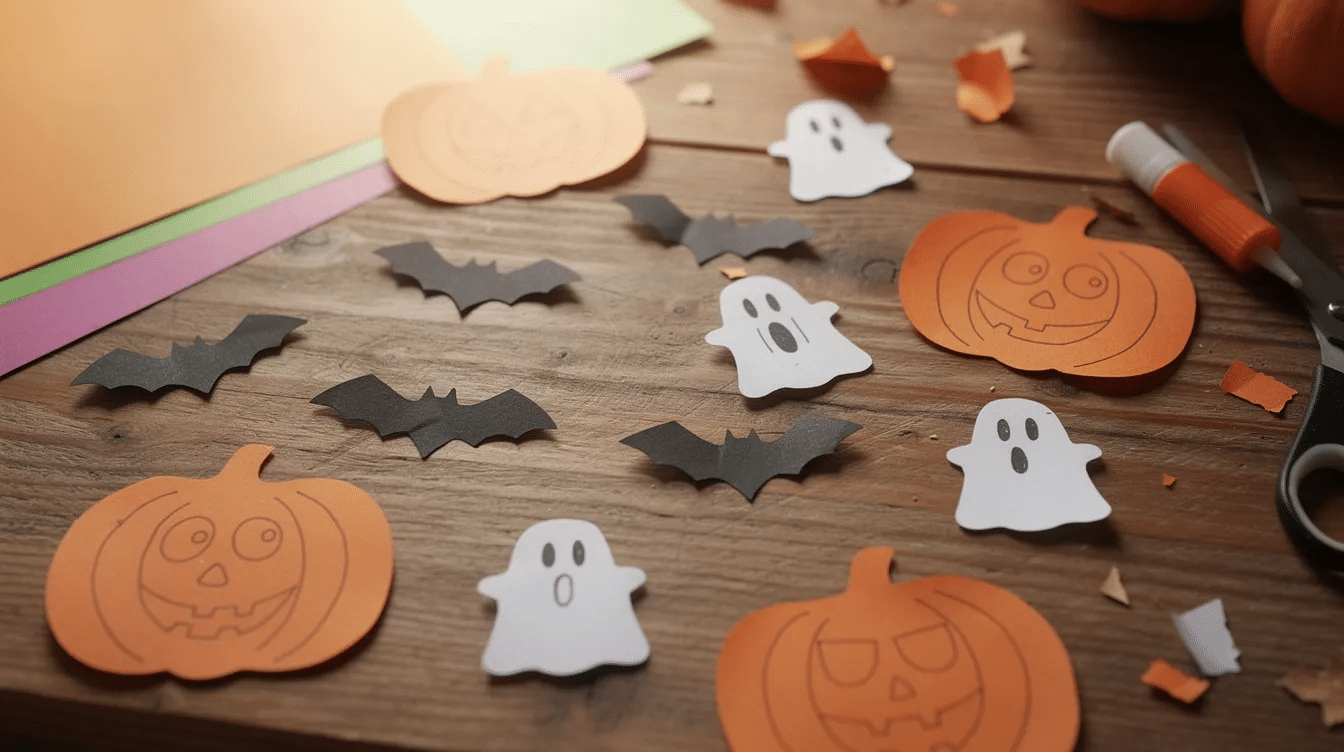
- Ghosts: Cut rounded shapes from white paper or felt with wavy bottoms. Draw friendly or spooky faces. Glue them around the wreath.
- Bats: Fold a black rectangle in half, draw half a bat wing along the fold, cut and unfold for perfect symmetry. Add tiny eyes with a paint pen. (For more bat inspiration, check out Mini Makers: Rainbow Bats.)
- Spiders: Draw and cut circle bodies with strip legs, or glue plastic spiders randomly for a 3D creepy effect. Plastic spiders and googly eyes are common decorations for halloween wreaths, and kids love placing them.
- Pumpkins: Cut mini pumpkins from orange card and draw jack-o’-lantern faces with black markers – great for children who dislike very scary decorations.
- Layering options: Create a mini graveyard at the bottom with little tombstones reading “R.I.P,” or paint a moon and stars at the top using silver or glow-in-the-dark paint.
Children can use construction paper to make spooky shapes for wreaths in any combination they like. Wreaths can also be decorated with halloween-themed foam shapes for a quick, no-cut option.
Mummy & Cheesecloth Wreath Twist (With Adult Help)
This variation is inspired by mummy decorations and works best with ages 6+ and close adult supervision.
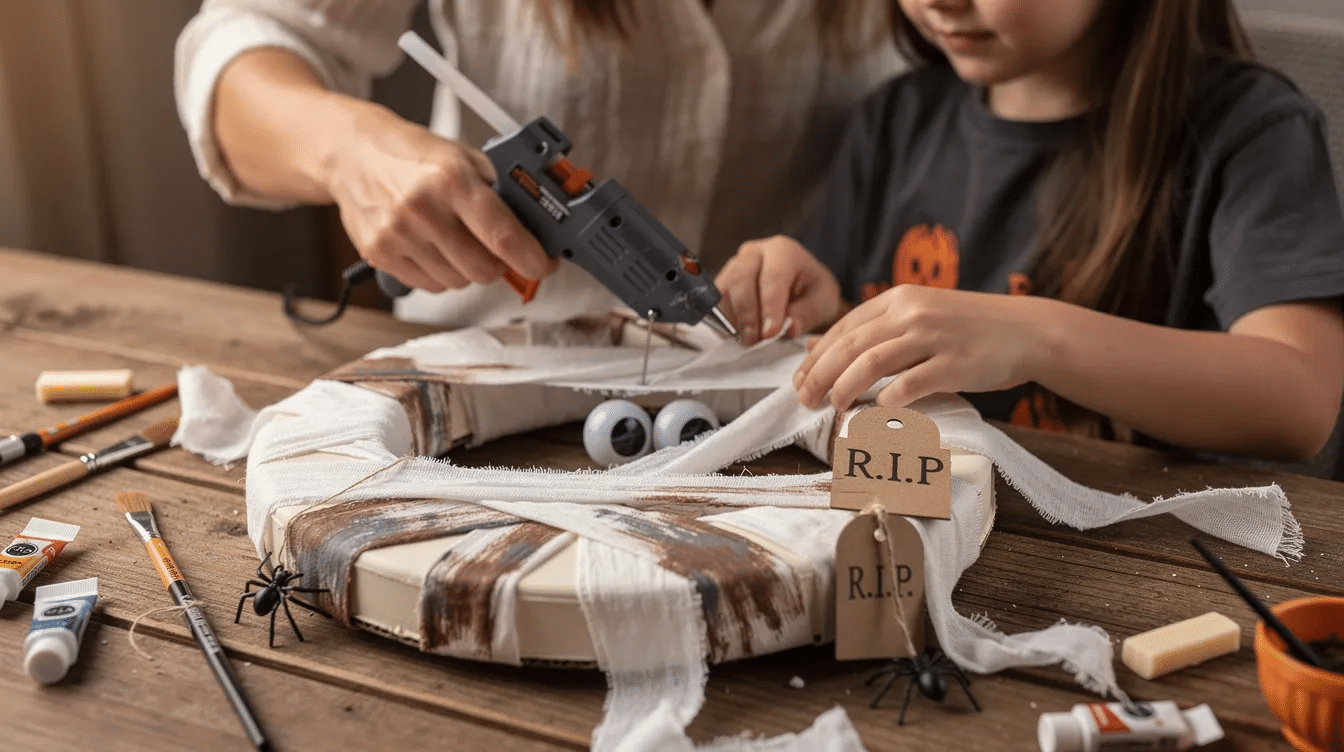
- Tear white fabric or cheesecloth into long strips.
- Wrap the painted cardboard ring or foam wreath, criss-crossing and overlapping to leave a few peek-through gaps.
- Tuck two large googly eyes or paper eyes halfway behind the “bandages” so it looks like a mummy peeking through.
- For a more haunted look, lightly brush brown or grey paint on the bandages for an aged effect.
- Adults can secure the first and last fabric strips with hot glue, while older children manage wrapping and gentle taping.
- Add a tiny “R.I.P” sign or a dangling spider from one of the bandage strips for extra spooky halloween charm.
Hanging and Displaying Your Halloween Wreaths
Time to decorate your house with your finished project!
- Making a hanger: Punch a hole at the top of lightweight cardboard or plate wreaths and thread a length of ribbon, yarn, or string through it. Hang it on your front door for instant festive curb appeal.
- Front door options: Use a wreath hanger over the door, a sturdier hook, or removable adhesive hooks that won’t damage paint. Hang under a porch roof to shelter paper-based wreaths from rain.
- Indoor display: For families in apartments or where outdoor hanging isn’t ideal, try bedroom doors, a mantel, a hallway gallery string, or classroom display boards.
- Layer the look: Combine your kids’ wreath with other halloween decorations – paper bats on the door, fairy lights around the frame, a doormat with pumpkins – to create a simple spooky doorway scene for trick-or-treaters.
If your area gets wet october weather, keep paper wreaths indoors or inside a storm door. Coating cardboard with a layer of outdoor Mod Podge or spray sealant can extend its life for several weeks.
Safety, Mess Management, and Age Adjustments
Halloween crafts don’t have to mean chaos. Here’s how to keep things safe and relatively tidy.
- Small parts: Googly eyes, beads, and plastic spiders are choking hazards for children under 3. Supervise ages 3–4 closely. In 2024, U.S. poison centers received over 15,000 calls about children and art products, so always choose non-toxic, AP-sealed supplies.
- Tools by age: Adults handle hot glue and craft knives. Younger children use glue sticks and child-safe scissors. Pre-cut shapes for any toddler joining in.
- Mess control: Cover the table with newspaper or an old sheet, use washable paint, keep wipes nearby, and put kids in old T-shirts or smocks.
- Adapting by age: Toddlers stick big shapes and tissue. Preschoolers paint and add large decorations. Older kids cut their own bats, letters, and detailed faces. This range of involvement supports real developmental benefits like fine motor skills and creativity.
- Timing: Allow about 30–45 minutes for younger kids and up to an hour for older children who enjoy adding lots of details.
More Spooky Halloween Craft Ideas from Little Button Diaries
Once your family has tried these halloween wreaths, carry the creative mood into other simple seasonal projects. Use leftover materials to make matching mini wreaths or door hangers from small cardboard rings or jar lids wrapped in ribbon.
A few complementary craft ideas that fit right in:
- Paper roll mummies and egg-carton bats using recycled materials
- Painted jar lanterns with tissue-paper stained glass effects
- Halloween hand puppets for a spooky story-time party
- Simple halloween bunting kids can color and hang
Turn the wreath craft into a mini halloween decorating party: children make their own decorations, then help hang everything up before reading a spooky (but age-appropriate) halloween story. For even more ideas across every season, search through our easy craft ideas and craft activities for kids collections. We hope you find all the inspiration you need!
Happy halloween from Little Button Diaries. Now grab those googly eyes, log your favorite version in a comment below, and get crafting with your kids this week – or save it for a november rainy day, because these wreaths make life more fun any time during the holiday season. If you try this project, we’d love to see an image of your finished wreath. Share it with us or pin it for later!
FAQ: Kids’ Spooky Halloween Wreaths
What age is this Halloween wreath craft best for?
The simplest googly-eye version works well from about age 3 with close supervision – pre-cut shapes, glue sticks, no tiny pieces. The more detailed monster or mummy wreaths are ideal for ages 5–8. Even a toddler can join in by sticking large tissue pieces and foam stickers onto a pre-prepared base held steady by an adult. Crafting wreaths can be a fun group activity for kids across mixed age groups when you set up stations. For cooking-level simplicity, think of this like letting a 3-year-old stir while you do the chopping.
How long will the wreath last on our front door?
Cardboard and paper wreaths hold up well indoors for several weeks and outdoors if sheltered from rain and heavy wind. A foam wreath base lasts even longer. If you’re in a damp area in september through november, hang it under a porch overhang, inside a storm door, or just on an interior door. Without any sealant, expect outdoor paper crafts to last about a week in wet conditions.
Can we reuse the wreath next year?
Allow the wreath to dry completely, then store it flat in a shallow box or large envelope to prevent squashing decorations. Foam-based wreaths tend to survive multiple halloweens easily. Paper wreaths are more delicate but can be kept if handled carefully and stored in a dry spot. Avoid stacking heavy items on top. You could even purchase a simple plastic sleeve to protect it.
How do I make this craft easier for a group or classroom?
Use paper plates as bases, pre-cut tissue and shapes, and set up stations – painting, sticking eyes, adding spiders – to keep traffic flowing. Label each child’s wreath with their name on the back and have a drying area ready. This approach works well in a daycare setting or a weekend party. Each center or station keeps kids moving without bottlenecks, and parents or teachers can manage one step at a time.
What if my child is scared of spooky decorations?
Lean into the “silly spooky” side: friendly ghost faces, smiling pumpkins, bright colors, and lots of googly eyes rather than blood or dark themes. A video of other kids making similar friendly wreaths can help set expectations. Making the craft themselves often helps children feel braver about the finished wreath – when they built it, it’s not scary, it’s theirs. You can always search for “friendly halloween” on our website for more ideas.


